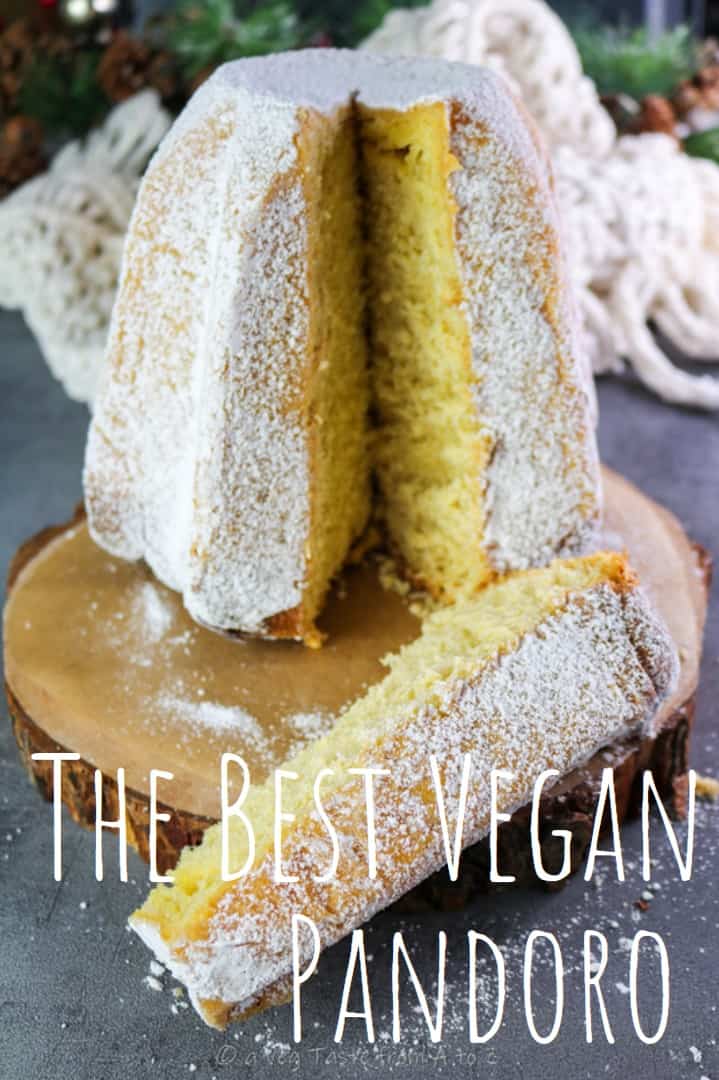
The Best Vegan Pandoro
Questa ricetta è disponibile anche in italiano
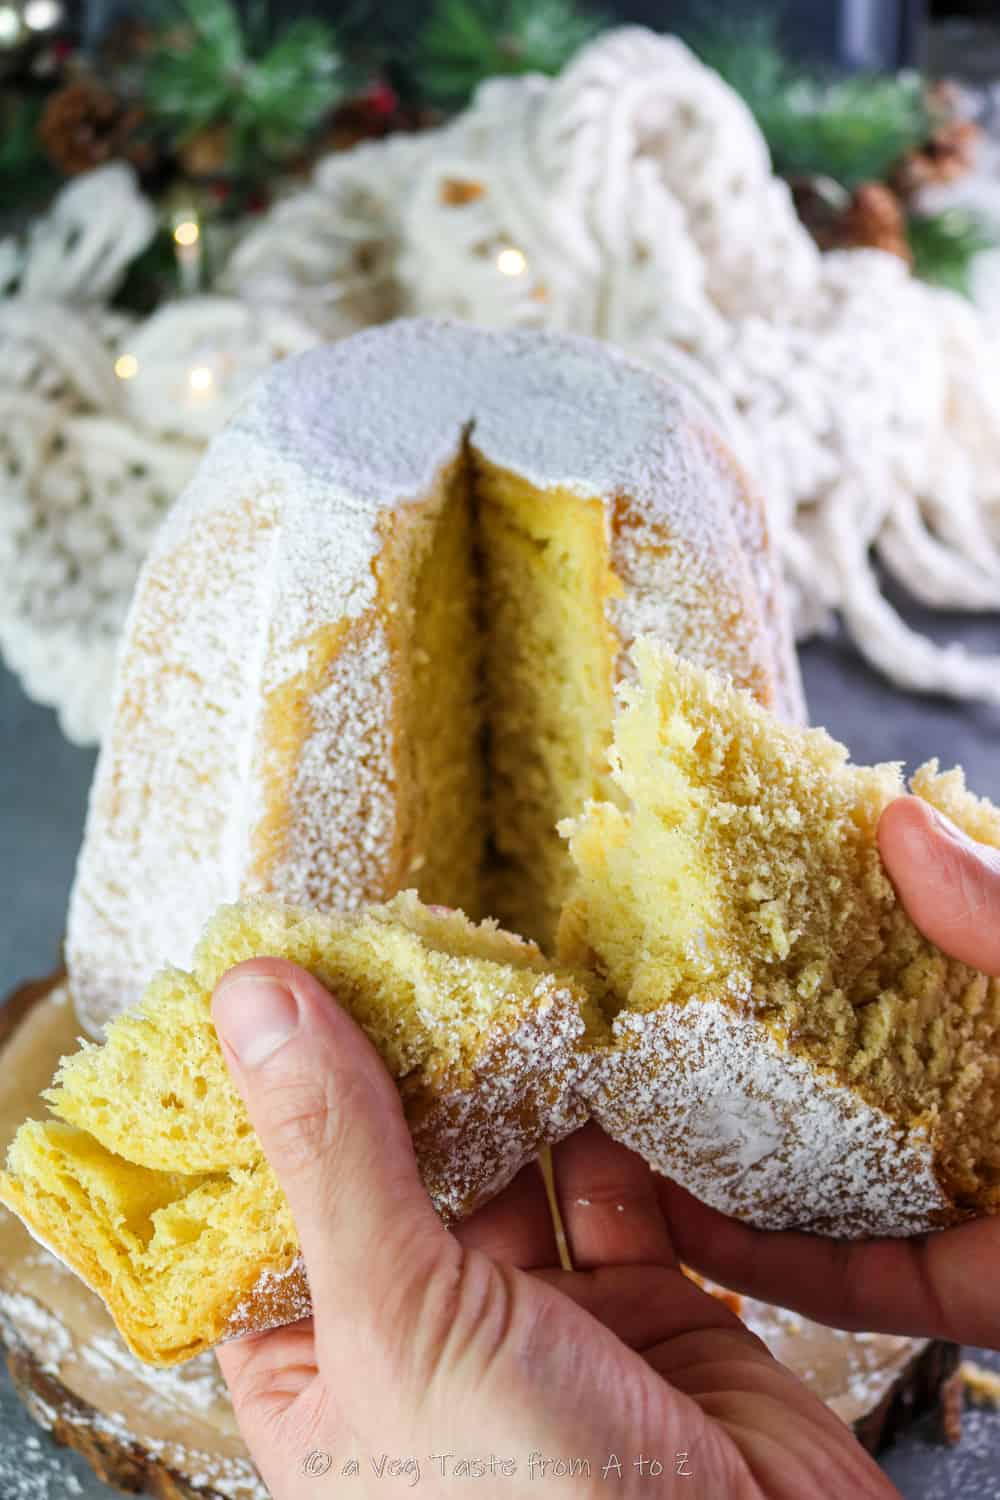
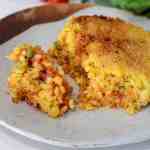
Fluffy, buttery and sugary with a golden inside: Pandoro, the beloved Christmas dessert in the Italian tradition made completely vegan friendly.
After the success of my Vegan Panettone last year, I’ve been asked to share the recipe for the Pandoro as well.
And here I am today, after a few months spent developing the PERFECT vegan recipe for it (my husband doesn’t complain, he absolutely loved testing every single batch of it!).
…A bit of History…
Apparently the first traces of the pandoro date back to 1500 during the period of the Venetian Republic. However, there are those who are convinced that was the evolution of other desserts, such as Nadalin, a star-shaped dessert, or Vienna Bread, similar to a brioche.
The only certainty is that pandoro was born (commercially speaking) in Verona, when the pastry chef Domenico Melegatti obtained the patent for a Christmas cake from the Ministry of Agriculture and Commerce of the Kingdom of Italy. It was October 14, 1884, and Christmas would never be the same ever since!
To make his recipe, the pastry chef Melegatti took inspiration from the Veronese tradition. In fact, in the villages found in these areas, women have been cooking Levà, a proven cake covered with almonds and sugar since ancient times. Melegatti used the same recipe, adding eggs and butter, but left out the topping, in order to make the dough very soft and smooth.
The star shape was created by Angelo Dall’Oca Bianca, a painter who created the pyramid mold with eight points. Pandoro was immediately a great success and became part of the Italian Christmas tradition together with panettone.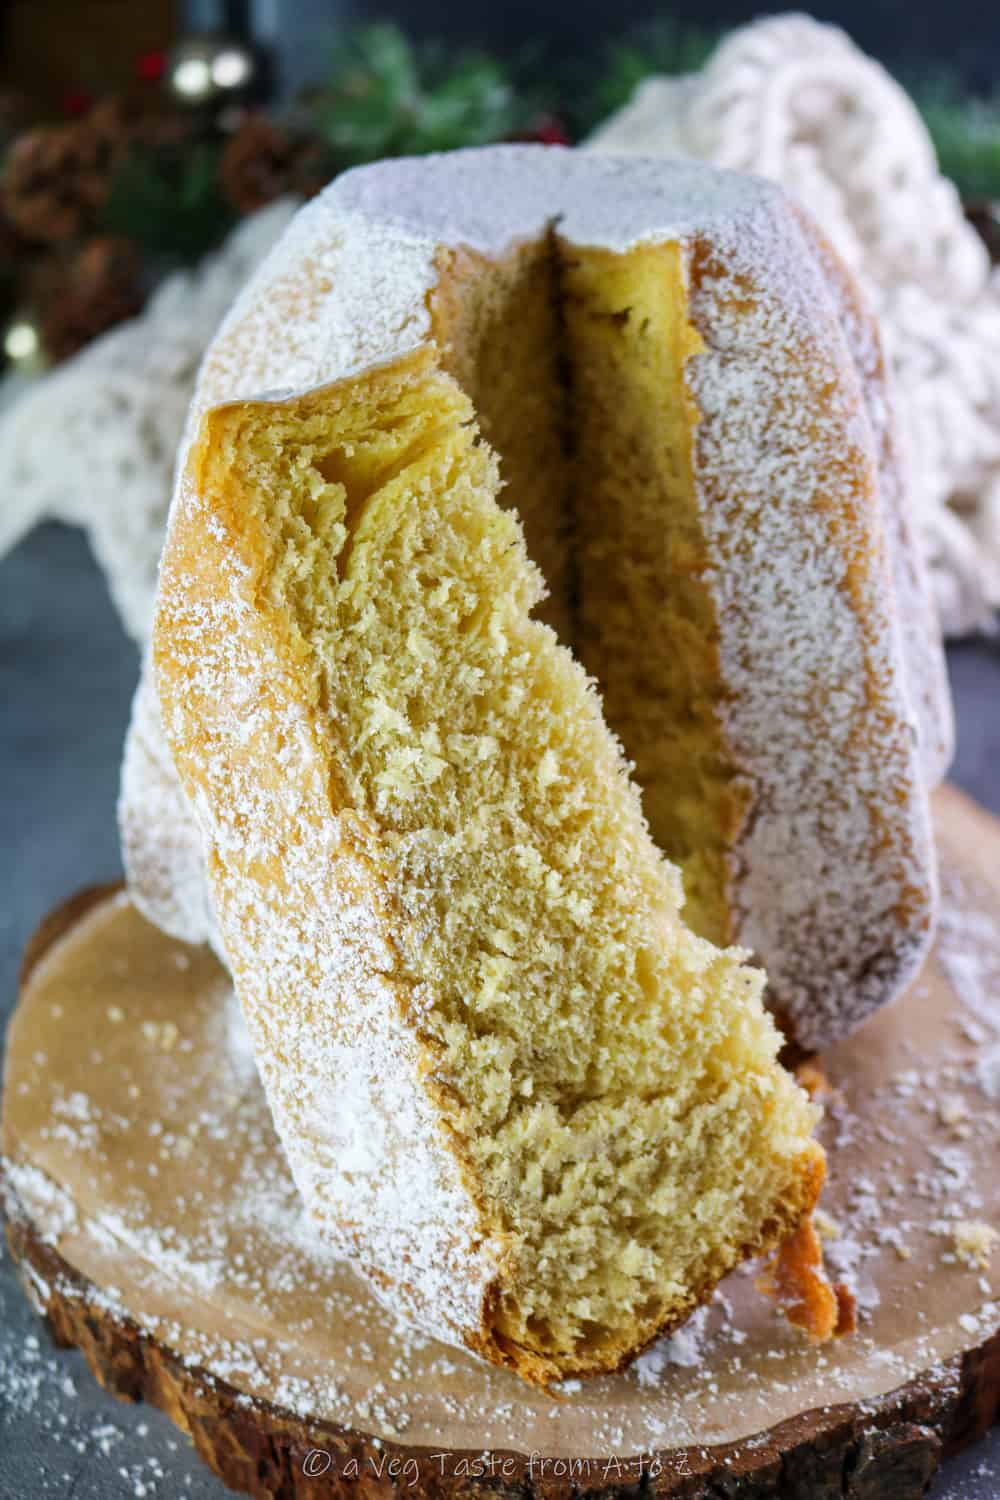
There remains only a small detail to discover: why is it called pandoro? According to a legend, the name was given to it by a pastry chef. The man, after taking the cake out of the oven, was surprised by its golden color and called it "Pan d’oro" (Golden Bread), hence the term "Pandoro" that we all know very well today.
Now tell me, which one is your favourite between Pandoro and Panettone? Every single Italian has a strong preference about it. Let me know yours in the comments!
How to Make Vegan Pandoro
I’ve developed this recipe starting from the long passed family recipe for this delicious bread that contains both eggs, milk and butter.
Overall the execution of Pandoro is a tad easier than the one for Panettone.
As well as for Panettone, Pandoro too is developed through 3 doughs:
1. Yeast Dough or Starter (Lievitino)
2. First Dough
3. Second Dough
After the first dough has risen there’s a fourth and final step to the preparation:
4. Lamination.
I normally spread its preparation over 2 days, starting the morning on day 1 with the yeast mixture, and baking the pandoro in the evening of day 2.
So compared to panettone it requires less time overall, but the same amount of care and patience.
Let’s see the details of how.

Yeast Dough. First we have to make a starter. This is made from the yeast and only a small amount of flour, sugar and room temperature or slightly warm plant milk (I suggest soy unless you’re allergic). This starter will activate the yeast which will secondly boost the rise of the first dough.
Cover the yeast mix, and place in a warm place until it triples its (it will take around 1:30h at ideally 26°C).
Meanwhile make sure to take the vegan butter block out of the fridge.
The First Dough. Once the yeast mix has risen we start adding the ingredients of the first dough to it, incorporating them in this order: sugar, RT or slightly warm plant milk, and finally the flour. Work the dough for a few minutes until the ingredients come nicely together (for pandoro I actually don’t use the dough mixer), then cover again and put it back for the second proof until it doubles its size (1:30-2 hours, depending on house temperature).
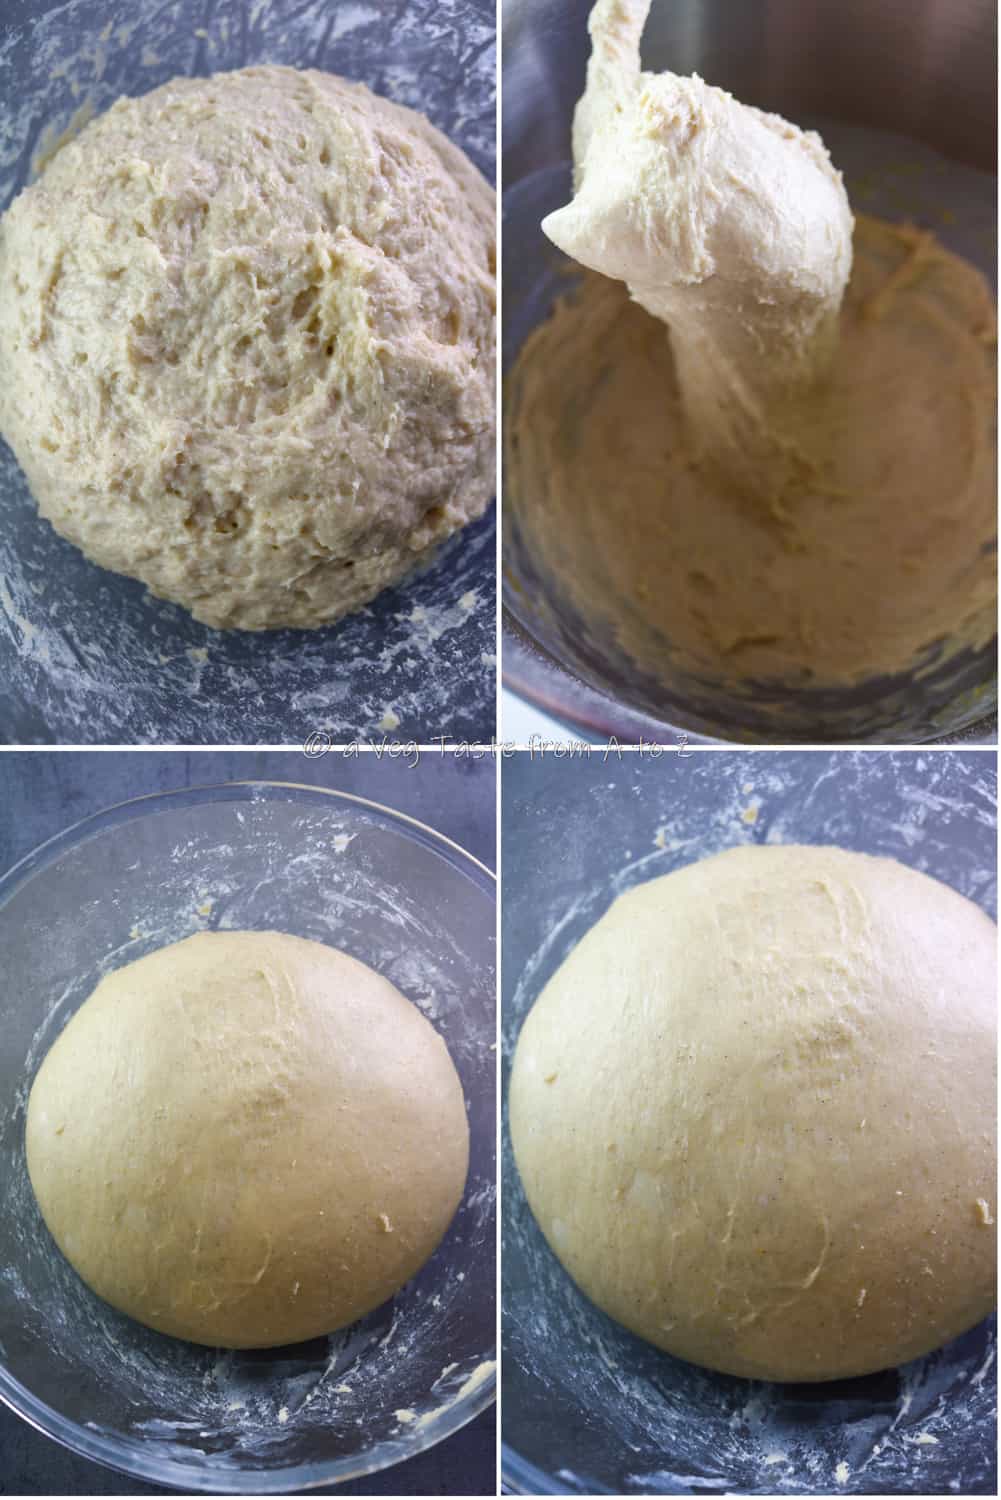
Second Dough. Dissolve some turmeric or yellow food coloring into the milk (I add a pinch of coloring until the milk turns bright golden). As per the first dough we just work the remaining ingredients into the dough until it no longer sticks to the sides of the bowl. This time we are also adding salt and all the flavourings such as lemon and orange zest, and vanilla paste or seeds.
Finally allow to proof for a good 2-3 hours.
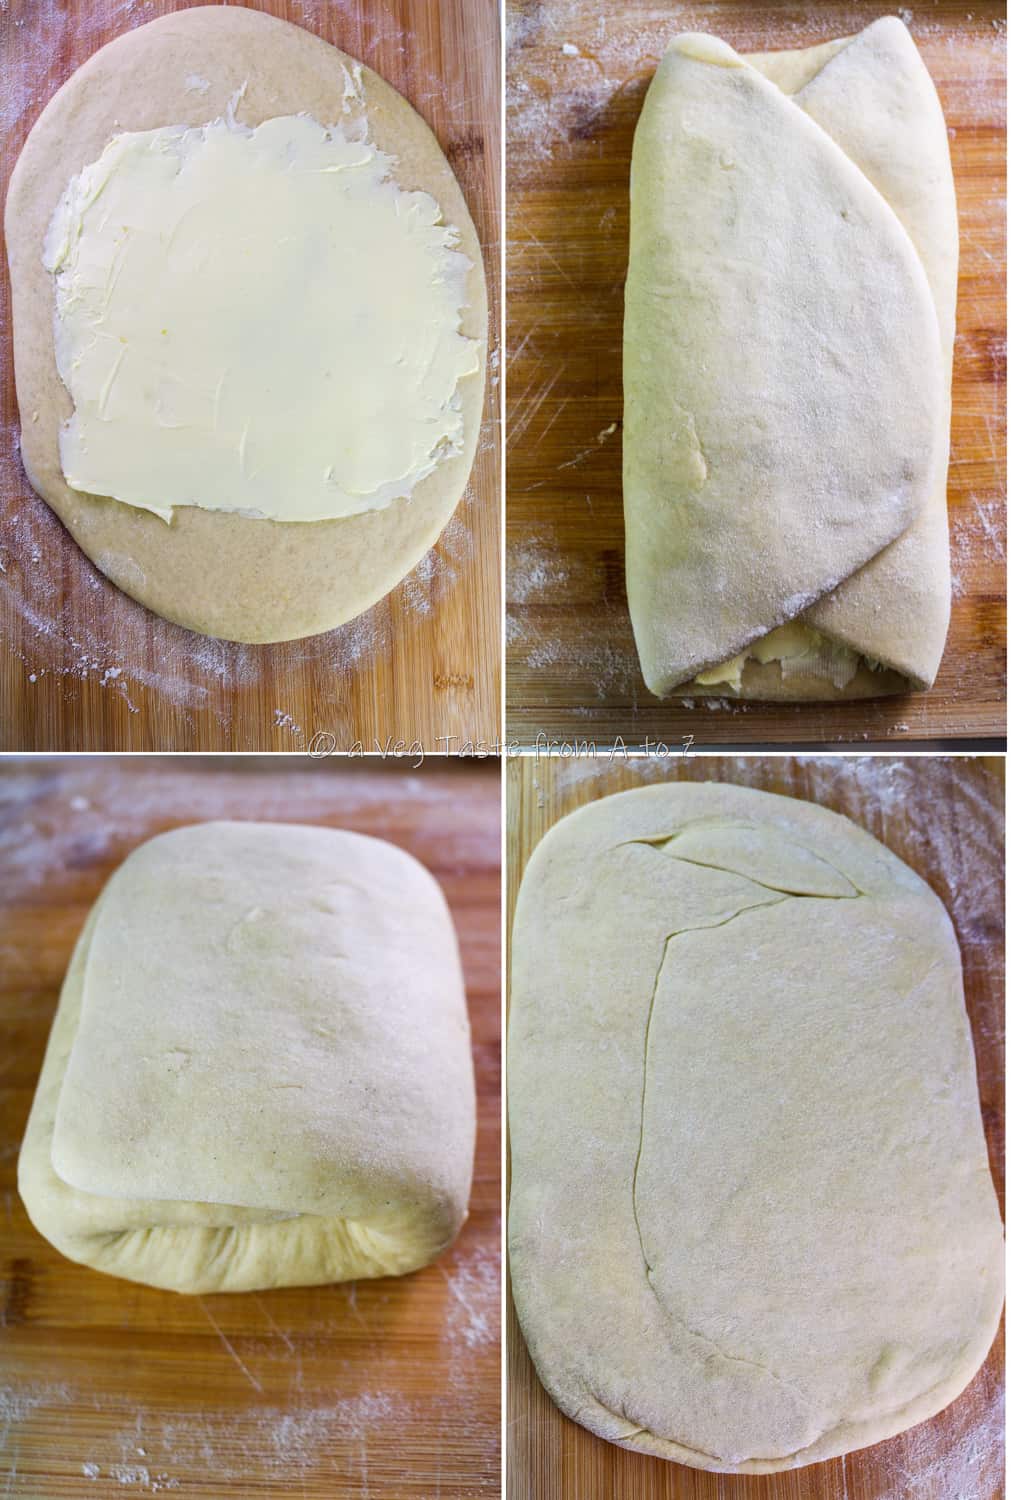
Lamination. For the lamination step we have to roll our dough into a rectangle shape onto a lightly floured surface.
Spread the plant butter on the central portion of the dough and fold each side over half of the buttered portion. Now fold the upper and lower sides onto the other, wrap with film and place in the fridge for half an hour.
After 30 minutes roll the folded dough again and repeat the folds. Place back into the fridge for 15 minutes.
Repeat the folding two more times and shape the dough into a ball.
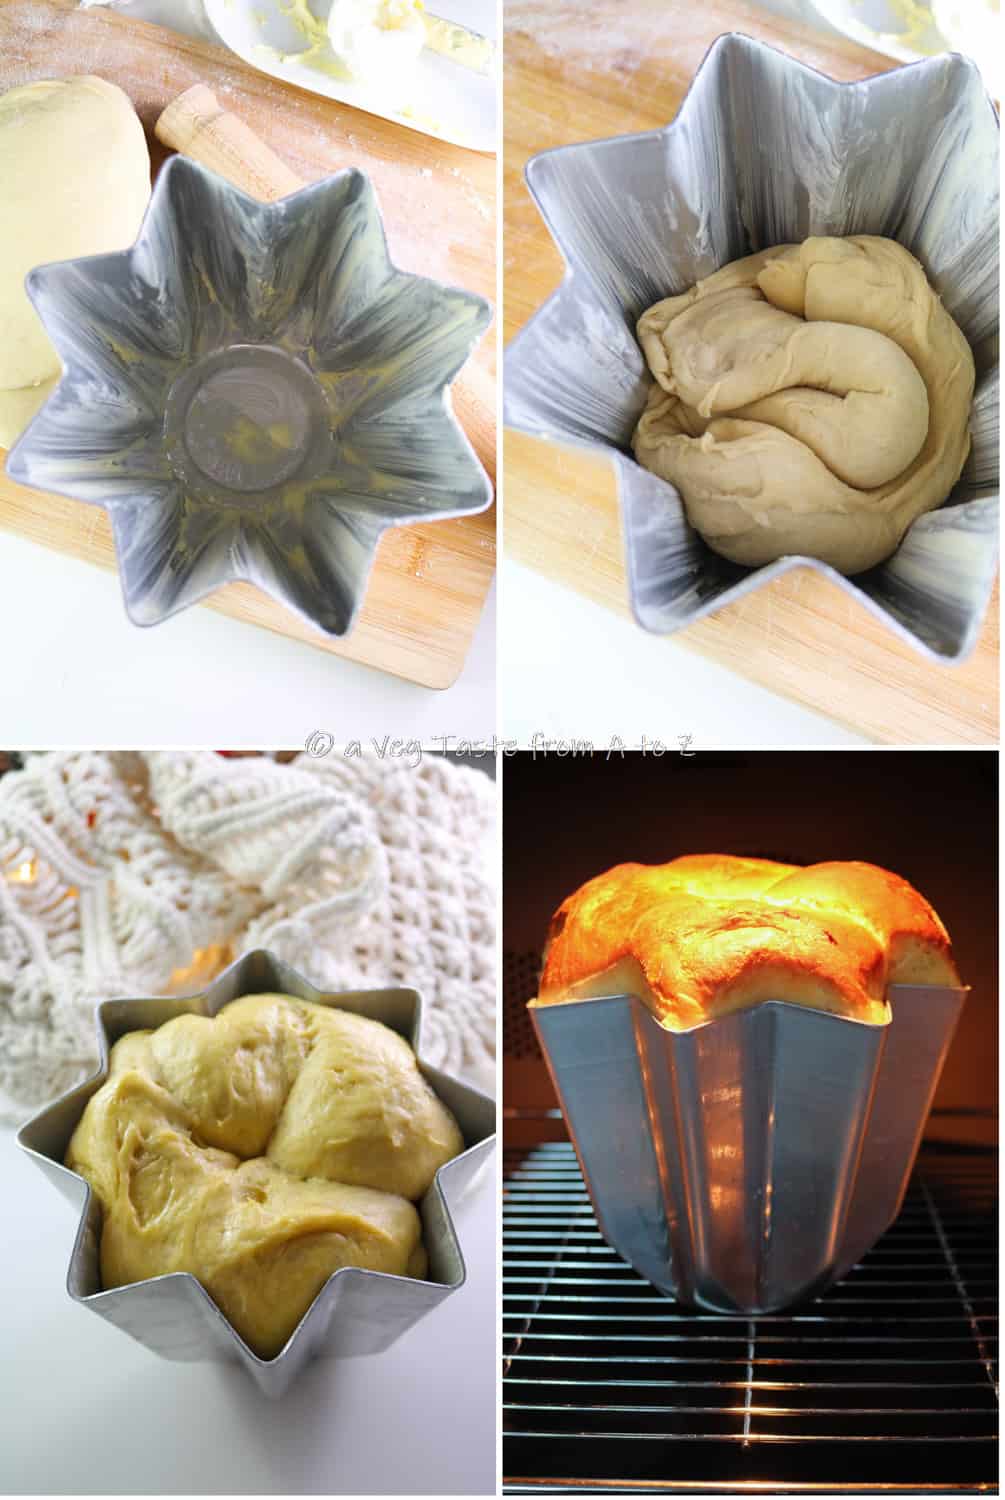
Generously butter the pandoro mould and sprinkle it with some flour. This will prevent the pandoro sticking to the mold.
Carefully place the dough in the mold with the smoother side of the ball down. Cover with plastic film and a table cloth and allow to rest in the fridge overnight.
Lamination Video
The morning after remove from the fridge and leave in a warm environment to rise for 6-7 hours, or until the dough reaches the top of the mold (once again, the recommended temperature is 26°C. The oven with the light switched on works perfectly).
Preheat the oven at 180°C and bake the pandoro for 20 minutes. After the first 10 minutes cover it with a foil sheet to prevent the bottom from burning.
Lower the oven heat to 160° and cook for another 50 minutes.
Allow the pandoro to cool down completely at room temperature before removing it from the mold.
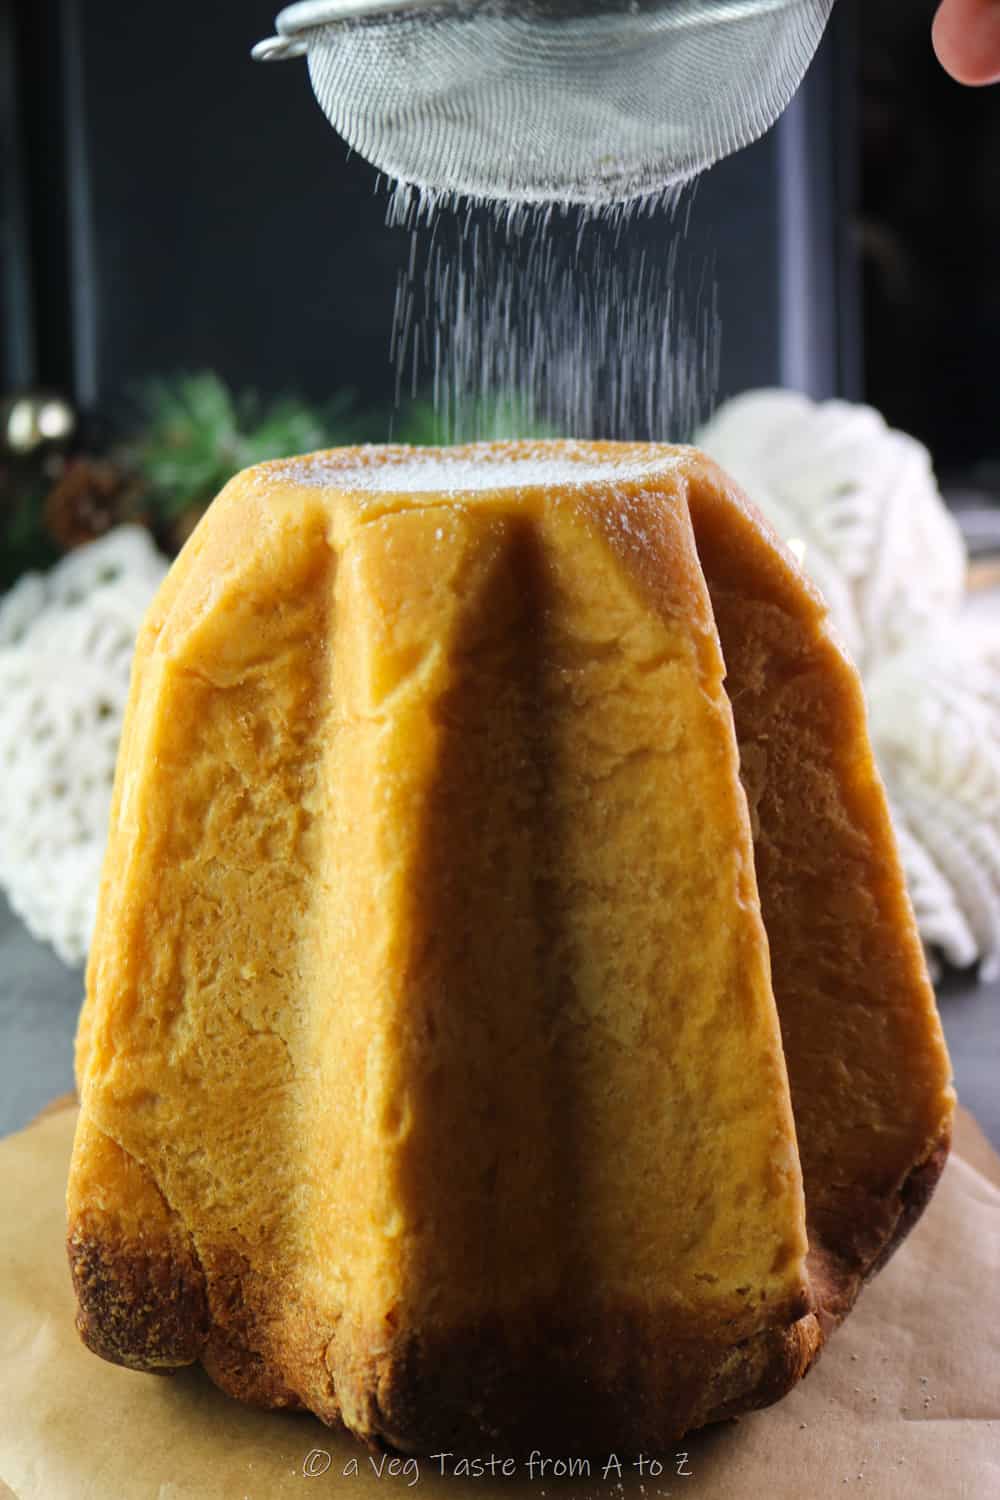
Sprinkle abundant icing sugar on it and serve.
The Best Vegan Pandoro Recipe
Ingredients (500 g mould):
...for the yeast dough...
50 g Plant Milk (Soy)
40 g Strong Bread Flour
15 g Sugar
3 g Yeast
...for the first dough...
165 g Strong Bread Flour
75 g Plant Milk (Soy)
35 g Sugar
25 g Vegan Butter
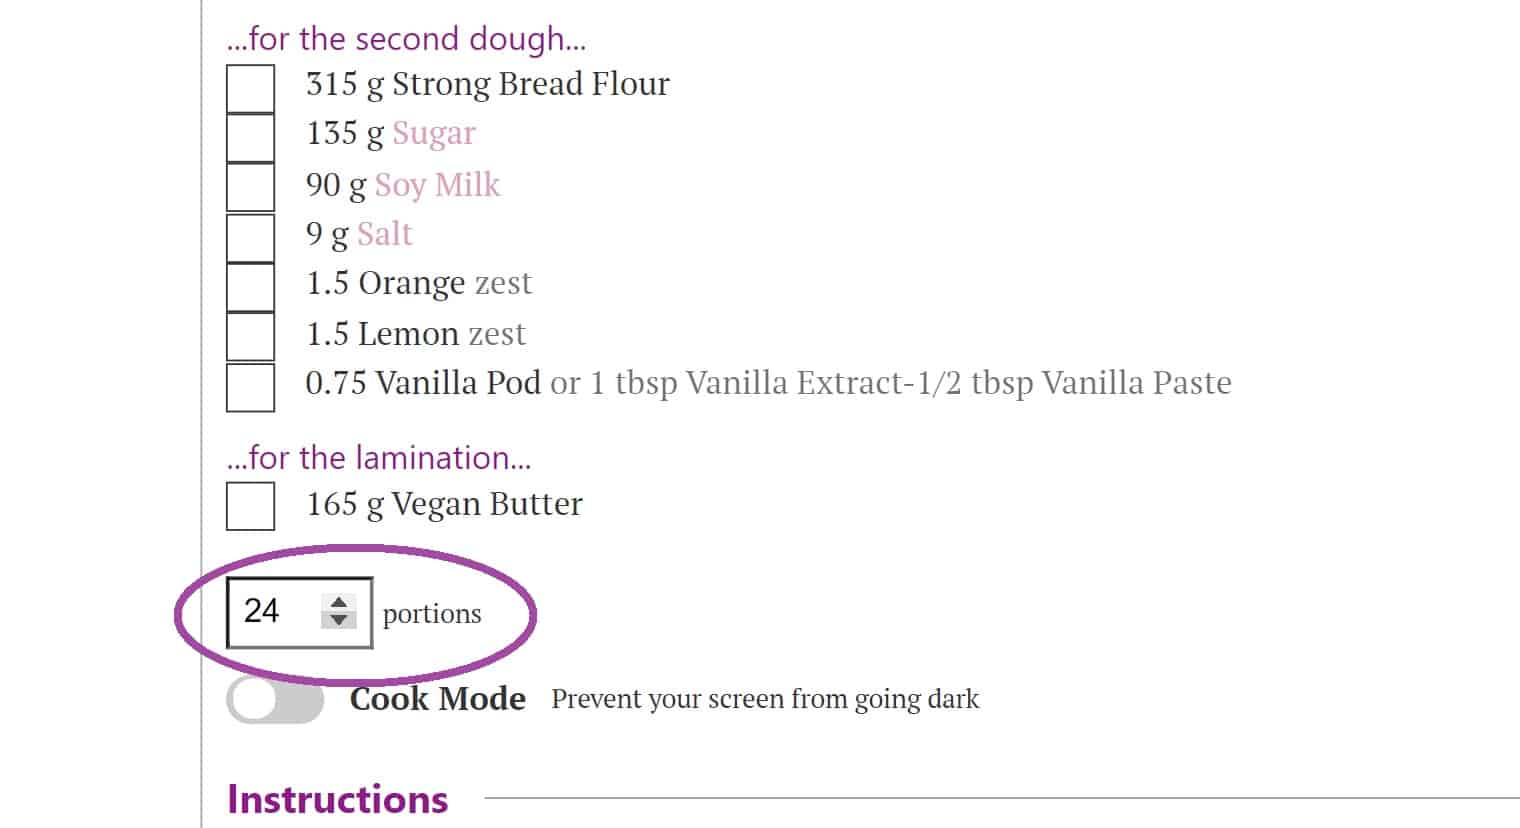
...for the second dough...
210 g Strong Bread Flour
90 g Sugar
60 g Soy Milk
6 g Salt
1 Orange (zest)
1 Lemon (zest)
½ Vanilla Pod (or 1 tablespoon Vanilla Extract-½ tablespoon Vanilla Paste)
...for the lamination...
110 g Vegan Butter
Method:
1. Make the starter by mixing together the flour, sugar and yeast, then pour over room temperature or slightly warm plant milk and work with a fork until all is well combined. Cover the yeast mix, and place in a warm place until it triples its size (it will take around 1:30h at ideally 26°C).
2. Meanwhile place the vegan butter block at room temperature.
3. Once the yeast mix has risen it is time to start adding the ingredients of the first dough. Add first the sugar, then room temperature or slightly warm plant milk, and finally the flour. Work the dough for a few minutes until the ingredients come nicely together (you can also use a dough mixer if that's easier or you're making more batches). Add the butter and work the dough until it is evenly incorporated, then cover again and put it back for the second proof until it doubles its size (1:30-2 hours, depending on house temperature).
4. Dissolve some turmeric or yellow food coloring into the plant milk (I add a pinch of coloring until the milk turns bright golden). As per the first dough, work the remaining ingredients into the dough starting from the sugar, then the milk, the salt, the zests and vanilla, and finally the flour, until the mixture no longer sticks to the sides of the bowl. Cover again and proof for 2-3 hours.
5. For the lamination step roll the risen dough into a rectangle shape onto a lightly floured surface. Spread the plant butter on the central portion of the dough and fold each side over half of the buttered portion. Now fold the upper and lower sides, one onto the other, wrap with film and place in the fridge for half an hour.
6. After 30 minutes roll the folded dough again and repeat the folds. Place back into the fridge for 15 minutes.
7. Repeat the folding (step 6) 2 more times, then shape the dough into a ball.
8. Generously butter the pandoro mould and sprinkle it with some flour. This will prevent the pandoro sticking to the mold.
9. Carefully place the dough in the mold with the smoother side of the ball down. Cover with plastic film and a table cloth and allow to rest in the fridge overnight.
10. The morning after remove from the fridge and leave in a warm environment to rise for 6-7 hours, or until the dough reaches the top of the mold (once again, the recommended temperature is 26°C. The oven with the light switched on works perfectly).
11. Preheat the oven at 180°C and bake the pandoro for 20 minutes. After the first 10 minutes cover it with a foil sheet to prevent the bottom from burning. Lower the oven heat to 160° and cook for another 50 minutes.
12. Allow the pandoro to cool down completely at room temperature before removing it from the mold.
13. Before serving, sprinkle the Pandoro with abundant icing sugar.
Ingredients
...for the yeast dough...
- 50 g Plant Milk Soy
- 40 g Strong Bread Flour
- 15 g Sugar
- 3 g Yeast
...for the first dough...
- 165 g Strong Bread Flour
- 75 g Plant Milk Soy
- 35 g Sugar
- 25 g Vegan Butter
...for the second dough...
...for the lamination...
- 110 g Vegan Butter
Instructions
- Make the starter by mixing together the flour, sugar and yeast, then pour over room temperature or slightly warm plant milk and work with a fork until all is well combined. Cover the yeast mix, and place in a warm place until it triples its size (it will take around 1:30h at ideally 26°C).
- Meanwhile place the vegan butter block at room temperature.
- Once the yeast mix has risen it is time to start adding the ingredients of the first dough. Add first the sugar, then room temperature or slightly warm plant milk, and finally the flour. Work the dough for a few minutes until the ingredients come nicely together (you can also use a dough mixer if that's easier or you're making more batches). Add the butter and work the dough until it is evenly incorporated, then cover again and put it back for the second proof until it doubles its size (1:30-2 hours, depending on house temperature).
- Dissolve some turmeric or yellow food coloring into the plant milk (I add a pinch of coloring until the milk turns bright golden). As per the first dough, work the remaining ingredients into the dough starting from the sugar, then the milk, the salt, the zests and vanilla, and finally the flour, until the mixture no longer sticks to the sides of the bowl. Cover again and proof for 2-3 hours.
- For the lamination step roll the risen dough into a rectangle shape onto a lightly floured surface. Spread the plant butter on the central portion of the dough and fold each side over half of the buttered portion. Now fold the upper and lower sides, one onto the other, wrap with film and place in the fridge for half an hour.
- After 30 minutes roll the folded dough again and repeat the folds. Place back into the fridge for 15 minutes.
- Repeat the folding (step 6) 2 more times, then shape the dough into a ball.
- Generously butter the pandoro mould and sprinkle it with some flour. This will prevent the pandoro sticking to the mold.
- Carefully place the dough in the mold with the smoother side of the ball down. Cover with plastic film and a table cloth and allow to rest in the fridge overnight.
- The morning after remove from the fridge and leave in a warm environment to rise for 6-7 hours, or until the dough reaches the top of the mold (once again, the recommended temperature is 26°C. The oven with the light switched on works perfectly).
- Preheat the oven at 180°C and bake the pandoro for 20 minutes. After the first 10 minutes cover it with a foil sheet to prevent the bottom from burning. Lower the oven heat to 160° and cook for another 50 minutes.
- Allow the pandoro to cool down completely at room temperature before removing it from the mold.
- Before serving, sprinkle the Pandoro with abundant icing sugar.
Notes
The Pandoro will store for 4-5 days in food proof plastic bag. If you want for it to last for longer spray some 90-95% Alcool all around it and secure the pandoro in a plastic bag. Upon serving, sprinkle it with icing sugar. To adapt this recipe for a 750 g or 1 kg moulds change the portions in the recipe box as following:
24 for 750g Mould; 38 for 1 kg Mould
 Baking times will not vary, but I strongly recommend to use a tooth prick to check the inside of the cake.
Nutrition

How about enjoying this Italian classic with a warm mug of home brewed Mulled Wine? You'd be in for a treat!
Happy Holidays!


Carolydie
Hi, I'd like to try your recipe, but I've one question though, what type of yeast do you use ? Is it the fresh one from the baker's or the dry one that needs to be hydrated? Or the instant dry yeast? Thanks for your answer!
Duncan
Absolutely amazing! Thank you
Adriana Z.
I'm so happy you liked it!
Genie
Thanks Adriana for the recipe! I made it for the new yearly! My family loved it, however, next time I will include less orange and lemon pieces and I will use a flavouring and add more sugar in the second dough.
Adriana Z.
Hi Genie, I'm so happy you enjoyed it and that you're planning to make it again tailored to your taste!
I really appreciate the feedback. Have a marvellous new year!
Cloe T.
I made this yesterday, and it turned out spectacular. It's such a nice cake I didn't know of. I have always liked panettone although not very fond of the fruit pieces. This is my new favorite!! Thank you so much for the recipe, I will be making it again.
Adriana Z.
Hi Cloe, I'm so pleased to hear you enjoyed it! That's exactly why people that dislike the dry fruit prefer Pandoro over Panettone and I'm pleased you found an alternative that better suits your taste!
I wish you happy Holidays!