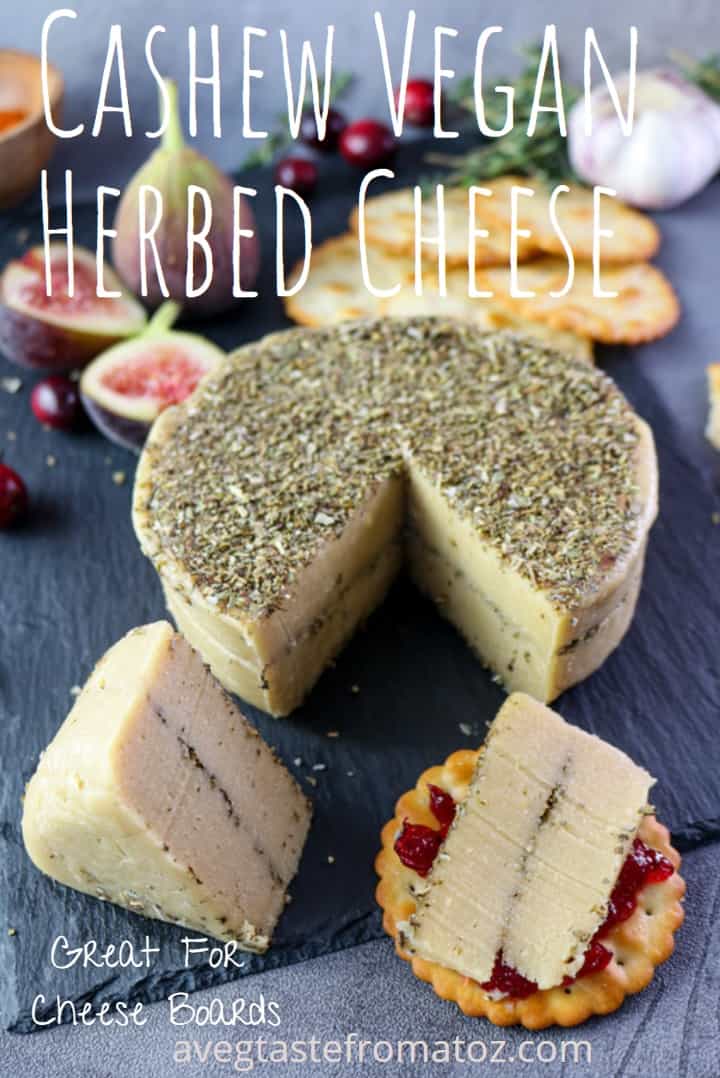
Vegan Aged Herbed Cheese
Questa ricetta è disponibile anche in italiano
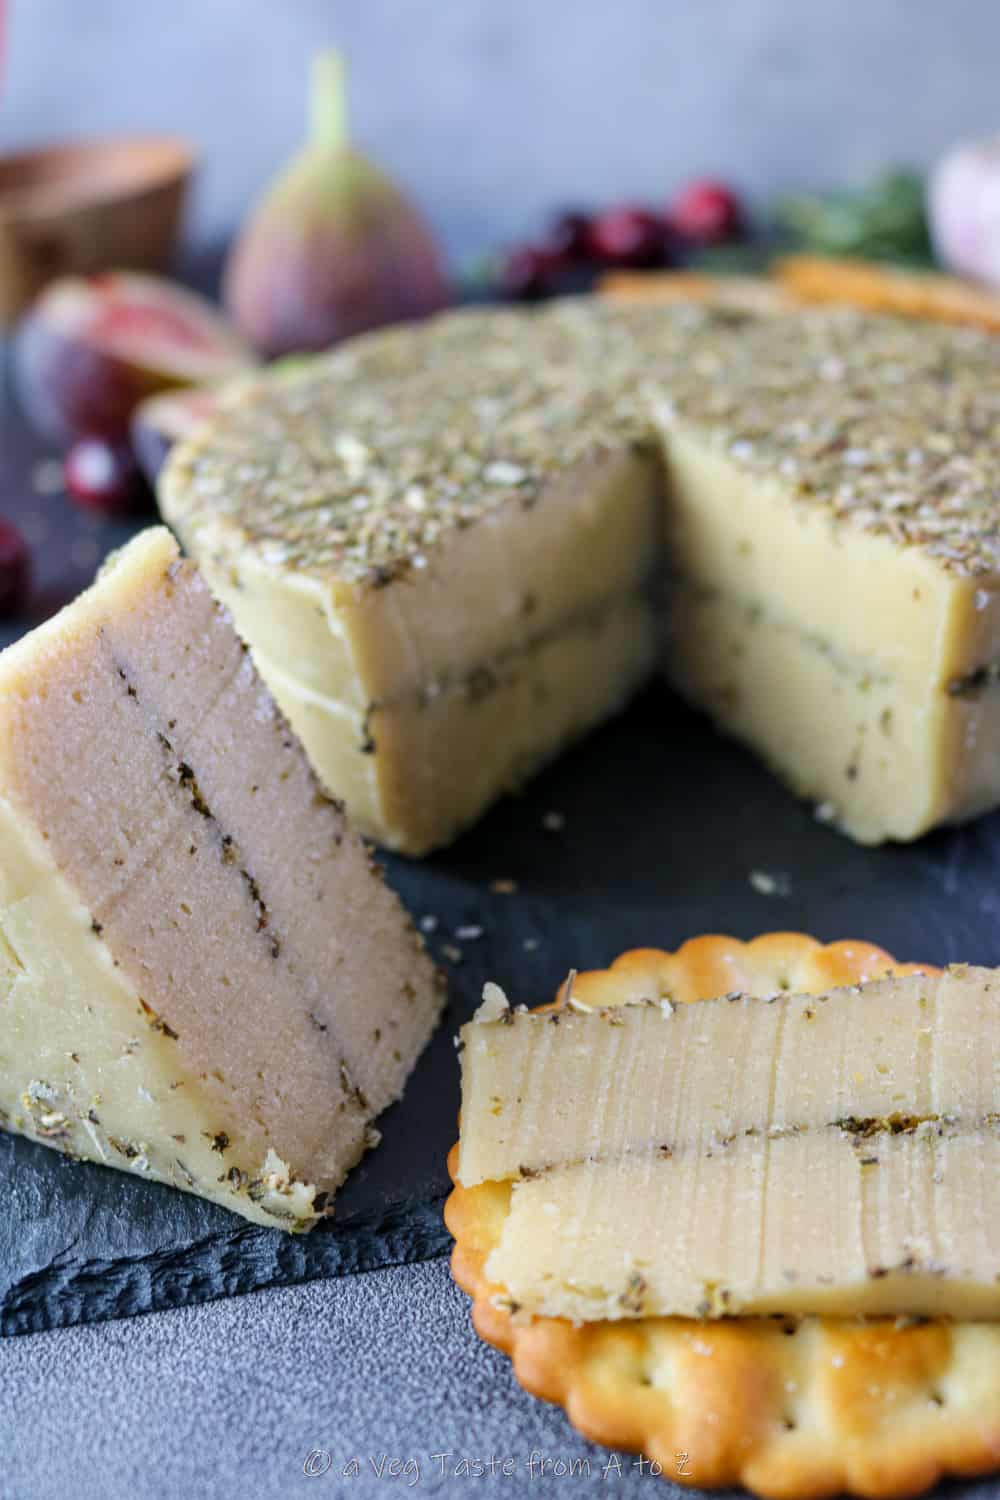
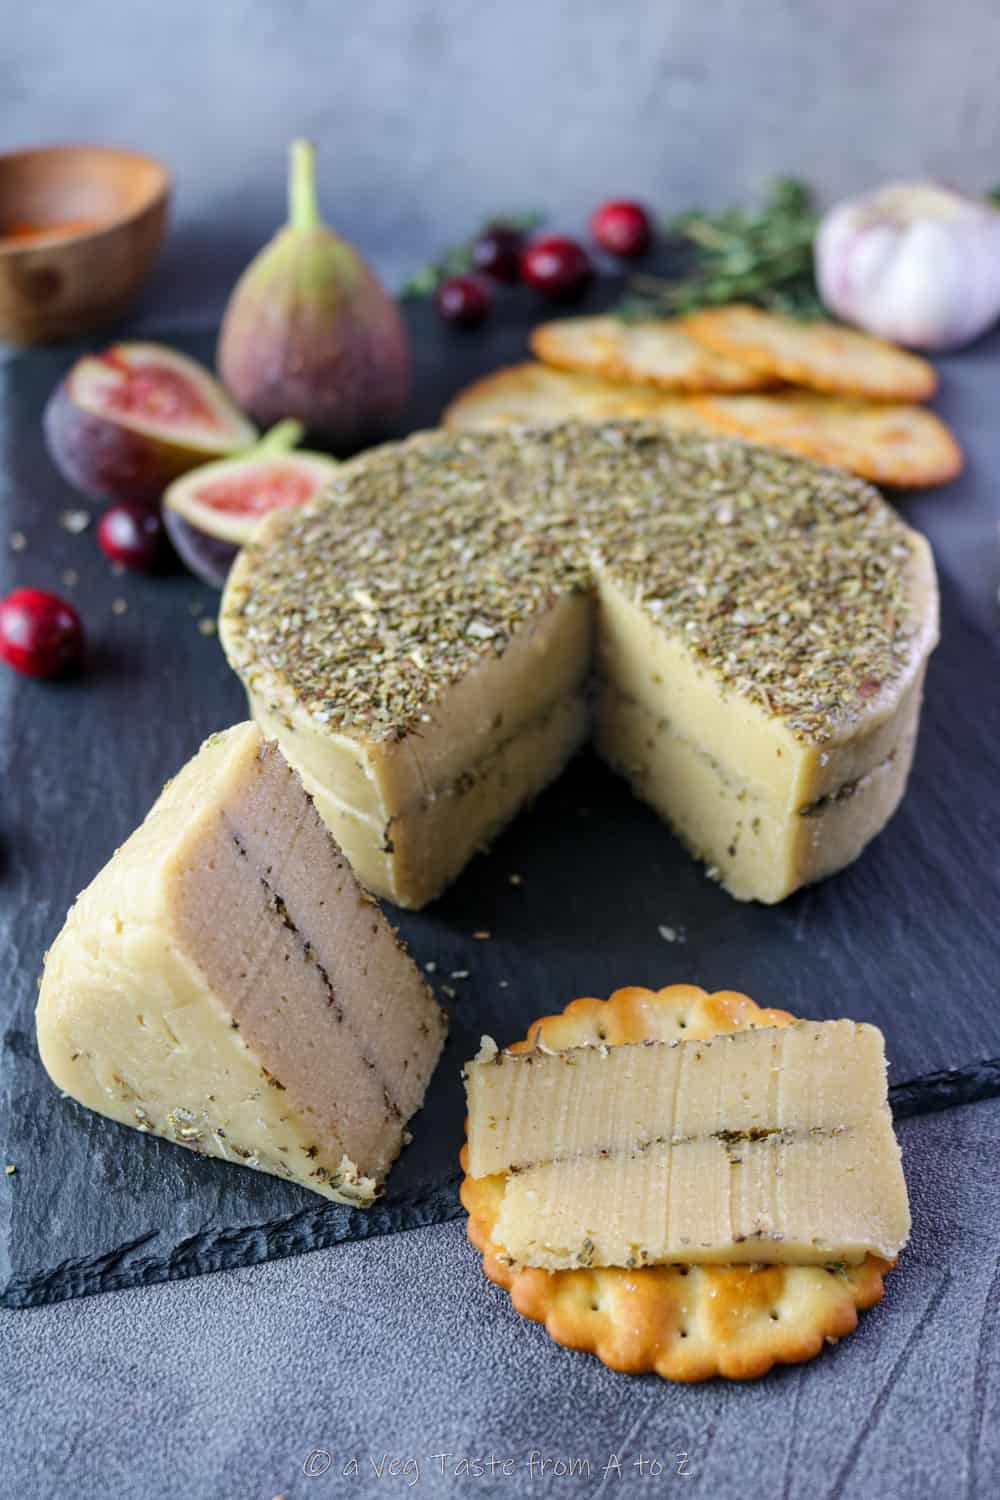
This delicious and simple recipe for vegan aged herbed cheese is a wonderful way for you to get the tangy, salty goodness of cheese in your life while remaining completely plant-based. Try it out soon!
I'm very proud to introduce this cashew based vegan cheese.
Method might seems a bit long and scary, but I assure you it's 100% doable and the result will be totally worthy of the wait and efforts.
I highly suggest to serve this flavourful beauty with a spread of chutneys, crackers, fruits (especially grapes, figs and cranberries) and a bowl of olives. I'm sure everyone will love it! You can serve it as star of the show or as a part of a wider cheese spread, along with a selection of plant-base cheeses, such as the followings:
- Vegan Overnight Cream Cheese
- Aged Chickpea Cheese
- Garlic & Chives Vegan Roulade
- Vegan Baked Camembert
- Vegan Stracchino
- Vegan Buffalo Mozzarella
The consistency chances according to how long you keep it in the fridge for, going from quite soft and almost spreadable to firm and buttery.
If you have any questions do not hesitate to write me a comments and I'll try to help as soon as possible.
Let's immediately see how to make it at home from scratch, shall we?
Method inspired from fullofplants.com
How To Make Vegan Aged Herbed Cheese
To get started with this lovely recipe, place the cashew nuts into a heat-proof bowl, and then boil some filtered water. Pour it over the cashews, before allowing them to soak it all up over the course of forty-five minutes. This will mean that the nuts are perfect for blending in a little while! While the nuts are soaking, set up your food processor.
After soaking, drain the cashews, and then allow them to cool down to room temperature.
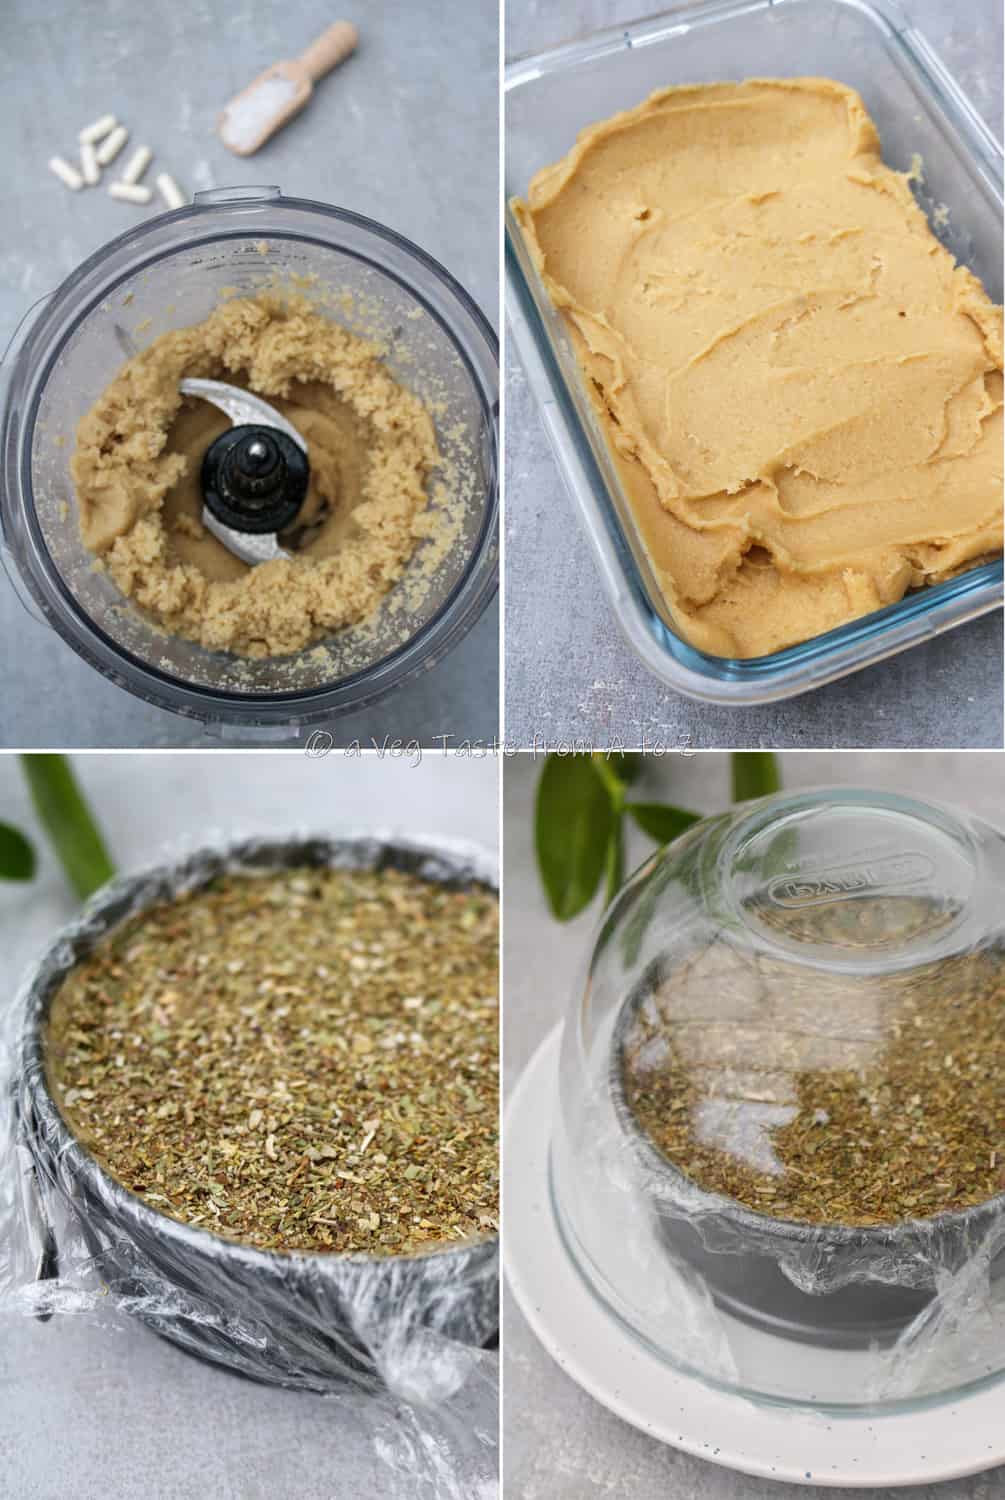
Add your cashews to the blending bowl of your food processor, along with just a couple of tablespoons of filtered water: you can always add water, but you can’t take it away! Start blending the mixture at high speed, making sure to scrape down the sides from time to time. You’re aiming for a mixture that’s smooth and thick, without having too much liquid added to make it thin and runny.
This blending phase can take up to ten minutes, depending upon your food processor. Make sure not to add too much water at first, as you’ll be better served by adding it later to finish the correct texture of your mixture.
Add the garlic and onion powder next, followed by the salt and the content of the probiotic capsules. Blend on high for another twenty to thirty seconds - this will mix in the herbs and salt very well.
Transfer the cashew mixture to a clean glass bowl, and then cover the cling film. Make sure that the cling film touches the surface of the cashew mixture: this will prevent contaminants from getting to the mixture itself.
Leave the bowl at room temperature for twenty-four hours, and this should start the fermentation process.
Place a generous sheet of cling film (one that overhangs the sides) into a 4-inches hinged cake tin, and then scoop half of the cheese mixture into it. Press it down into the tin evenly, and then sprinkle a layer of the herb mix on top. Cover the cheese with the remaining cheese mixture, and then compress everything onto the first layer.
Place the tin over a plate, or cover it with a glass or plastic bowl turned upside down and placed over it.
The next day, carefully remove the cheese from the mold and then sprinkle some salt over the top of it. Carefully flip it by lining a plate with parchment paper, and sprinkle it again with salt. Add a tablespoon or so of the herb mixture to the top, and then place it back into the fridge with the bowl on top.
Continue flipping the cheese every day, or every other day, for two weeks. Always handle it with a layer of parchment paper, cling film, or simply gloves to prevent you from touching the cheese directly: this would introduce contaminants, which would interfere with the cheese mixture.

After the first two weeks, the cheese will be harder and ready to be consumed. Although, if you’d prefer it to be even harder and crumbly, you can wrap it in parchment paper and store it in the fridge for longer.
Overall, make sure not to exceed four weeks. The cheese will be tasty to be enjoyed within a month and a half from the start of the process. If that’s a bit of a short window for you, then you can consider freezing it - it’s completely suitable for home freezing.
Vegan Aged Herbed Cheese Recipe
Ingredients:
350 g raw cashews
3 capsules Vegan Probiotics (Acidophilus)
½ tablespoon g Nutritional Yeast
½ teaspoon Garlic Powder
¼ teaspoon Onion Powder
7 g Sea Salt
...for the dry herb mix...
3 tablespoon Sage
2 tablespoon Oregano
2 tablespoon Parsley
1 tablespoon Basil
Method:
1. Place the cashew nuts into a heat proof bowl, boil some filtered water and pour it over the cashews. Cover with a plate and allow to soak for 45 minutes.
2. Drain the cashews and allow them to cool down to room temperature.
3. Add the cashews to a food processor bowl along with a couple of tablespoons of filtered water. Start blending on high speed, scraping down the sides from time to time, until you get a very smooth and thick mixture. This step can take up to 10 minutes, depending on your blender. Try not to add to much water at this stage, however, if your mixture doesn’t smooth up add more filtered water until the desired consistency, one tablespoon at a time.
4. Add the garlic and onion powder, the salt and the content of the probiotic capsules. Blend on high speed for another 20-30 seconds.
5. Transfer the cashew mixture to a clean glass bowl and cover with plastic film to touch.
6. Leave the bowl at room temperature for 24 hours day to start the fermentation process.
7. Place a generous sheet of cling film into a 4-inches hinged cake tin and scoop into it half of the cheese mixture, press it down filling the bottom of the tin evenly, then sprinkle a tablespoon of the herb mix. Cover with the remaining cheese mixture and compress onto the first layer.
8. Place the tin over a plate and cover with a glass or plastic bowl upside down over it.
9. The next day, carefully remove the cheese from the mold and sprinkle some salt over the top of it, then carefully flip it by lining a plate with parchment paper and sprinkle it again with salt. Sprinkle the top with another tablespoon or so of the herb mixture and place it back into the fridge with the bowl on top.
10. Continue flipping the cheese everyday or every other day for 2 weeks, always handling with a layer of parchment paper, cling film or simply use gloves to prevent touching the cheese directly.
11. After the first 2 weeks the cheese will be harder and ready to be consumed, although, if you prefer it even harder and crumbly you can wrap it into parchment paper and store in the fridge for longer.
Please Note: Try not to exceed 4 weeks in total. The cheese will be good to be enjoyed within a month and half from the start. It is suitable for home freezing.

gg


Simon Warren
I made mine. Its been in the fridge 10 days but does not seem to have hardened at all. Its in a cake tin covered in cling film - any advice? Thanks
Adriana Z.
Hi Simon!
Sorry I didn't get back to you earlier. It can be for multiple factors. Did you de-mould it and sprinkle it with salt? This is a crucial step to harden the cheese. You also want to make sure though that the cheese is out of the cake tin, it should have been out after the first 24 hours.... Hope that helps.
All the best.
Simon Warren
Thanks so much for this. I will take your advice. What do you mean by de-mould it? Thanks for your help and time.
Carole
I am making this cheese right now. I did my first flip and salt yesterday and ready to flip again today. My question is, doesn’t all that salt make the finished cheese very very salty, something I am trying to avoid these days as we are told too much salt is bad for our health. I see you do not list the sodium content in your nutritional data.
Cecilia
Hi, just wondering do we need penicillium candidum it is that only needed if we want to have a rind growing around it? Also would you be so kind to tell me why we need to flip the cheese each day ? Is it because we need to sprinkle salt on it? Then we salt the cheese I am thinking that’s the reason to make it become more solid and harder ??
Adriana Z.
Hi Cecilia.
That's right. The penicillium candidum is if you want to grow the rind around the cheese.
It is important to flip the cheese to better distribuite the moisture whilst it dries out thanks to the salt we sprinkle on each side. Failing to flip can result in bad mold growth, and we absolutely don't want that.
Hope that helps 🙂
Cecilia
Ah I get it I get it.
Margie
Would this be okay to make w/o the dried herb mix? I would rather have a plain cheese but not sure if they service any purpose in the aging process. Thx in advance
Adriana Z.
Hi Margie! Yes, of course! You're gonna have a plain "cheese" in this case. Herbs have nothing to do with the aging, only purpose is flavour 🙂
Happy Holidays