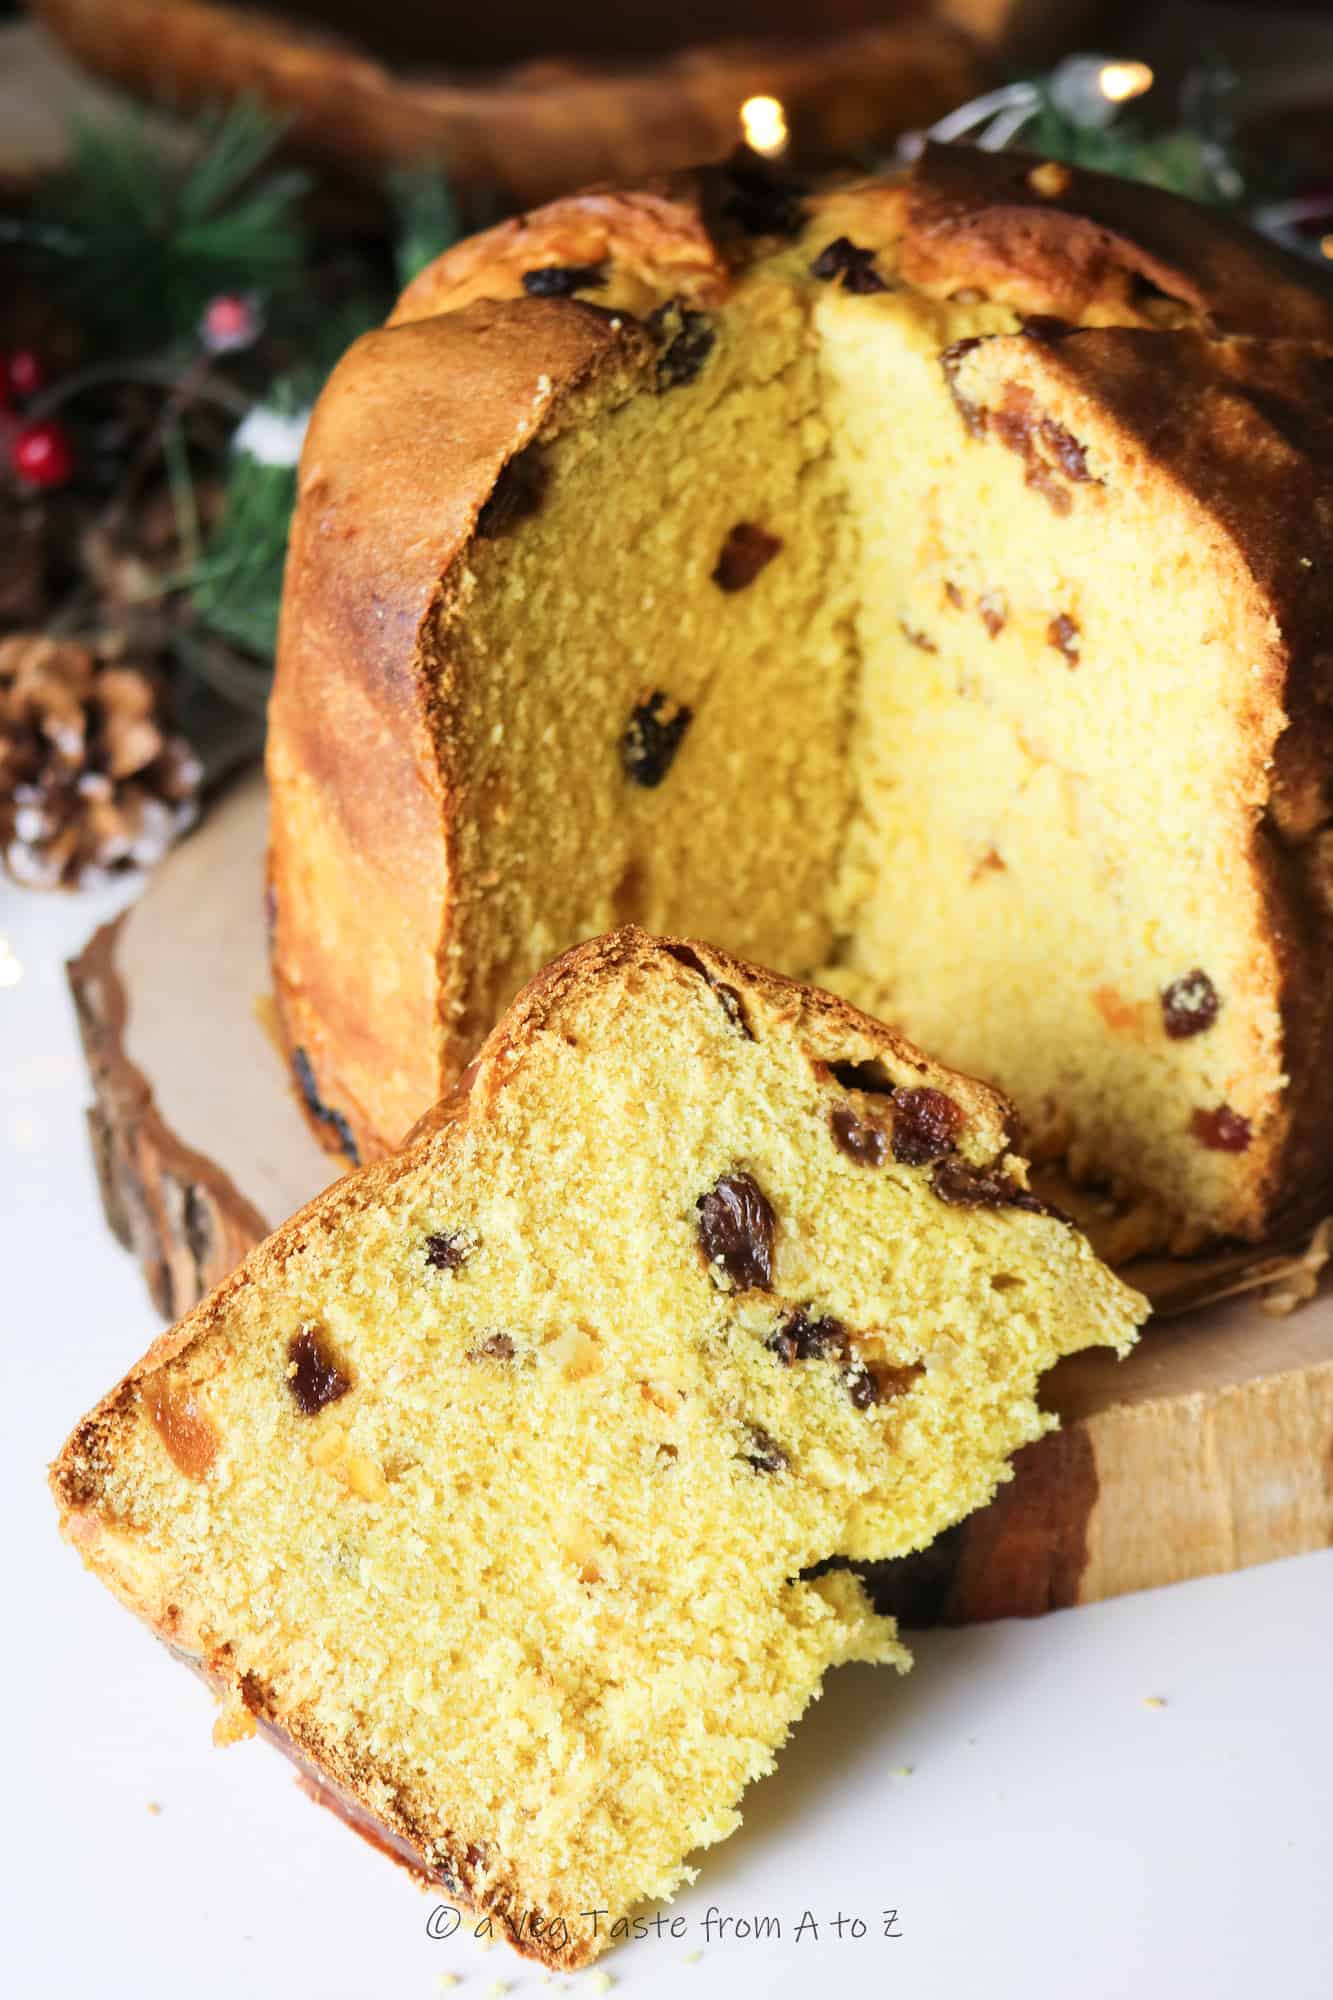
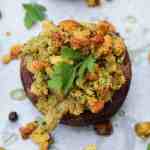
Nothing beats a homemade fluffy and aromatic Panettone in the holiday season. Here's my 100% vegan take on this Italian classic!
Questa ricetta è disponibile anche in italiano
Are we still on time to bake some Panettone?!
Indeed we are!
With this long tested recipe, you will achieve a vegan, fluffy panettone in as little as 1 day, that smells and feels like the real deal, and tastes better than any store bought!
I thought I couldn't make it for this festive season, but eventually all of my efforts paid off and I can finally present a recipe for a vegan panettone that I'm proud about!
A few heads up...
I started experimenting in early November with a sourdough starter, but eventually I decided to leave it out in place of the instant yeast because I felt it was more stable and consistent, as well as largely replicable, especially for those that are not confident enough or don't have any starter.
For those that don't know, making panettone is almost like an art. You have to (must, actually) give the dough the time it needs to develop the best structure as well as the perfect rise. Nobody can rush that, so we won't.
If you're looking for a shortcut recipe, I'm afraid you have to look elsewhere and (most definitely) be prepared to be underwhelmed.
This is the shorter you can get, and I can already hear the most renewed Italian masters telling me off for what I dare to call with the actual name, despite it missing a few key-and-unreplaceable ingredients of the traditional recipe. So sorry folks, I am a vegan that used to enjoy this festive treat during the holidays, that managed to have achieved a complete plant based version of it MINUS the cruelty. So to me this only can be considered a win.
In fact, the main (tedious) ingredient to substitute in this recipe were indeed the eggs. The two non vegan ingredients that the traditional recipe calls for are basically butter and eggs. Luckily we have access almost worldwide to an array of decent to great plant based alternatives to butter, however, when it comes to substituting a large amount of eggs for a vegan recipe, that's what the troubles lie within. It is more than fine working with recipes that call for up to three eggs (using the commons eggs substitutes like aquafaba, the plant milk+vinegar+rising agent combo, applesauce, flax or chia seeds, ripe bananas, etc), but it's when we need to work with more than that that we need to put some extra effort in.
To replicate this I've tried different egg substitutes before going with the combo plant milk (soy) + starch (tried both with corn and potato and I couldn't tell any difference).
Every time I used applesauce the dough didn't rise (if there's any scientific reason why it wouldn't I completely ignore it, actually please do tell me in the comment section, as I'm still curious to find out why it didn't work). Both times I used applesauce I added it in the last dough, before adding the butter and the fruits and aromas. I used this substitute to replace only "half" of the amount of eggs of the traditional recipe I used to bake when I still was a veggie, for the other half I used milk+starch.
Last year I tried with flax eggs but I didn't like how it turned out at all.
And I haven't tried with aquafaba just because I've already used it a lot for other baked goods (like these Italian Almond Cookies and all of my unsuccessful attempts to make a vegan nougat) and we really didn't want more chickpea dishes (seriously, we had them at least once a day for over a weeeeek!).
For the rest we are going to need the usual:
- Flour. A strong, bread flour is important to achieve the best outcome possible. Try not to use all purpose and definitely not self rising flour.
- Butter - Vegan, of course. I used the newly UK released "Flora Salted" which I immediately fell in love with. Your favourite plant butter (not margarine) or vegetarian shortening I'm confident will work a treat.
- Sugar - I tried with both caster and brown, before deciding to only use caster sugar. Caster somehow gave it a better rise. If you want to use brown I'd suggest to only replace up to 40% of the total and grinding it a bit in a food processor before adding it to the dough.
- Raisin + Candied Fruit Peels (typically citrus fruits). As per the traditional recipe. Some people may not like this combo and often substitute (or even add) some chocolate drops instead. If that's your case just make sure to buy chocolate drops that are suitable for vegans.
- Aroma mix. There are two schools: one that prepare the aroma mix that will flavour the panettone at least 24 hours in advance (up to three days) and the one that does not bother doing so. I've always done it at least 12h before incorporating the mix to the dough (as well as soaking and drying the raisins overnight before starting the first dough), but in my last two attempts that weren't "planned" in advance I just added the ingredients to the dough one by one, and to be completely honest with you, I couldn't taste any difference!
The "mix" that goes in this Vegan Panettone is made from: fresh lemon zest, orange extract (although if you can find unwaxed oranges it's better, unfortunately I couldn't), vanilla paste (or extract, or pod) and liquid glucose (I also tried with maple and agave but I wasn't fond).
How to make Vegan Panettone at Home
As mentioned before, making panettone at home is a real art that requires passion, patience and time. The real deal takes up to three days to make, plus you are supposed to (preferably) wait at least 3-4 days before tasting it, to savour this Italian festive dessert at its best.
In this version I've already thinned up some steps to make something easily achievable at home, especially when we are very close to the holidays.
It will take you (only) 13 hours from start to finish (cooling time apart), and this, my friends is as quick as it can be!
Do not trust those quicker versions on the web that claim to make panettone in less time. If you don't have at least 3 doughs (including the starter mix), ain't panettone my friends. Maybe just something flavoured like it.
But believe me, if you follow my steps and advice you'll end up with a gorgeous product to be proud of. Most of the time is proofing time anyway. Our actual labour will be of around 1 to 1:30h, depending on your practicality.
But let's immediately see what are these doughs and how to make them.
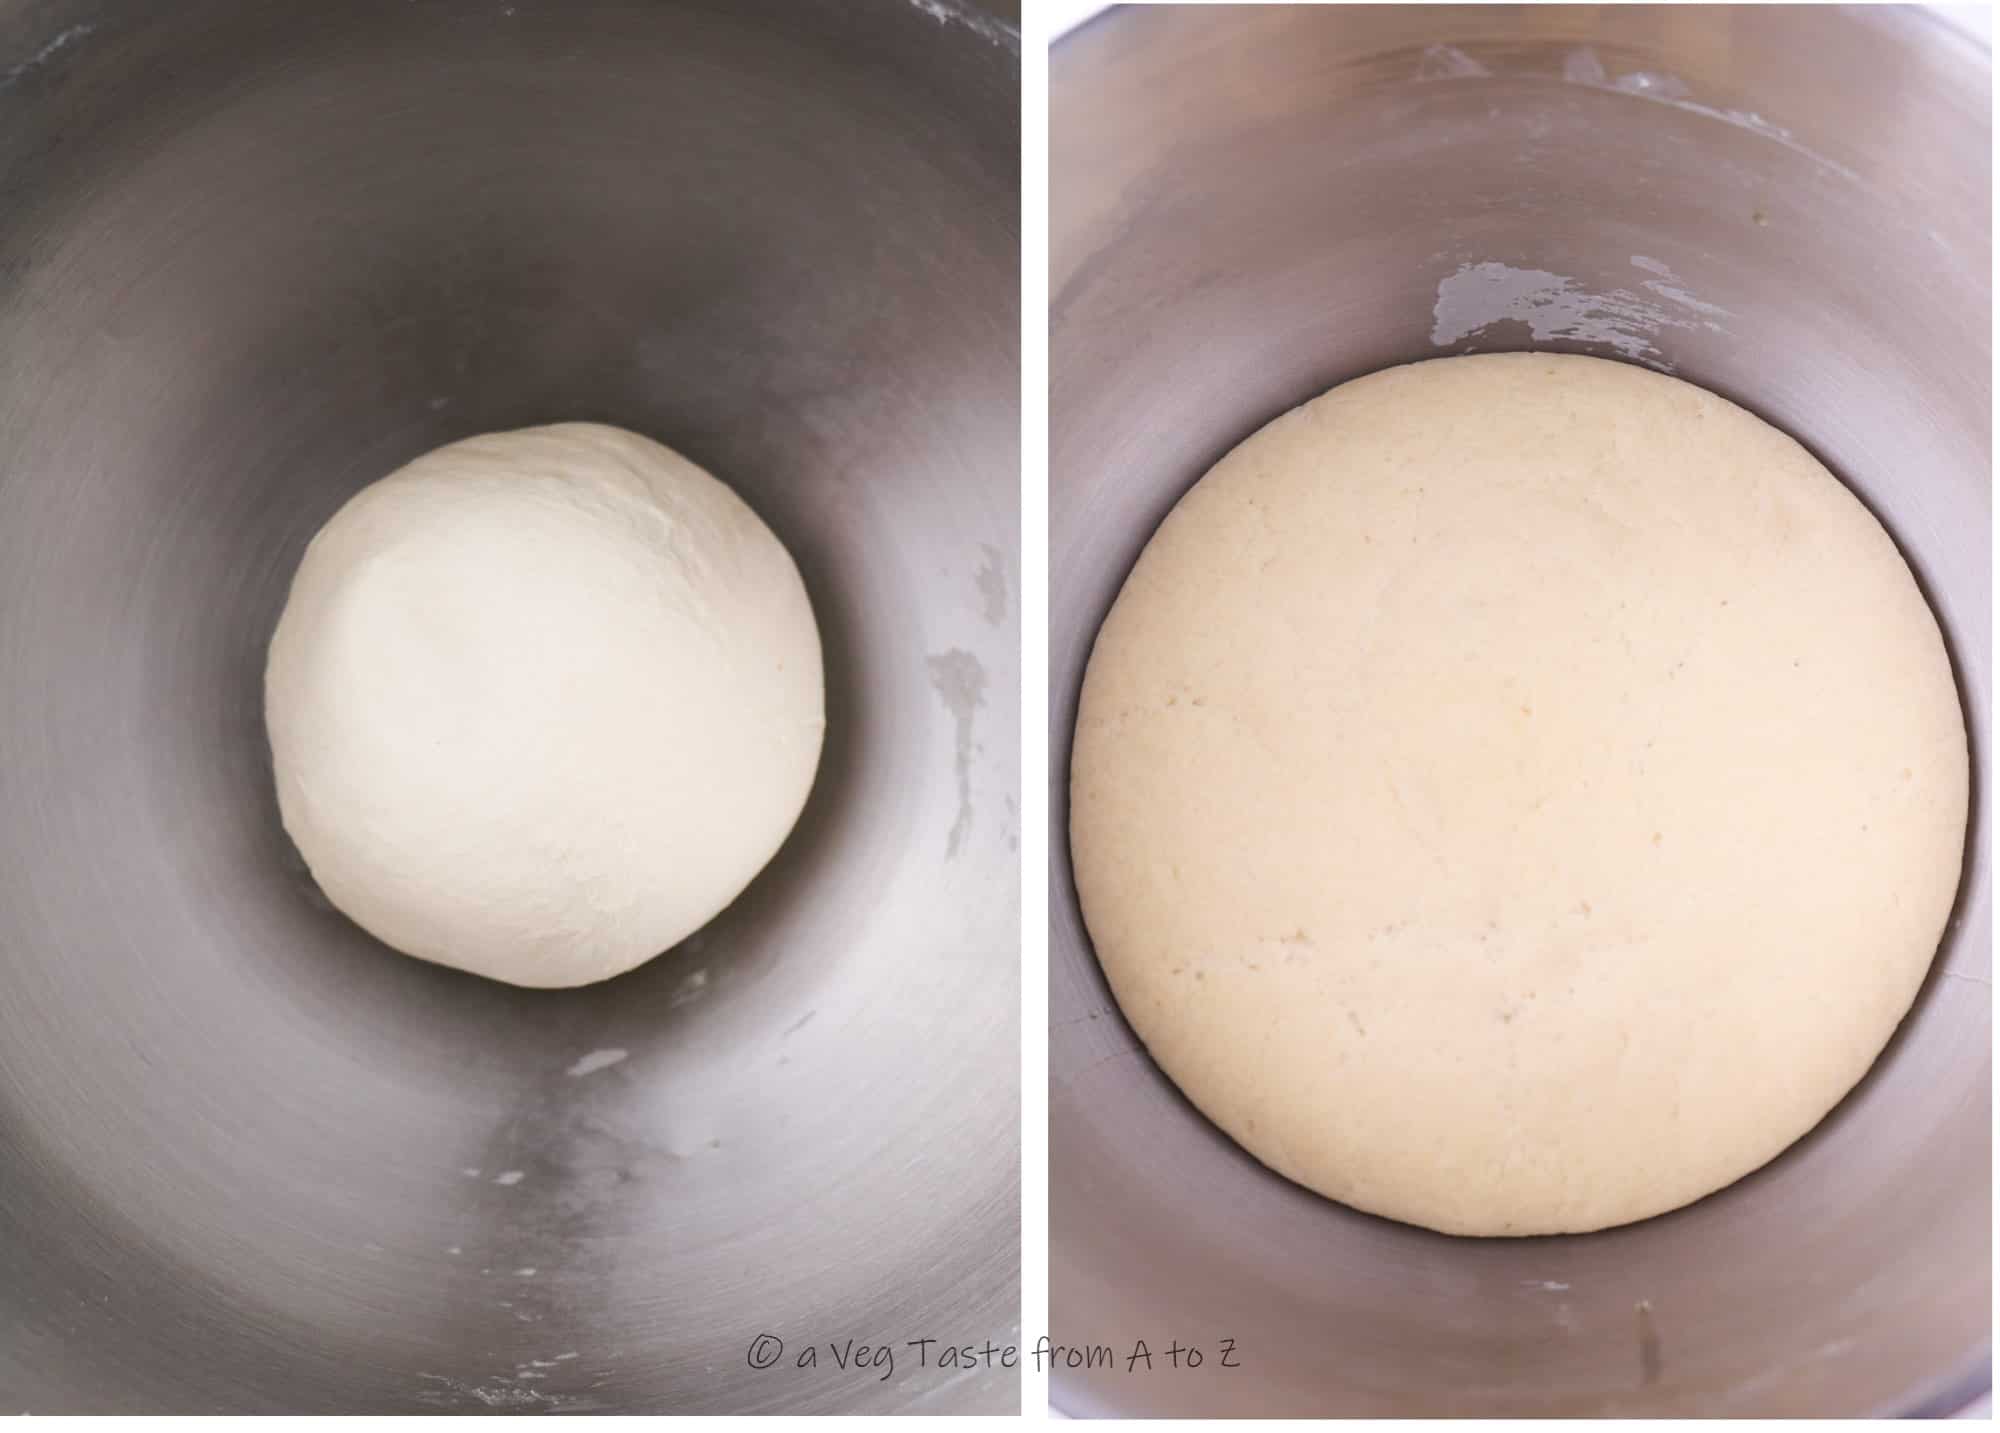
First we have to make a starter. This is made from the yeast and only a small amount of flour, sugar and water, and it will allow to activate the yeast which will secondly boost the rise of the second dough.

As soon as the starter (or biga) has tripled its size (after around 1:30h), it's time to add it to the second dough.
The second dough. This dough is firstly worked with a another little bit of sugar, a bigger portion of flour and the egg replacement. Before proofing it again, we have to add half of room temperature softened vegan butter, a very small bit at a time, and allow the dough to incorporate the fat.
It's just mesmerising and fascinating how at this point the dough will change its texture and appearance.
Back to proof for a bunch of hours (4-5h this time) until it becomes four times bigger.
 In the meantime we can soak the raisins in some hot water for 20-30 minutes and grate the citrus peel to be added in the third and final dough.

After the raisins have soften up, they need to be drained and pat dry with a kitchen cloth or paper. We don't want to leave any extra moisture to them, otherwise that will compromise the final result.
Third (and final) dough. We first need to add the remaining flour, the plant milk and the sugar to the previous dough and work it well for a few minutes.
Then sugar and all the ingredients of the aroma mix go in (plus some yellow food colouring or turmeric, to give the characteristic eggy colour) and dough gets mixed again for another 3 to 5 minutes.
Next, the remaining room temperature softened butter goes in, once again, a bit at a time, until all well incorporated.
Now it's time to remove the dough from the mixer bowl and arrange it on the working surface. Please make sure not to use any flour at all from this point on.
Pull the dough with the hands into a big circle or rectangle, and place the candied fruits and the raisins on top of the stretched dough.
Fold the dough so the fruits are evenly distributed, and gently work it on the table to spread the raisins even more.
When you're happy with the dough, fold the sides to the centre of the dough a few times, and roll it into a ball. If you want to make smaller panettones you have to portion the dough before this step.

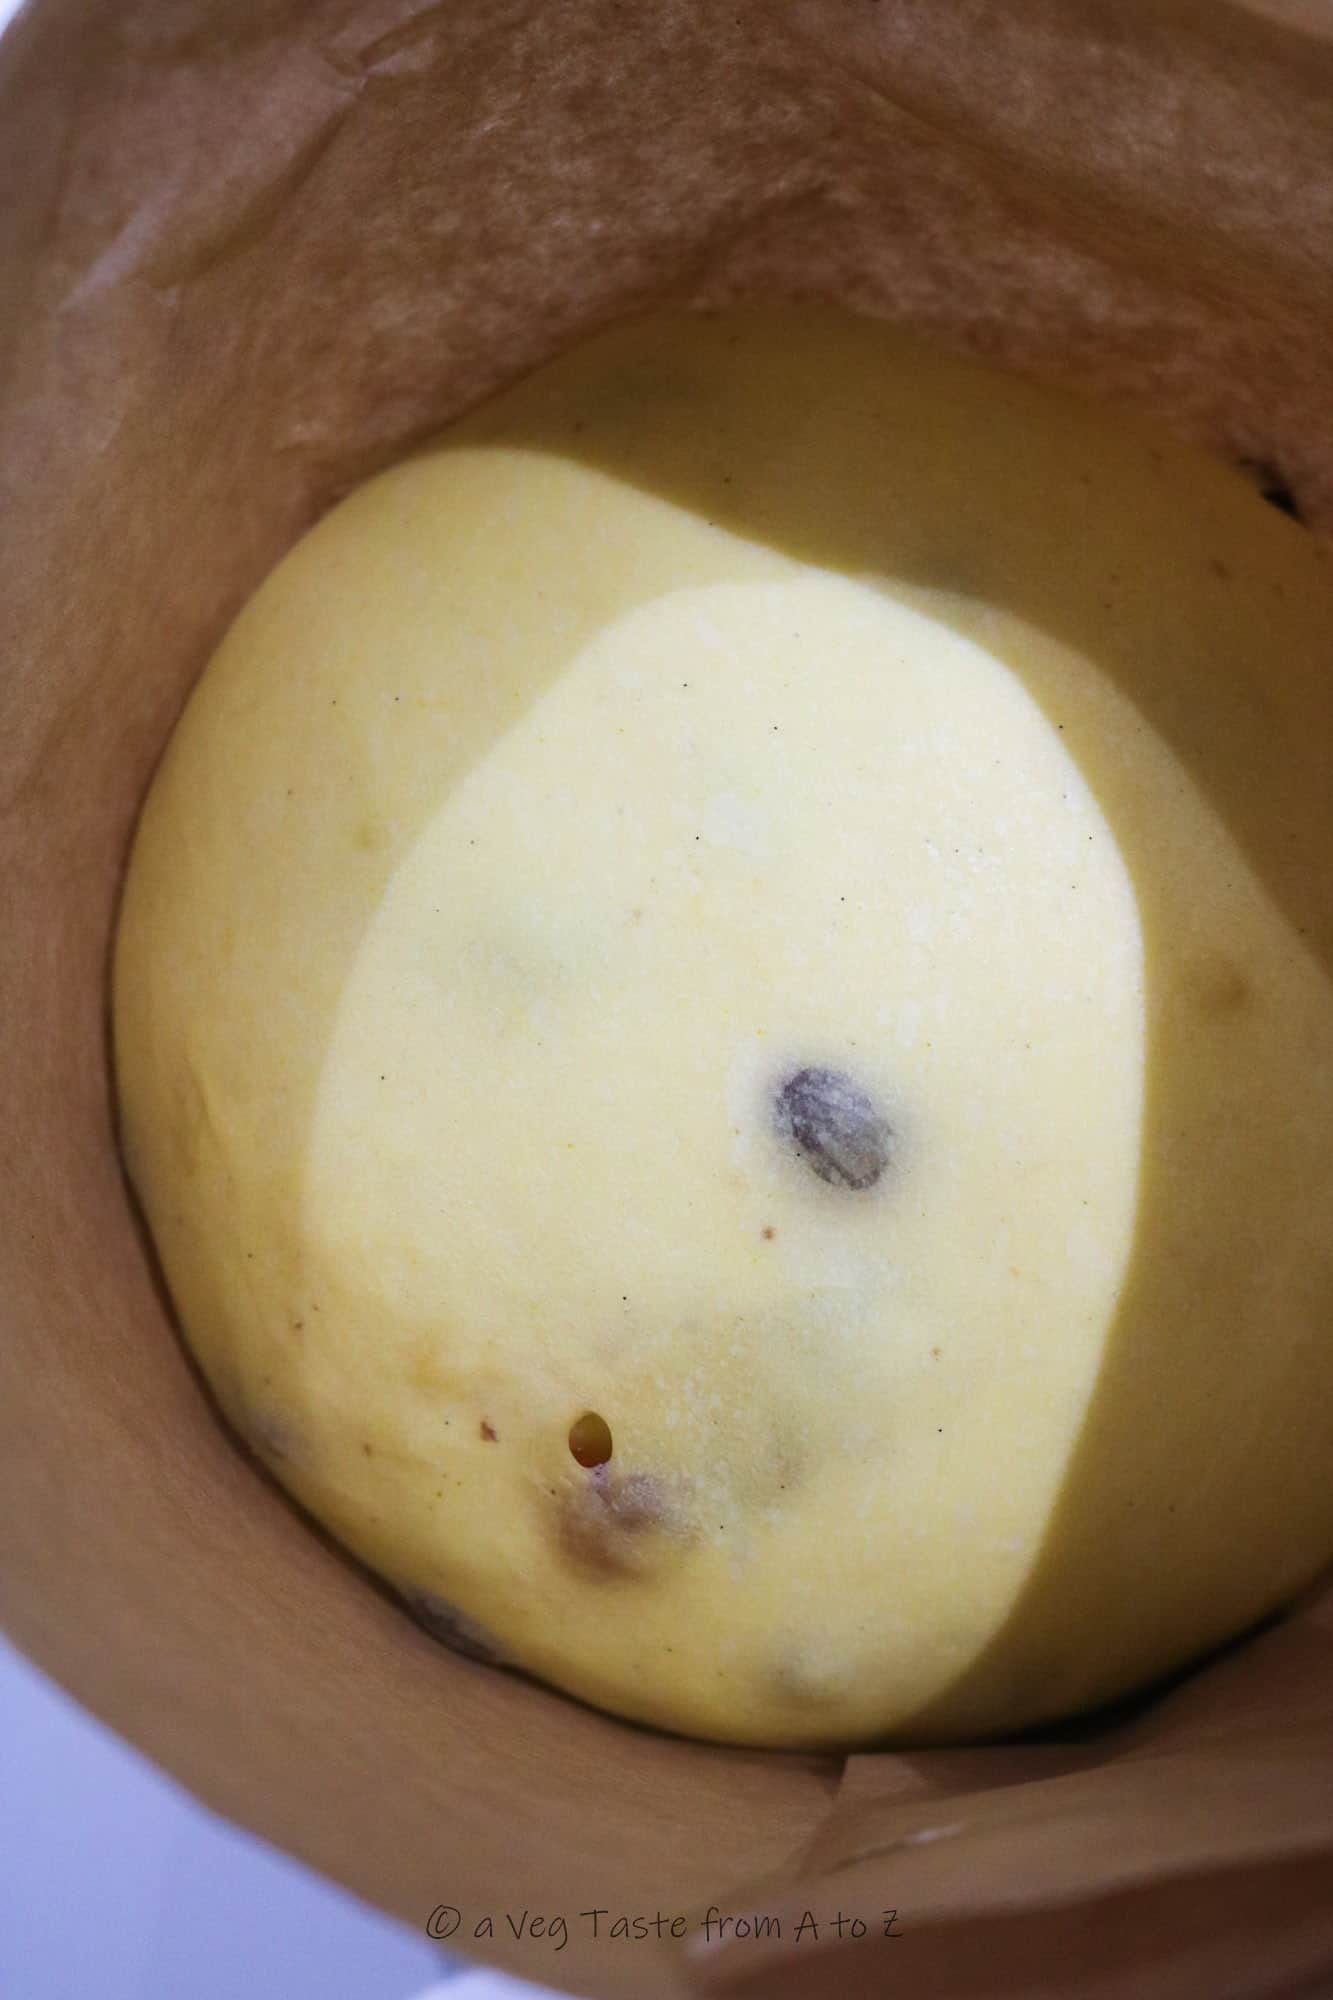
Transfer the dough into a 1 kg panettone mould and leave to proof for the last time until it quadruple in size.
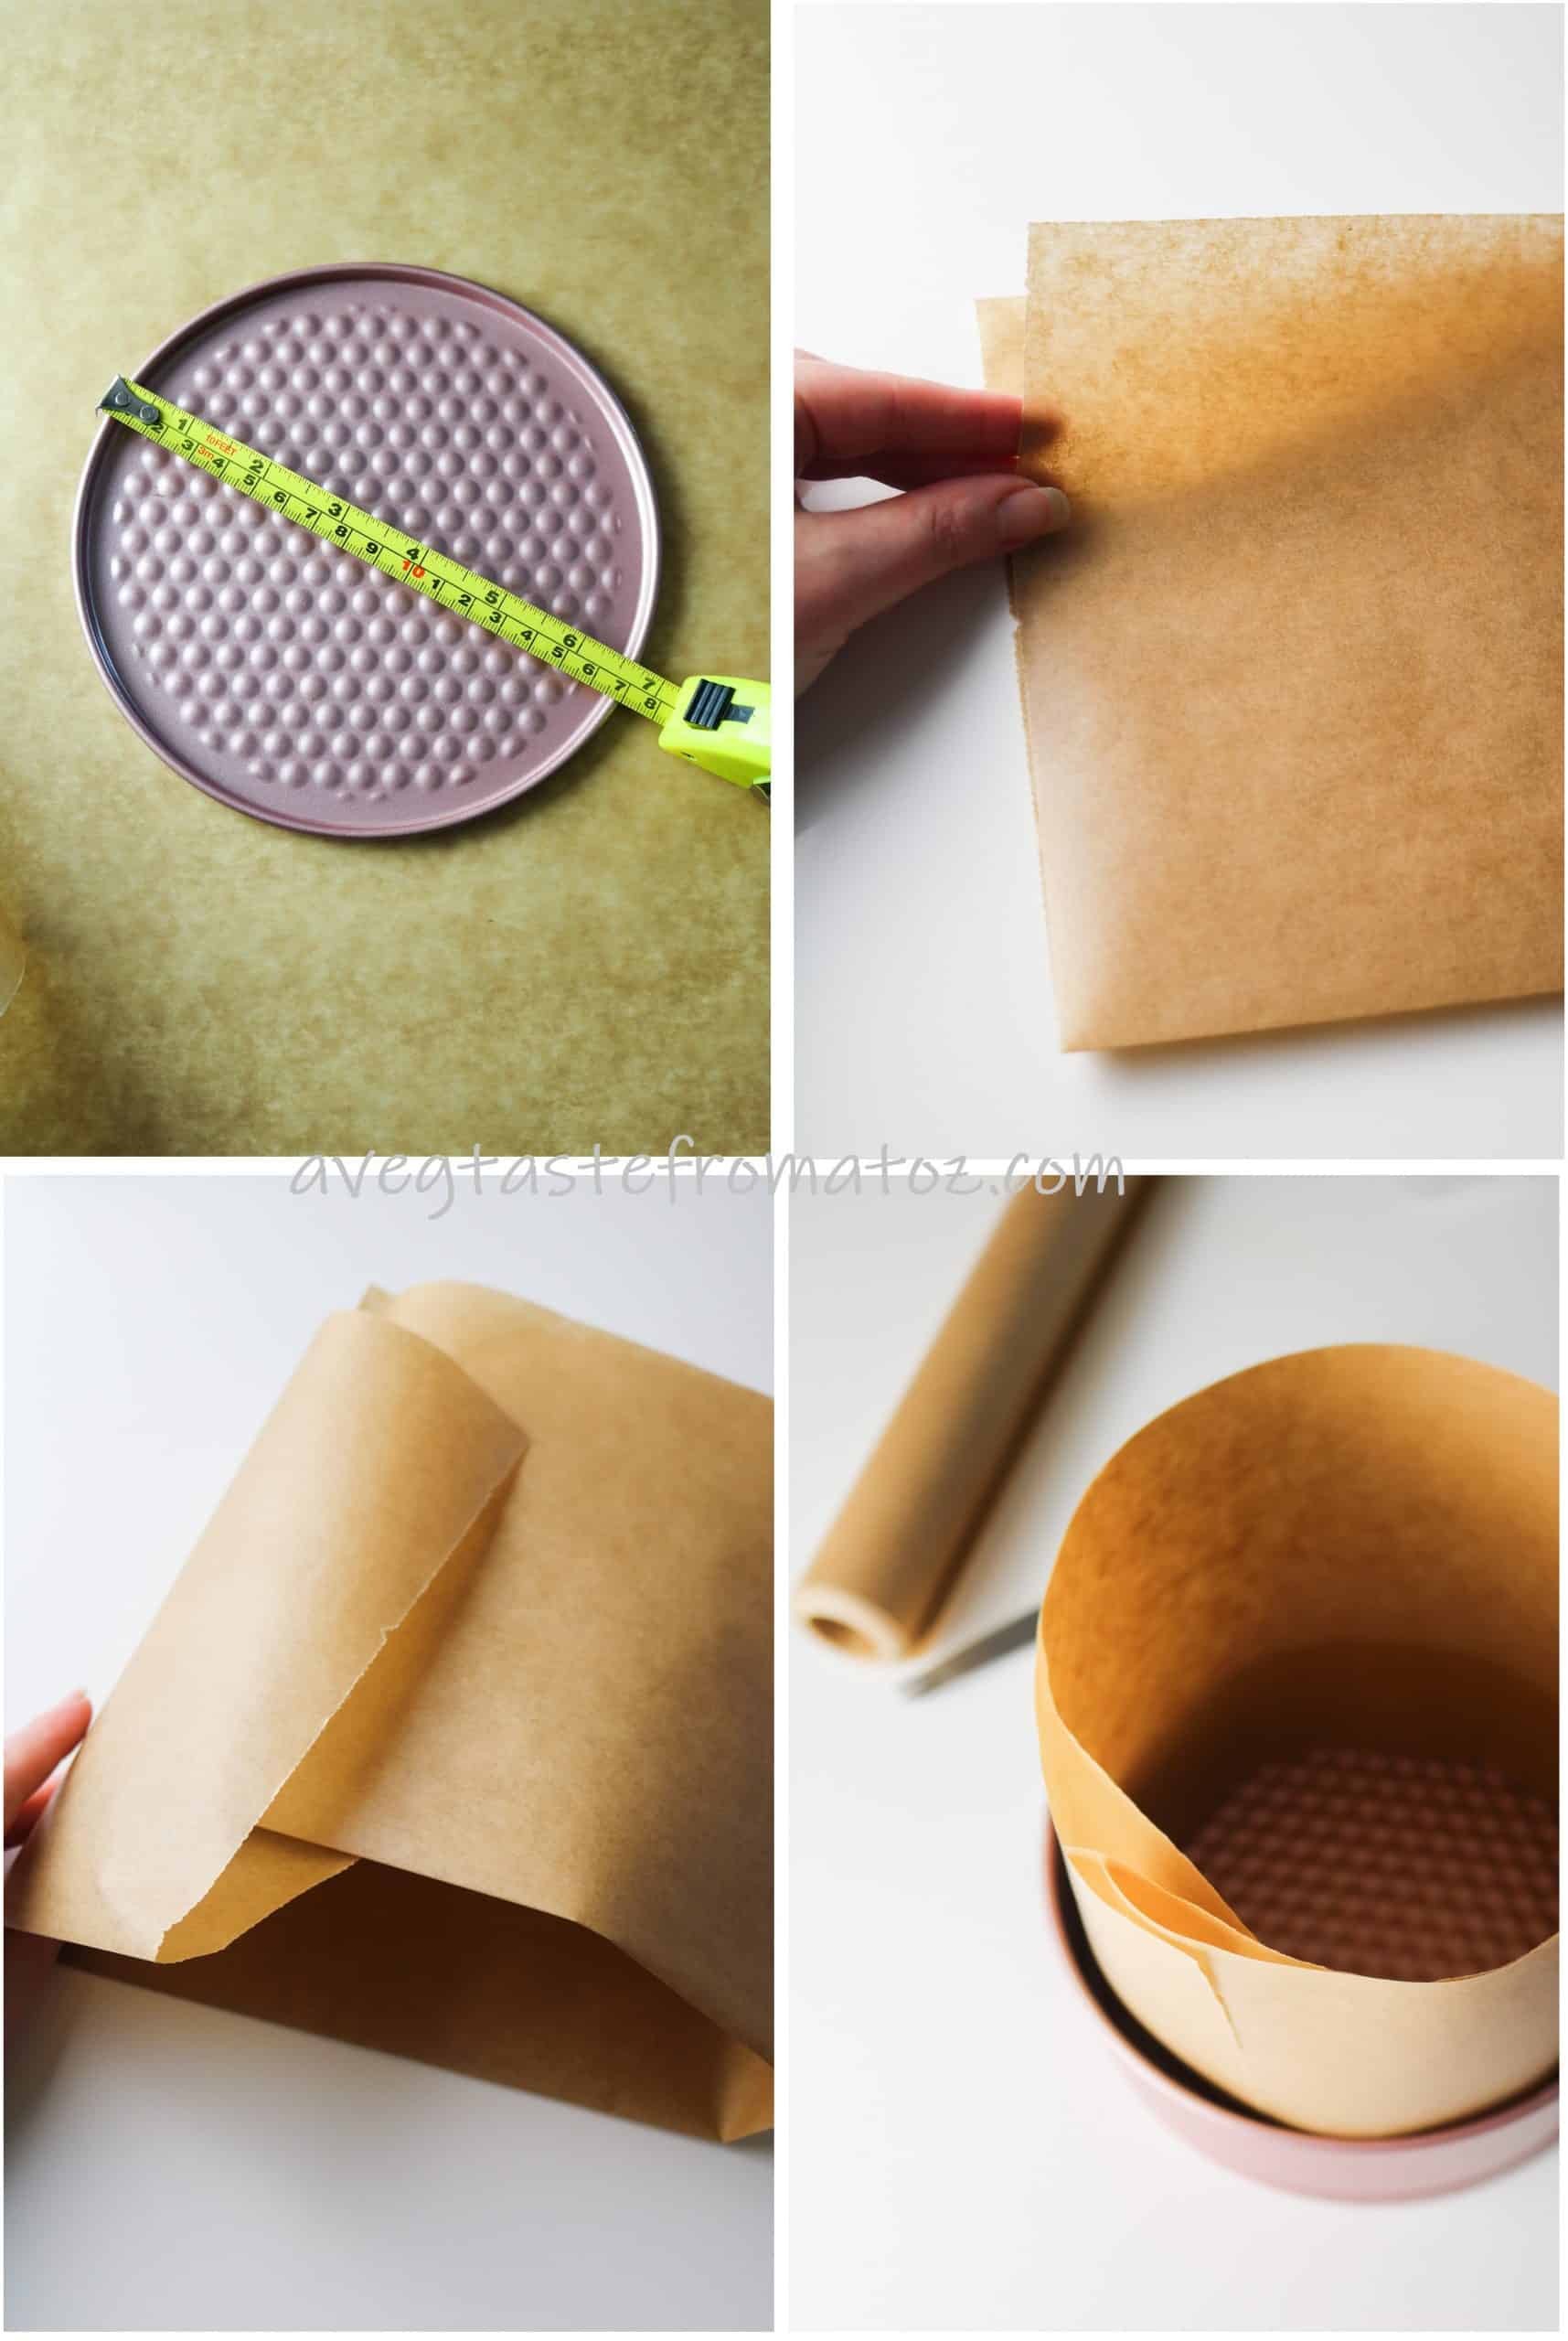
If you don't have or want to buy a specific mould you can make it yourself in a couple of minutes.
All you need is a 20 cm (8inch) hinged mould, a pair scissors, measuring tape and baking paper.
First coat the bottom of the mould with a piece of paper. To do so, just place enough paper to cover the bottom dish, then lock the mould together and cut off the excess paper.
Measure a 60 cm long piece of parchment paper and fold it in half from its length. Form a cylinder keeping the folded edge down, tucking one end of the paper into the other as shown in the pictures below.
Alternatively you can purchase them online. I do recommend these 500g ones that I used in the tests (and I didn't want to wait for another delivery). With these you can easily put the panettone upside down after baking, to make it even fluffier and moist.
Take the panettone out of the oven while it preheats to 180° C (350°F) temperature. This will allow to form a little dry crust on top of the risen dough.
Score a cross on top, place a couple of knobs of vegan butter on the cut and bake the vegan homemade panettone for 1 hour, or until the temperature of it hits 95°C.

Allow the panettone to cool down for at least 3 hours at room temperature before sealing it into a food bag to be enjoyed within three weeks.

It's best if you wait at least a couple of days before opening it, if you can!
Happy holidays my friends!
*all proofing must be done in a warm environment that ranges between 25 to 28°C (77-82°F). The oven with the light on does the trick for me.
I do not recommend to hand work the dough for panettone. You have to have a mixer.

Homemade Vegan Panettone Recipe
Ingredients (total for 1 kg mould):
450 Flour (strong)
200 g Plant Milk (Soy)
155 g Sugar (Caster)
150 g Raisins
100 g Salted Butter (plus 1 tablespoon on top)
100 g Candied Fruits
50 g Corn Starch (or Potato)
30 g Liquid Glucose
½ tablespoon Vanilla Extract (or 1 pod seeds)
2 Lemons (zest)
1 Orange (zest) or ½ teaspoon Orange Extract
½ teaspoon Turmeric or Yellow Food Colouring
4 g Instant Yeast
For each dough:
..for the starter/biga..
30 g Strong Flour
20 g Lukewarm Water
5 g Caster Sugar
4 g Instant Yeast
...for the second dough...
1st Dough
150 g Strong Flour
150 g Soy Milk
50 g Corn Starch
50 g Room Temperature Softened Vegan Salted Butter or Shortening
20 g Sugar
...for the third dough...
2nd Dough
270 g Strong Flour
130 g Sugar
50 g Soy Milk
50 g Room Temperature Softened Vegan Salted Butter or Shortening
30 g Liquid Glucose
½ tablespoon Vanilla Extract (or 1 pod seeds)
2 Lemons (zest)
1 Orange (zest) or ½ teaspoon Orange Extract
½ teaspoon Turmeric or Yellow Food Colouring
...plus...
150 g Raisins (or Vegan Dark Chocolate Drops)
100 g Candied Fruit Peels
1 tablespoon Vegan Butter
Method:
1. For the starter. Weight the flour, the sugar and the instant yeast in a bowl. Add lukewarm water and work the ingredients with a spatula until they come up together. Shape into a ball and allow to rise it until it triples its size (around 1:30h).
2. The second dough. Transfer the risen starter into the mixer bowl. Add the flour, the sugar, the starch and the plant milk (at room temperature) of the second dough and work with the flat (or flex) beater attachment for approx 10 minutes.
3. Add the room temperature softened vegan butter (if you don't have it salted, also add a small pinch of salt), a very small bit at a time, and let the dough incorporating the fat.
4. Remove the bowl from the mixer, cover with film and allow to proof in the oven with the only the light switched on (or in a warm place between between 25 to 28°C/77-82°F. Anything more or below this range will kill the yeast.). This second proof will take around 4 to 5 hours.
5. Soak the raisins in some hot water for 20-30 minutes and grate the citrus peel to be added in the next dough.
6. After the raisins have soften up, they need to be drained and pat dry with a kitchen cloth or paper (we don't want to leave any extra moisture to them, otherwise that will compromise the final result).
7. After the dough has quadrupled its size, we are ready to move on the third and final dough. Place the bowl back into the mixer, add the flour and the plant milk to the previous dough and work it well for a few minutes.
8. Now add the sugar, the colouring or turmeric, and all the ingredients of the aroma mix (lemon zest, orange, vanilla and glucose) and keep mixing for another 3 to 5 minutes.
9. Next, the remaining room temperature softened butter goes in, once again, a bit at a time, until all well incorporated.
10. Switch the attachment to the hook and work the dough for as long as it needs to get "see through" (you'll know that you're there when by pulling a bit of dough from the hook it is super stretchy and it allows you to see through the thin layer between the rest of the dough and your hand, as shown in the following picture).

11. Remove the dough from the mixer bowl and arrange it on the working surface. Refrain to use any extra flour.
12. Pull the dough with the hands into a big circle or rectangle, and place the candied fruits and the raisins on top of the stretched dough.
13. Fold the dough so the fruits are evenly distributed, and gently work it on the table to spread the raisins even more.
14. When you're happy with the dough, fold the sides to the centre of the dough a few times, and roll it into a ball. If you want to make smaller panettones you have to portion the dough before this step.
15. Transfer the dough into a 1 kg panettone mould and leave to proof for the last time until it quadruple in size (see notes if you don't have a proper panettone mould). This will take around 5 hours. Do not worry, it is completely normal for the dough not to rise in the first couple of hours.
16. Take the panettone out of the oven while it preheats to 180° C (350°F) temperature. This will allow to form a little dry crust on top of the risen dough.
17. Score a cross on top, place a couple of knobs of vegan butter on the cut and bake the vegan homemade panettone for 1 hour, or until the temperature of it hits 95°C.
18. Allow the panettone to cool down for at least 3 hours at room temperature before sealing it into a food bag to be enjoyed within three weeks. It is advised to wait at least a couple of days before opening it, but if you can't or don't want to wait that long you can enjoy it as well.


Darnell Perng
you're really a good webmaster. The website loading speed is amazing. It seems that you are doing any unique trick. Moreover, The contents are masterpiece. you have done a great job on this topic!
Adriana Z.
Thank you so much Darnell, this comment made my day :))
Maddalena
Very good recipe but of course I made alterations based where I live. Sometimes we can get farina Manitoba in Montreal if you go to an Italian grocer. However seems like everyone bought it off the shelves. To any Canadian wanting to make this use the Robin Hood white bread flour only. The other brands are sifted wheat and that is better for baking actual (white) bread not like pastry bread like panettone, colomba di Pasqua or brioche as it will turn out darker. The third rise was way more than 4-5 hours more like 7-8 which is fine with me. Even with the light on in the oven. I'm in Canada with freezing cold winters and maybe kitchen not as warm because I never had this problem making colomba di Pasqua. I used vegan honey called m!el and tried maple syrup as I don't justify buying a huge container of liquid glucose that I would rarely use. I prefer the maple syrup when I used cranberries and the vegan honey when using raisins. I did the more traditional one in this recipe and did an Italo-Canadese version which my mother used to call it using cranberries soaked in sortilèges (maple liquor from Quebec), dark chocolate and the candied orange using 100 grams each. She even made a topping that I veganised using aquafaba, sugar and ground hazelnuts. Decorating the top with whole hazelnuts, some chocolate pieces and maple sugar pearls. There are fights over this variation every year... 😂. By the way my mother who died many years ago always soaked the raisins using hot Rhum. I did the same as she did. She hated the panettone in a box when she moved to Canada. Now you can actually buy regular and vegan panettone in Montreal at many fine bakeries for about 50-80$ each. It has become very popular here but I always preferred making it homemade as it reminds me of my mother going crazy every year before Christmas making them.. 😆 I have to thank you for your recipe as it is excellent and brings out the closest to the original non vegan version I remembered in my childhood. I've tried other recipes online and they don't come near as close. By the way you can also use half cocoa butter and half vegan butter as it gives a richer taste. Especially if you wanted to add chocolate in yours. Grazie mille e buone feste a Lei!
Ece
Hello Maddalena,
It has been year since you wrote this review, yet I am really hoping that you will read this and answer. I know that with aquafaba makes a great glaze/topping for panettone but I do not have a recipe. Would you mind sharing your formula for the topping?
Thanks
Deanna
I'm looking forward to trying this recipe as I love panettone but vegan shop ones are expensive (and not always great). Please can you elaborate on 'candied fruit'? I'm in the UK, shops sell mixed peel and glace cherries (both are sweet, preserved fruit) as standard and you can sometimes get other glace fruit such as pears, but not 'candied fruit'. Would you use a mixture or just mixed peel? Also, do you think there will be a difference between using golden caster sugar and white caster sugar? Thanks for your help (and the detailed recipe!)
Adriana Z.
Sure! I believe they are known as "cut mixed peels" in the UK. Normally in the Italian version there are only citrus fruit peels, but feel free to also use cherries if you like.
In regards to the sugars, you can pretty much mix&swap any sugars, they just slightly differ taste wise, mainly browns give a more caramel-y aftertaste, so just keep that in mind.
Hope you'll enjoy the end result. It takes a bit of effort, but I can guarantee the outcome is totally worthy!
Catherine
Just found this recipe and hope to try this holiday season. I have no idea what liquid glucose is; corn syrup? Agave nectar? Thanks.
Adriana Z.
It's another sugar (it's dense-ish and sticky), you can try to substitute it with other thick syrups.
Deesha
Hi, do we bake it with the foil on top?
Adriana Z.
Hi Deesha! It is adviced, yes. Technically you should cover it only if it darkens too much on top, but there's risk it might sink in the middle if the oven is opened too soon, so keep that in mind.
Looking forward to your review if you actually bake it!
Meanwhile: Happy Holidays!
Adriana
Deesha
So I should leave the foil on top for the entire baking time. OR add the foil on when it starts getting dark but only do so after halfway through the bake?
How much time is too soon(to open oven door)?
And yes I’m proving my final dough right now. I’ll bake it soon!
Adriana Z.
You should cover it in the last 15-20 mins top. If you cover it from the start it won't rise nicely.
Good luck!
Taiza
I made it yesterday and I really liked it! I made the chocolate version 🙂
Thanks so much for the detailed recipe!
Adriana Z.
I'm so pleased to hear Taiza! What changes did you make?? Did you leave the base the same and just swapped the raisins for chocolate chips??
I'm super curious!
Taiza
Hello! Yes, I didn’t change anything . Just didn’t add raisins/candied fruits . And added choco drops instead! Not sure about the choco quantity, as I didn’t weight it. I think I started with 150g…
Sorry, replying 1 year after your message 😂 I am doing the recipe again this week and was checking the comments, then I noticed you replied me one year ago!
Happy holidays!
Adriana Z.
It is ok, if you're making it again I guess it turned out well! And that makes me happy.
Happy Holidays to you too, and thanks for the comment. Always appreciated!
Kev
I made this for the second year. Never disappoints!
Thanks for this marvellous recipe
Adriana Z.
I'm super happy Kev!
Happy Holidays!
Emily
hi 🙂 Is it okay to leave the third and final dough overnight before baking it?
Adriana Z.
Yes Emily, you can indeed! That's exactly what I do for the Pandoro dough (recipe: https://avegtastefromatoz.com/the-best-vegan-pandoro/) It will only take a few more hours for the final proof.
I wish you good luck with the recipe and Happy Holidays 🙂
Dave
Hi Adriana
Thanks for sharing this recipe first off. It was fun to make. On my second attempt (let's forget my first try) , the cake was very tasty, but quite dense. Do you have any tips for what I might have done wrong? There are a number of steps and ingredients, so this is my most challenging bake to date.
Craig Martin
Hi there! I'm planning to use your recipe and have a question about the addition of sugar in steps 7 and 8. In both steps you mention adding sugar which has me confused. Is this a typo like your "oops" about hanging the panettone upside down "before" baking (clearly afterwards) or do you divide the sugar from the the third dough into portions? Thanks in advance.
Adriana Z.
Oh dear, thanks for pointing those out. I can confirm they're both typo and I have just edited the post. To be fair you can add the sugar in both steps, but it's slightly better with the aroma mix in step 8. Sorry about that, hope you'll enjoy this!
Craig Martin
Excellent! Thank you Adriana for getting back to me so promptly! My second stage dough is proofing in the oven as I type and it is such a wonderfully delicate and silky dough. My vegan partner loves panettone and very much misses it so thank you for the recipe! If all goes well tomorrow there will be fresh vegan panettone on the table!
Adriana Z.
That's great! I really hope it all goes well! Enjoy and have a happy holidays!
Eleonora Giusta
Ciao Adriana, thank you for sharing this recipe, I’ve read it a couple of times, it got me excited and I want to make it soon. I have a couple of points I’d like to clarifybrfore I commit to it please…
In relation to the panettone moulds, when you say you can put the panettone upside down for a fluffier result, when do you do this? While baking? For how long? Would it not just slip out?
When you say to bake it until it has reached 95degree, how do you measure this? With a prob? Do you open the oven door to do that? And finally (sorry!) do you hang it upside down at all for the cooking phase?
Thank you in advance for your help!
Eleonora
Adriana Z.
Hi Eleonora, thanks for stepping by and wanted to try this recipe.
The panettone should be put upside down after baking. Unfortunately I didn't take a pic of mine as it doesn't look very flattering on this stage, however there are plenty of pictures online that show how to do it (you can also really skip this step if you're not confident enough, I tried myself and it's still good, almost no difference!).
For the inner temperature I use a food thermometer to check at the end of the baking time, so that even if you open the oven that won't compromise the result. If you don't have a probe or thermometer you can use the good old wooden skewer method.
Hope that helps, and enjoy making it! Looking forward to your feedback now 🙂
Eleonora Giusta
Ciao Adriana, thank you so much for clarifying my few questions! sorry I meant to say upside down for the cooling time…not cooking! Autocorrect!
Anyway, I have made this panettone and it wasn’t a complete disaster! Hooray!
I must have made some mistakes along the line because my dough was a lot wetter than yours in the pictures (I also used my biga for the starter)
I found the proving time to be longer as well but I know the temperature has an impact in this.
I also realised when placing into my panettone moulds that mine were 750g size and not 1kg so I split the dough into two for fear of it spilling out…
Overall I am very very pleased with the results and I am going to make it again, I will just reduce the quantities by 25% smaller I think
I am just wondering if you ever managed to get a more open texture? Mine was a little on the dense side, still very enjoyable though!
Thank you so much for this I look forward to tying our some of your other recipes!
Jade
Hi may I know why there is a need for 3 doughs? Thank you!
Adriana Z.
Hi there Jade!
It is important for the yeast to develop its strength after all the rich ingredients are added.
You might have noticed that the amount of yeast per grams of flour is very low, that's because we don't want to taste it in the finished product, hence why we add the total ingredients in steps.
Hope that helps 🙂
Happy Holidays
Katia
This is just perfect Adriana. All my Italian non vegan family couldn't tell the difference!
Adriana Z.
I'm soooo happy to hear it Katia, I'm really proud of this baby and I will start shortly to make a few batches myself 🙂
Enjoy the Holiday season!
Nissy
hello, maybe a stupid question but what is a food bag? is it paper or plastic?
I'll be trying this recipe today!
Thomas
Gotta give this recipe a go