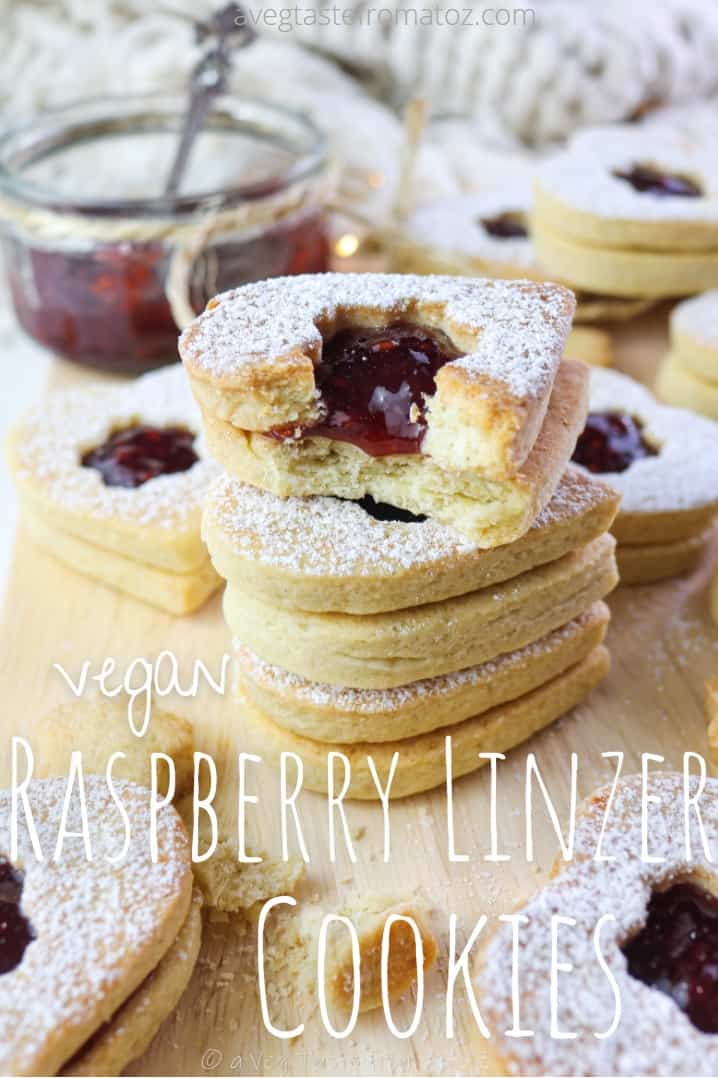
Vegan Raspberry Linzer Cookies
These crumbly and buttery Vegan Raspberry Linzer Cookies are perfect for any occasion with their fruity, sweet and sticky jam filling.
Are you familiar with Linzer Cookies?
Originating in Austria they are shortcrust biscuits, two in fact, used to sandwich between them a sweet fruity jam.
The shortcrust biscuits are enriched with ground almonds and are typical of the Christmas period.
But who said that you should only eat them at Christmas?
At home we love them so much that we make them several times a year, typically on Valentine's Day and also during the holidays.
In the UK there is a popular brand of biscuits that these may remind you of, but these are so so much better.
What do you say, have I convinced you yet to wan to give them a try?
How to make Vegan Raspberry Linzer Cookies
Adapting the recipe to make these cookies vegan is really quite simple and also another reason why I am sure you will make these more than once.
The concept of Linzer biscuits is really quite basic and you will have certainly seen or even tried a similar style of biscuits before. It uses the idea recalls of filled biscuits, also known as Tyrolean biscuits: two crumbly biscuits that contain a layer of delicious jam.
Obviously we can indulge ourselves with the jam or marmalade that we like best or that we simply have to use up.
Our favourite is raspberry but you can use whatever you like really, it is the jam that you can customize more to your own tastes.
The combination of sweet sticky jam with the crumbly almond paste is truly special!
Linzer Cookies are comprised of a basic shortcrust pastry enriched with fragrant chopped almonds, which gives its unique flavour.
STEP 1 - THE SHORTBREAD
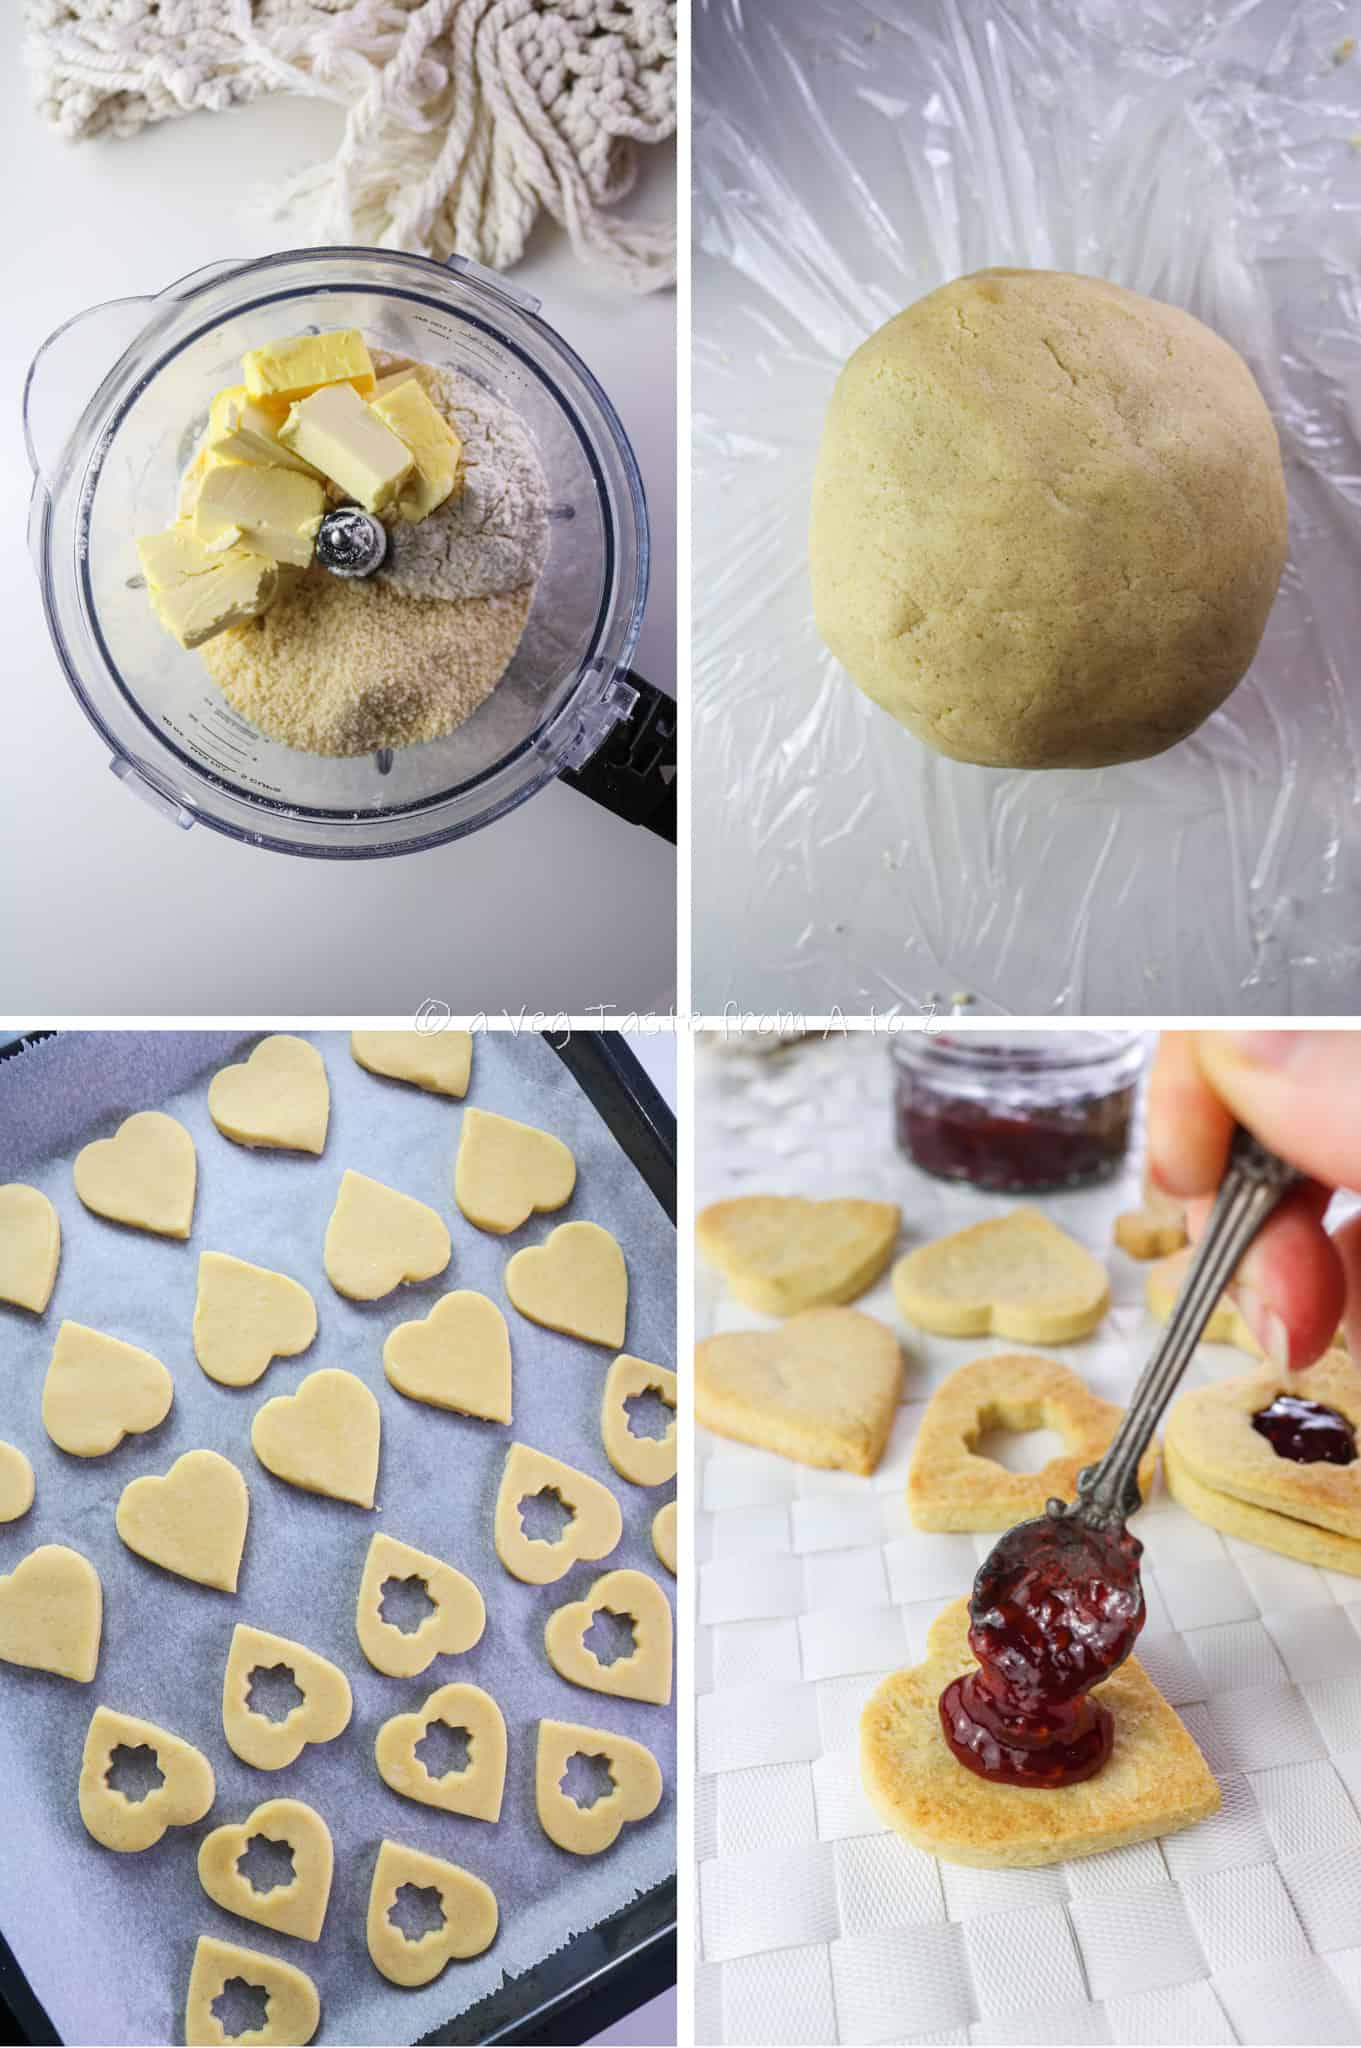
First we have to make the base of the biscuits by mixing the dry ingredients in a large bowl. So mix the flour, sugar and chopped almonds.
Then we add the diced vegan butter. You will need to work this well into the dry mixture and the best way is to use your hands. Just rub in between your fingers with the flour.
Finally, pour the vegetable milk just a little at a time and work everything together until it is mixed evenly with no lumps of flour.
A faster alternative, especially if you do not like or cannot work the dough by hand, is to add all the ingredients except milk in a food processor, operate it, and add the milk slowly from above.
Finally, wrap the dough in cling film and place in the fridge for at least 30 minutes.
STEP 2 - MAKING COOKIES
Once our dough has rested in the refrigerator, let's take it out and spread it onto a floured surface to about half a centimetre thick.
With a cookie cutter cut out as many shapes as you can from the dough. You can be as creative as you like but the amount of cookies you will have by the end will depend on the size of cutter you choose.
Next divide your shapes into half, so if you have 30 take 15 of them. One half will be the top, the other half the bottom of the sandwich. With a smaller cutter, and again be as creative with the shape as you like, you will cut the center out of what will be the top of your biscuits.
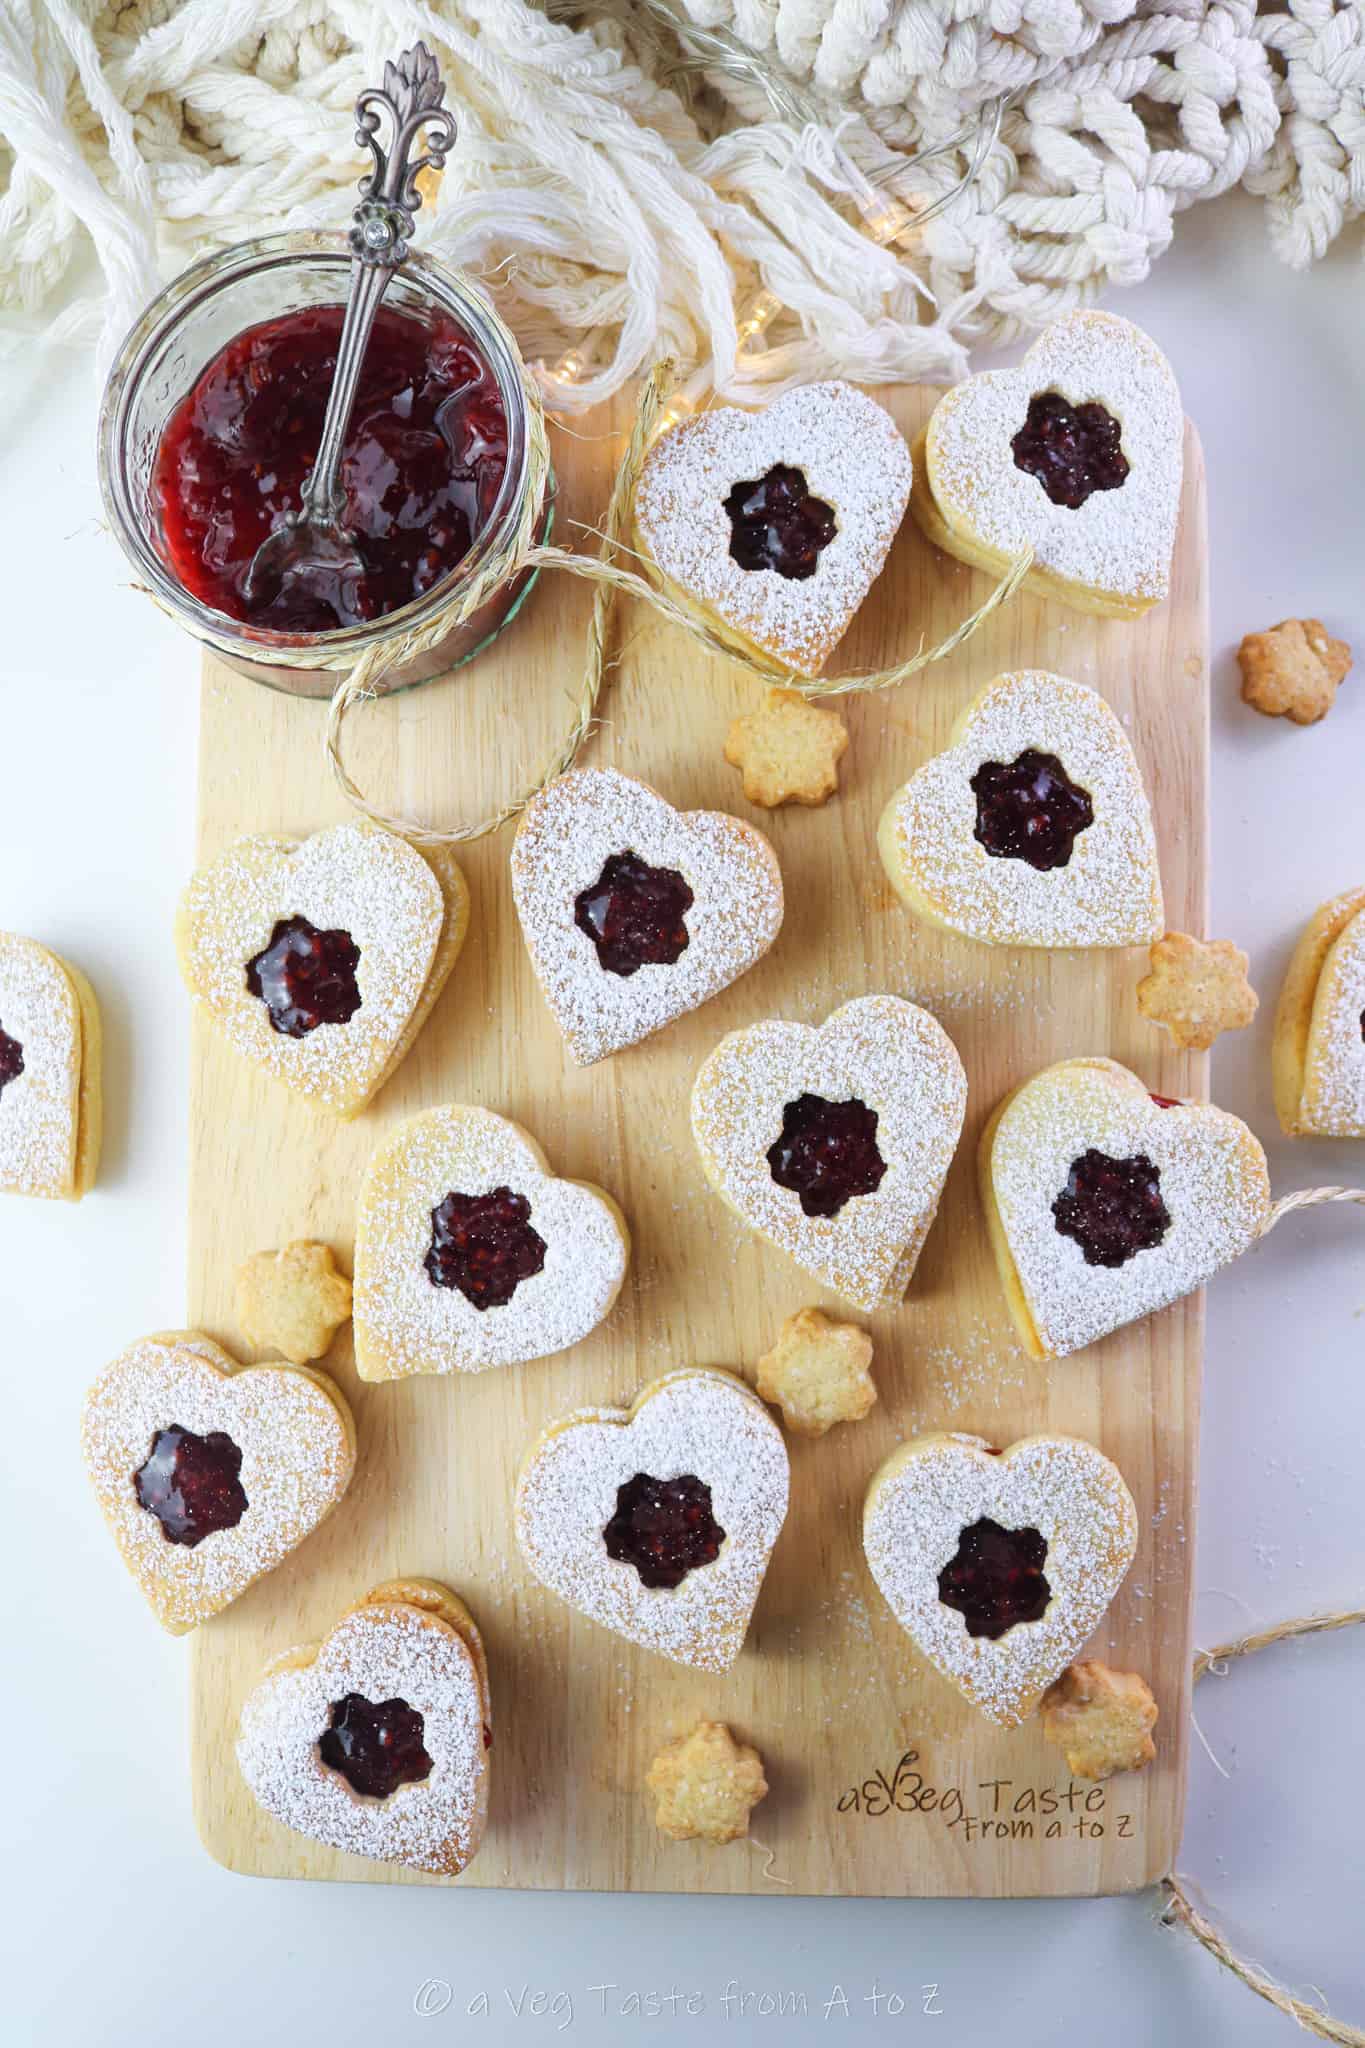
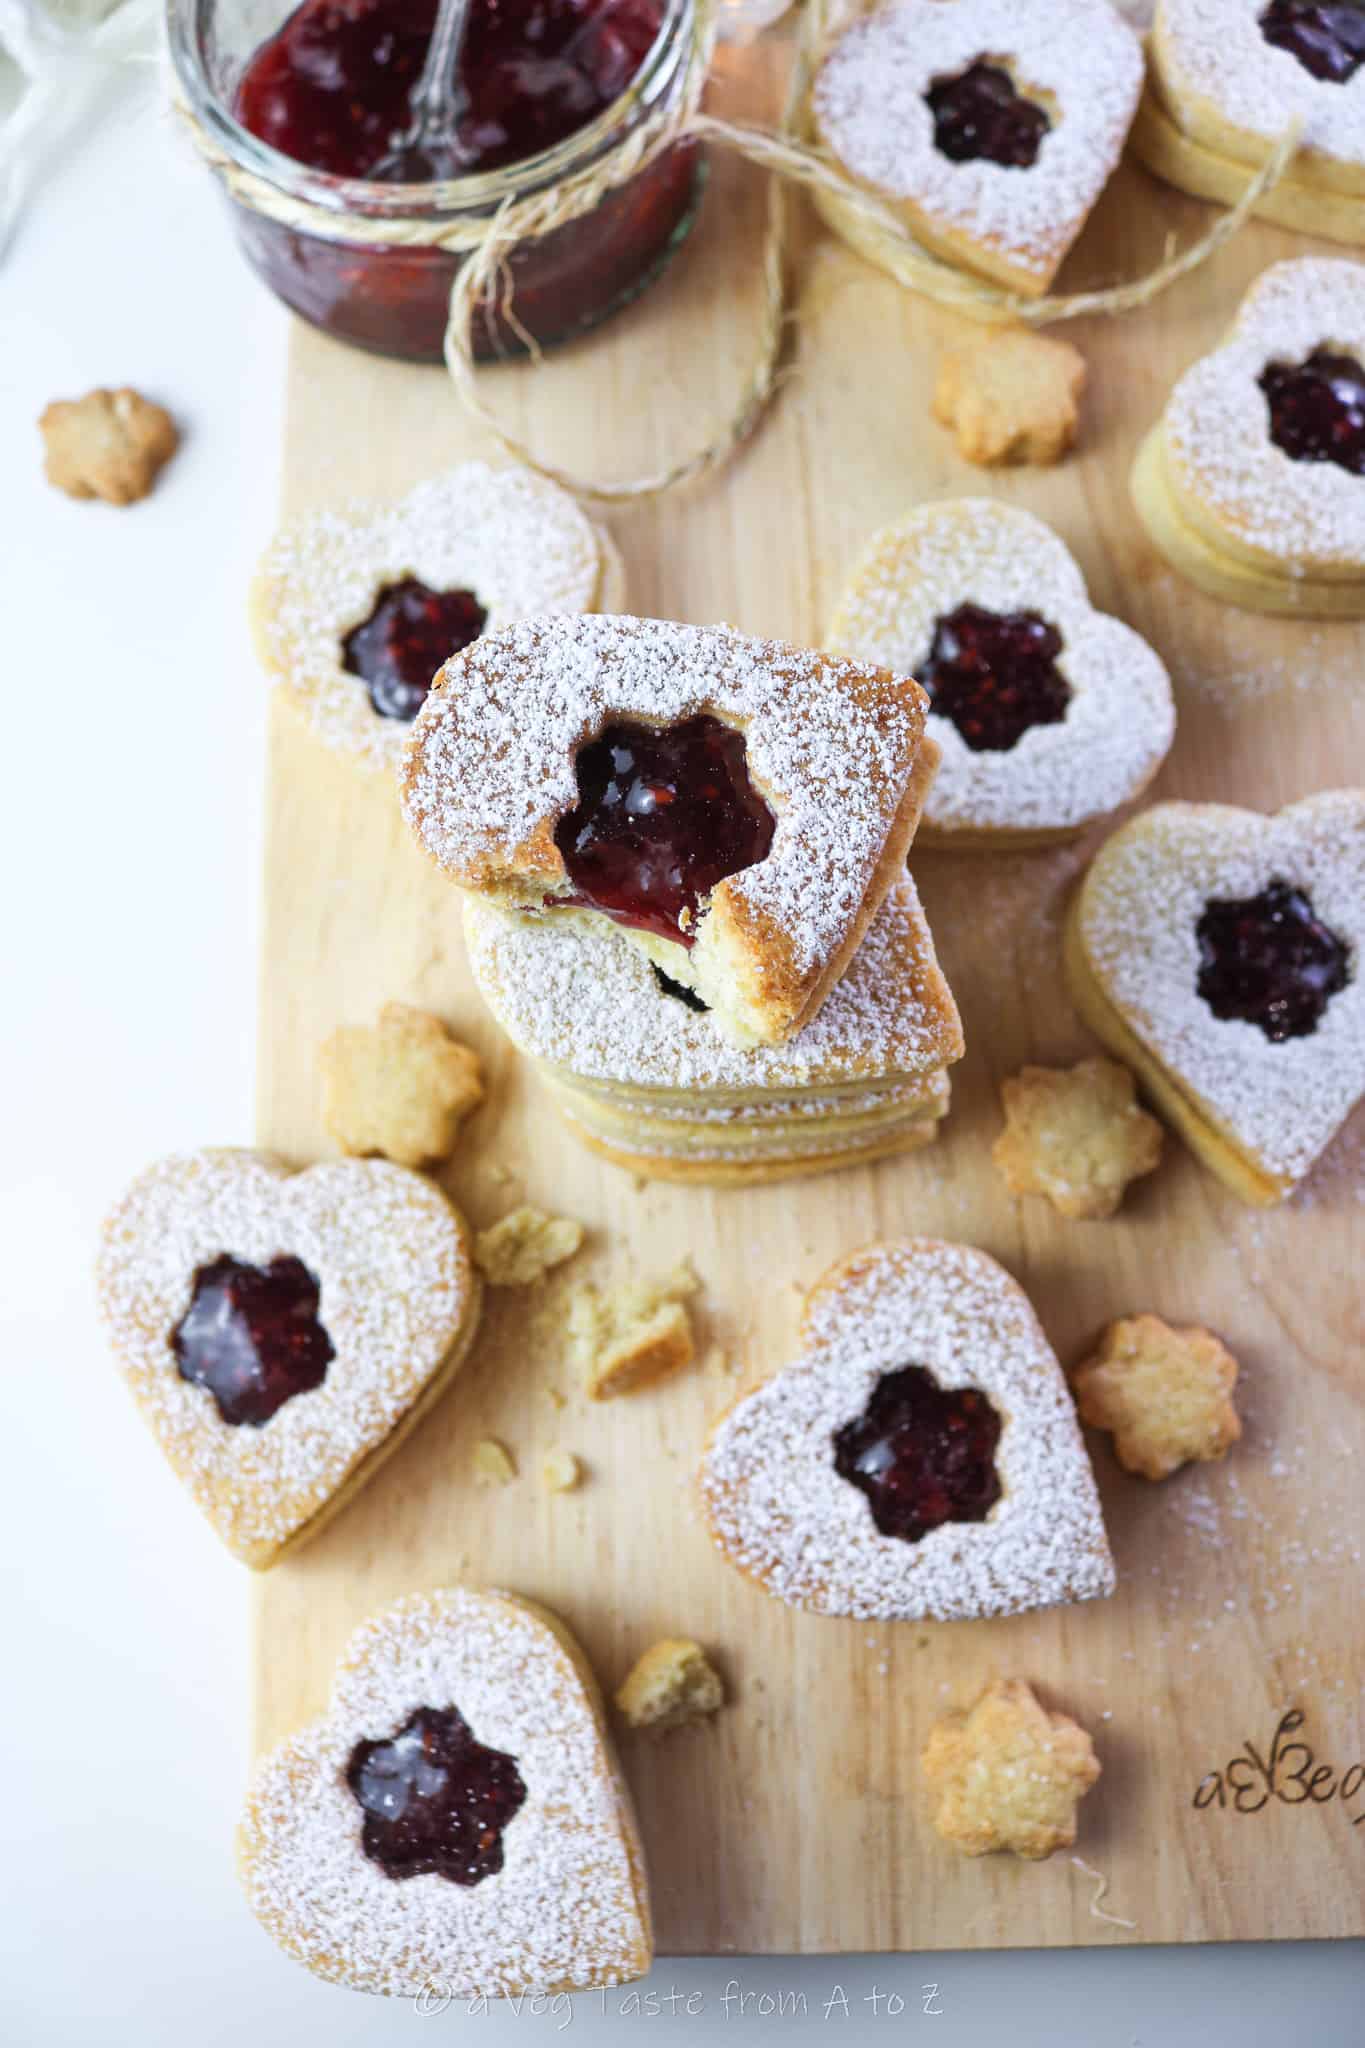
If you don’t have a small enough cutter for this you could just use something like the spout of a piping bag. I used a heart mould for the outside and a snowflake-shaped one for the centre. It makes a beautiful combination right?
STEP 3 - BAKING
We place the biscuits on a baking sheet covered with paper, and bake in a preheated oven at 180 ° C (355 ° F) for 10-12 minutes.
Be careful not to brown them too much, otherwise the cookies will become too hard and dry.
It is important that they brown slightly and that they remain a little soft as soon as we remove them from the oven, as they tend to harden during the cooling phase. We still want the biscuits to be crumbly when eating time arrives.
Place the biscuits on a cooling rack, and we wait for them to be at room temperature. You don't want them hot because when you add the jam it will run and make a mess of you so far gorgeous work.
STEP 4 - FILLING
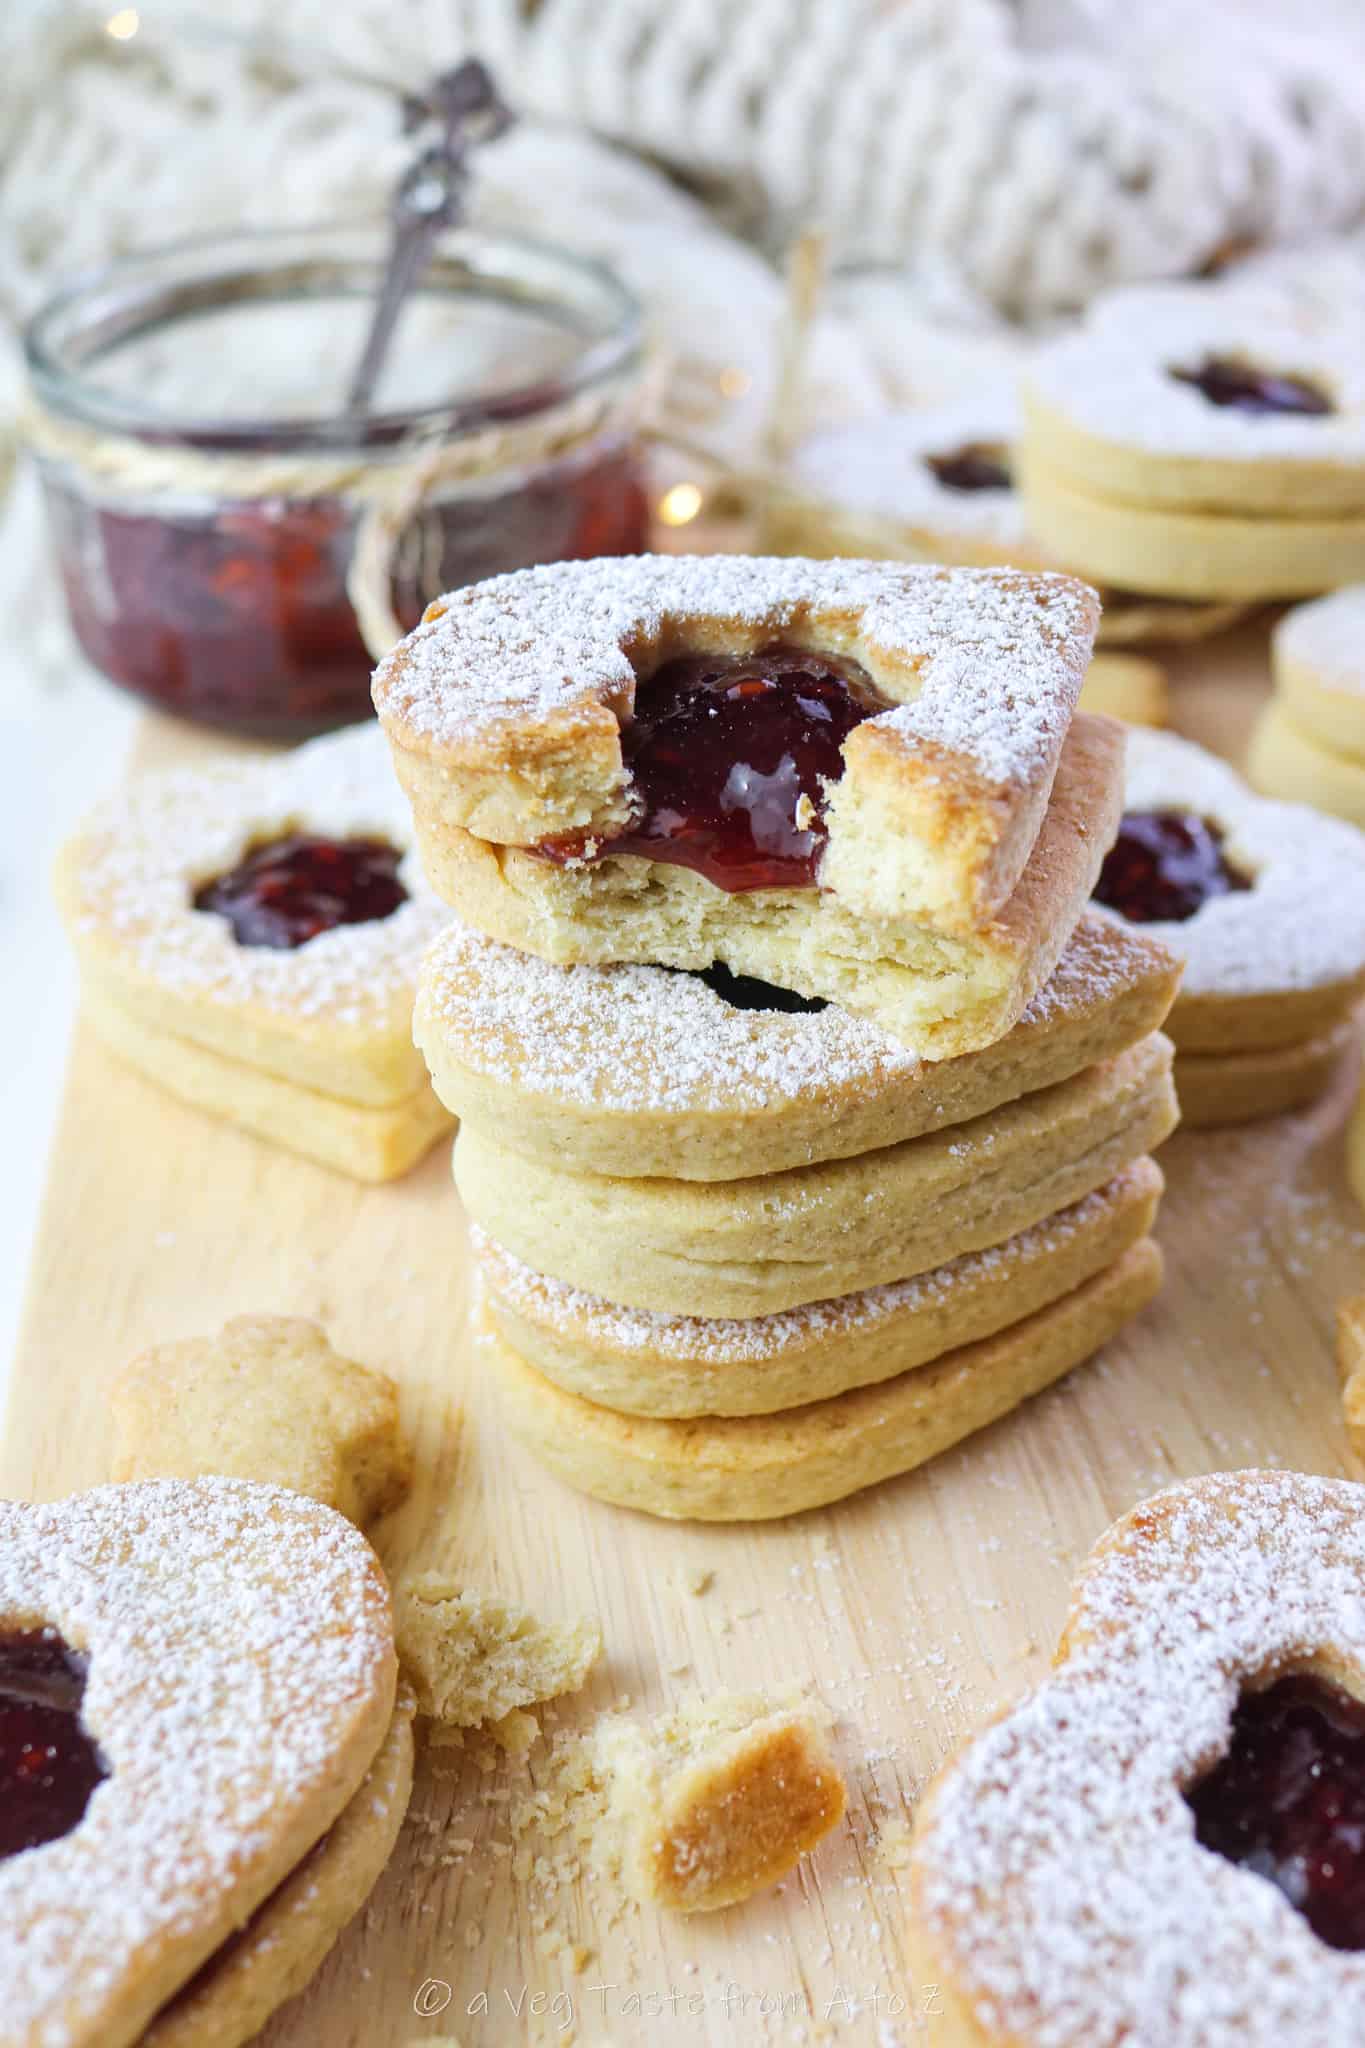
With the biscuits that you did not piece the centres of you will spread the jam over these cookies. As hard as it will be, try to not be toooooo generous otherwise when it comes to putting the halves together the jam will run out of the sides making a mess of all your work. We want the jam to be seductively peaking through the biscuits, not running all over the plate. A major factor of these biscuits is the beautiful aesthetic that you will achieve.
Now place the two halves together and finish with a sprinkling of vanilla icing sugar, absolutely perfect. Now the chef gets to taste….!
Vegan Raspberry Linzer Cookies Recipe
Ingredients:
...for the pastry...
280 g All Purpose Flour
150 g Vegan Butter
40 g Soy Milk (or Vegetable)
70 g Icing Sugar
25 g Almond Flour
...filling and extra...
50-60 g Raspberry Jam (or your personal favourite)
Icing Sugar
Method:
1. Make the pastry by mixing the dry ingredients in a large bowl: flour, sugar and ground almonds. Add the diced vegan butter and "crumble" it together with your fingers, incorporating it into the flour. Finally, pour the soy milk little by little until you get an evenly combined mixture. Alternatively, add the flours, sugar and diced butter in a food processor and pour the milk from above until it forms a ball.
2. Wrap the dough in cling film and place in the fridge for at least 30 minutes.
3. Roll out the dough on a floured surface about half a centimetre thick.
4. Make the biscuits with moulds of your choice. Then make a hole in the centre of half of the biscuits. Choose which shapes you prefer but remember the amount of biscuits will vary slightly depending on the size of mould you use.
5. Preheat the oven to 180° C (355° F).
6. Arrange the biscuits about 1cm apart on a baking sheet covered with paper, then cook for 10-12 minutes. The biscuits must be just golden and still be a little soft to the touch.
7. Place the cookies on a cooling rack. They will harden during this stage.
8. Fill the solid halves of the biscuits with about a small teaspoon of jam to taste. Do not overdo the filling, otherwise it will tend to leak out, ruining the final presentation.
9. Cover with the pierced halves, pressing gently so that the two halves stick together.
10. Finish with a sprinkling of icing sugar to taste.


Leave a Reply