butternut squash ravioli
Questa ricetta è disponibile anche in italiano
Who said that making pasta is a struggle? Learn how to make these delicious Butternut Squash Ravioli completely at home with the right tips!

Hello guys! butternut squash ravioli
I personally can't get enough of butternut squash. So versatile, it can be transformed in dishes from sweet to savoury and never, never disappoints! Rich on calcium, iron, potassium, magnesium and phosphorus, it also provides a bunch of vitamins, such as C, A, E and B-6 and 100 gr only has around 40 calories! So it's definitely a good ally for both weight loss and nutritional intake.
A few days ago I received my grandma's old ravioli mould and I was eager to recreate one of my favourite flavours from when I was a veggie: pumpkin and parmesan cheese. And let me tell you, they don't lack that cheesy flavour nor the eggy fresh pasta dough. I used to serve them simply with some sage butter (a classic really), but this time I fancied a creamy sauce to serve them with, so I decided to incorporate the sage in the filling and infused the cream sauce with another herb that I like, thyme.
And this is how this recipe was born. how to make butternut squash ravioli
Do not hesitate to replicate it to impress the most skeptical guests of yours. They will be pleasantly surprised, guaranteed!
How to make Vegan Butternut Squash Ravioli from Scratch
https://gfycat.com/tastyofficialbluebird
STEP 1 - Cook the Squash
When I am to make ravioli or gnocchi, I usually cook the squash the day before, so it is perfectly chilled when I need it.
If you have enough time I strongly recommend for you to do the same.
There are a bunch of ways you can prepare the squash for the filling:
1) Roast. Chop the squash in half, then place the squash on a baking tray (better if covered in baking paper), brush it with olive oil and season with salt, pepper and (optional) fresh sage.
Bake in a preheated oven @200°C (390°F) for around 45 minutes. As time can vary according to the size of the squash used, I highly suggest to try prick it with a fork or wooden skewer before removing from the oven. If the squash is fork tender it means it’s ready. Otherwise increase the cooking time by a few more minutes.

I often use this method as shown on this Stuffed Roasted Butternut Squash recipe, these Homemade Squash Gnocchi and this Butternut Squash Wellington, especially when I have the oven already on for other recipes, as for pasta bakes or roast dinners.
2) Microwave. Cut the butternut squash into 8 chunks and remove the seeds. Place the slices on a microwave proof dish, cover with film, and microwave for 15 minutes at max power. Rest for 10 extra minutes before opening the door. The squash should be fork tender, if not, microwave for some extra minutes accordingly.
3) Instant Pot. This is by far my preferred method as it is easy and literally fuss free. The only con I have is that I have to find a particular sized squash, as my IP is the mini one, however, if you own a standard sized one, you won't be facing the same problem.
Place the squash over the Instant Pot Steamer Rack, then add at least 1 inch of room temperature water. Close the lid, making sure the valve is on "sealed", and, similarly to what we have done for this recipe for boiled potatoes, set high pressure mode starting from 15 minutes, according to the squash size. A normal sized squash will cook in around 20-23 minutes.
STEP 2 - Make the Dough
For the dough all we need to do is to weight both flours in a large bowl (if you cannot find durum flour aka Italian semola/semolina you can use 100% all purpose) and combine turmeric powder with aquafaba in a small jug. Pour the aquafaba mixture over the flours and start combining into a dough.
 It might require extra water or aquafaba, according to the flour nature. Make sure to add a small amounts at a time to avoid ending up with a watery dough.
Next, transfer the dough on a working surface and kneed it until smooth. Cover or wrap it in cling film and let it rest for at least 30 minutes.
After this time you will notice how much easier to work the dough has now became.
STEP 3 - Prepare the Filling
Once the cooked squash has cooled down, scoop out the flesh into a bowl and mash it up with a fork or potato masher.
Add the remaining ingredients and combine everything together. Done!

STEP 4 - Make the Ravioli
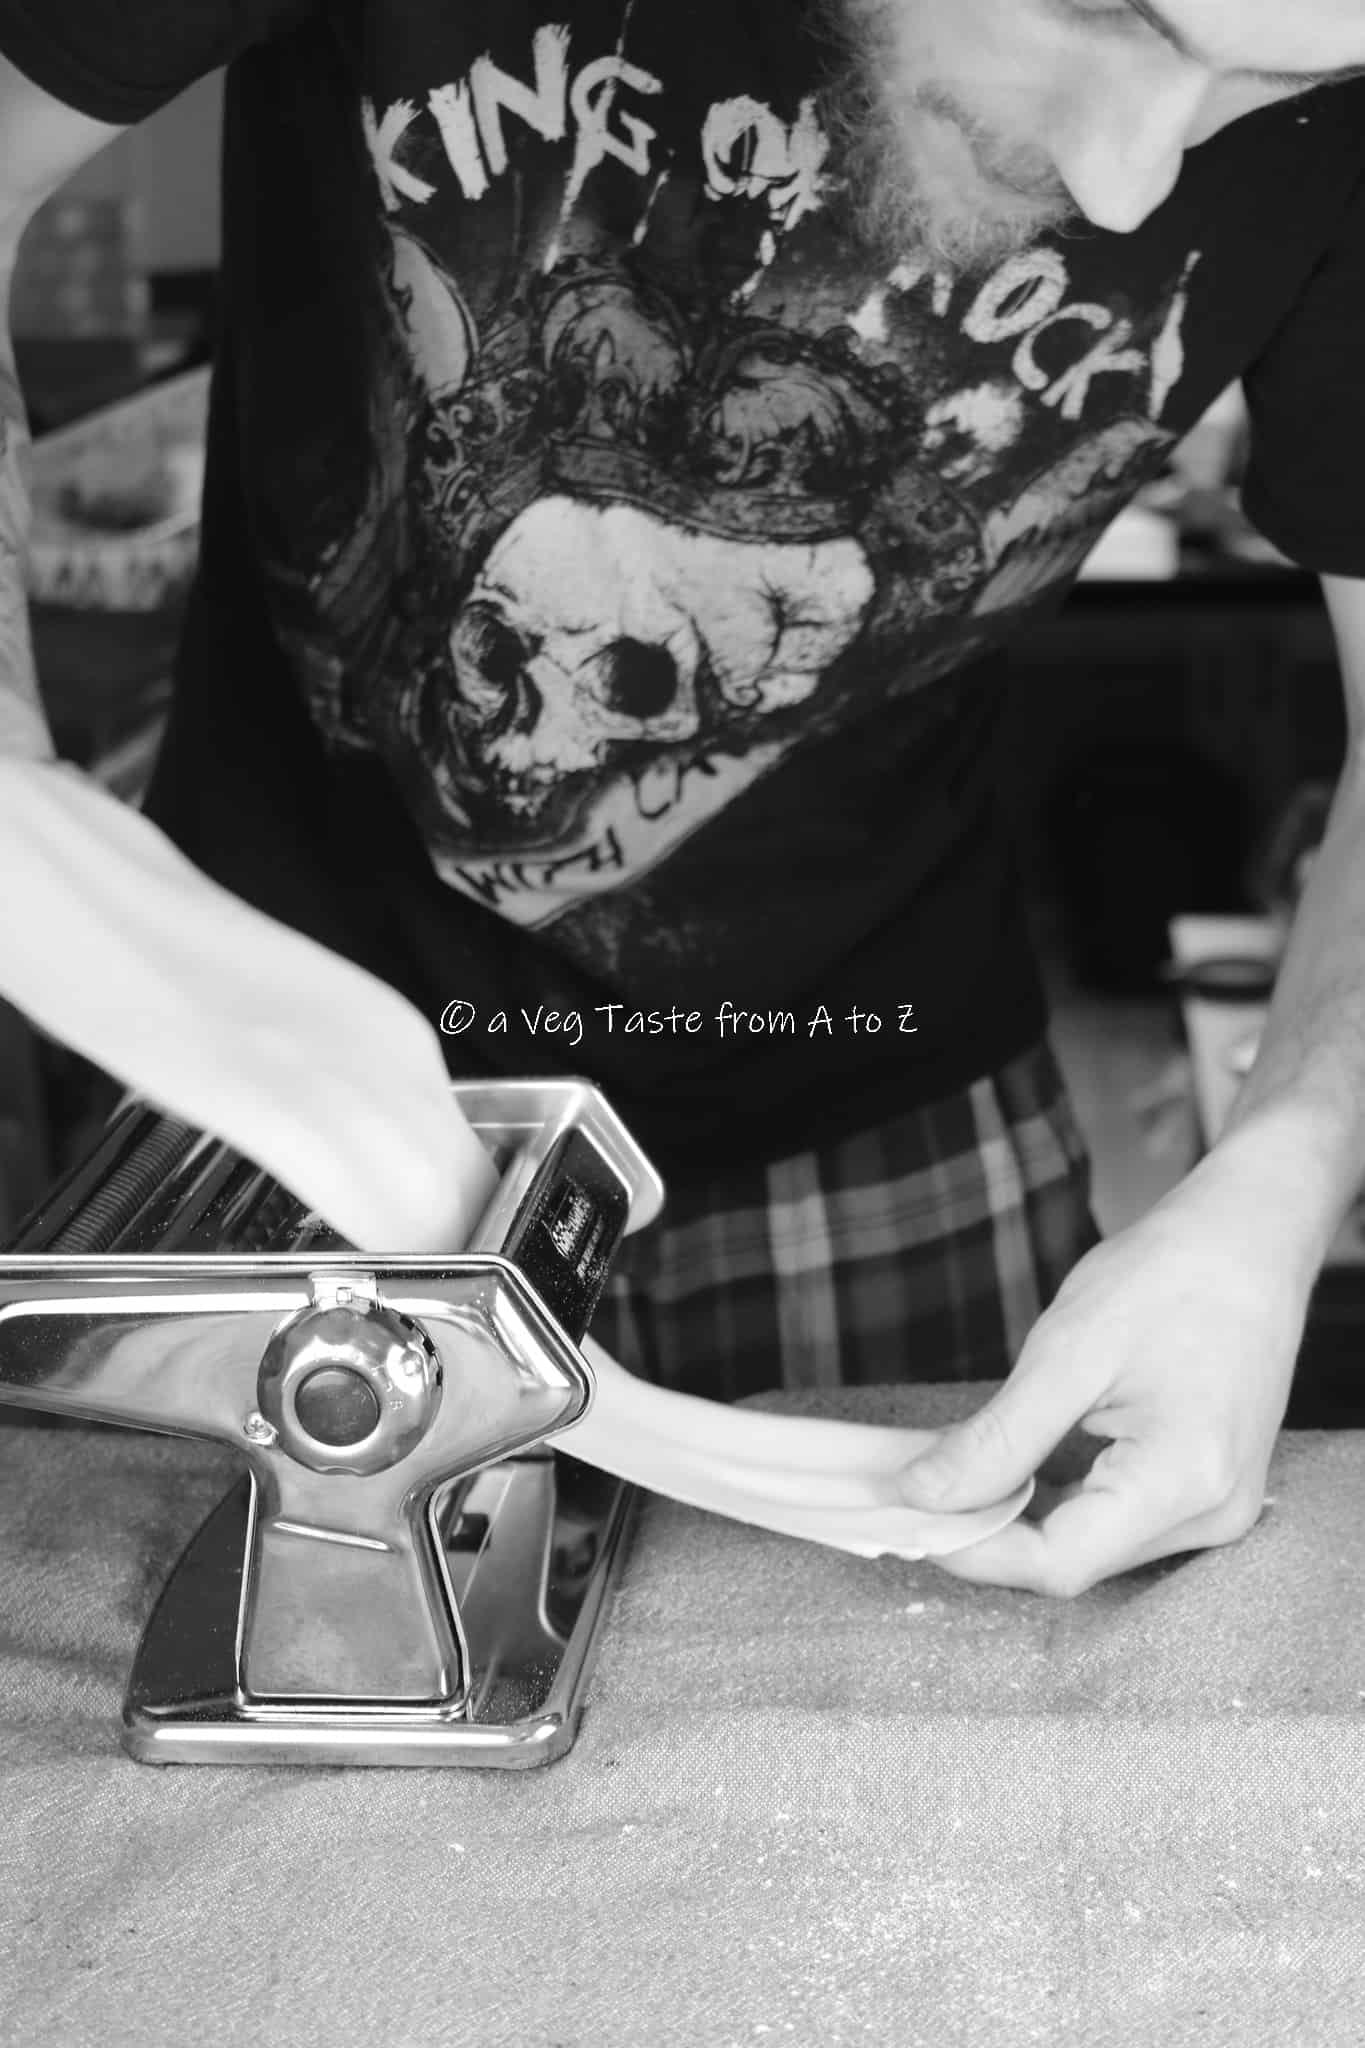
Now it's time to roll out the dough, both by hand using a rolling pin, or with a pasta machine.
Make sure you roll it into very thin sheets before shaping the ravioli. If using the pasta machine (nonna papera) it's recommended to use setting 2 or 3. We used number 3, as both my husband and I prefer thick pasta sheets.
 To shape the ravioli you can both use a ravioli mould or cutter.
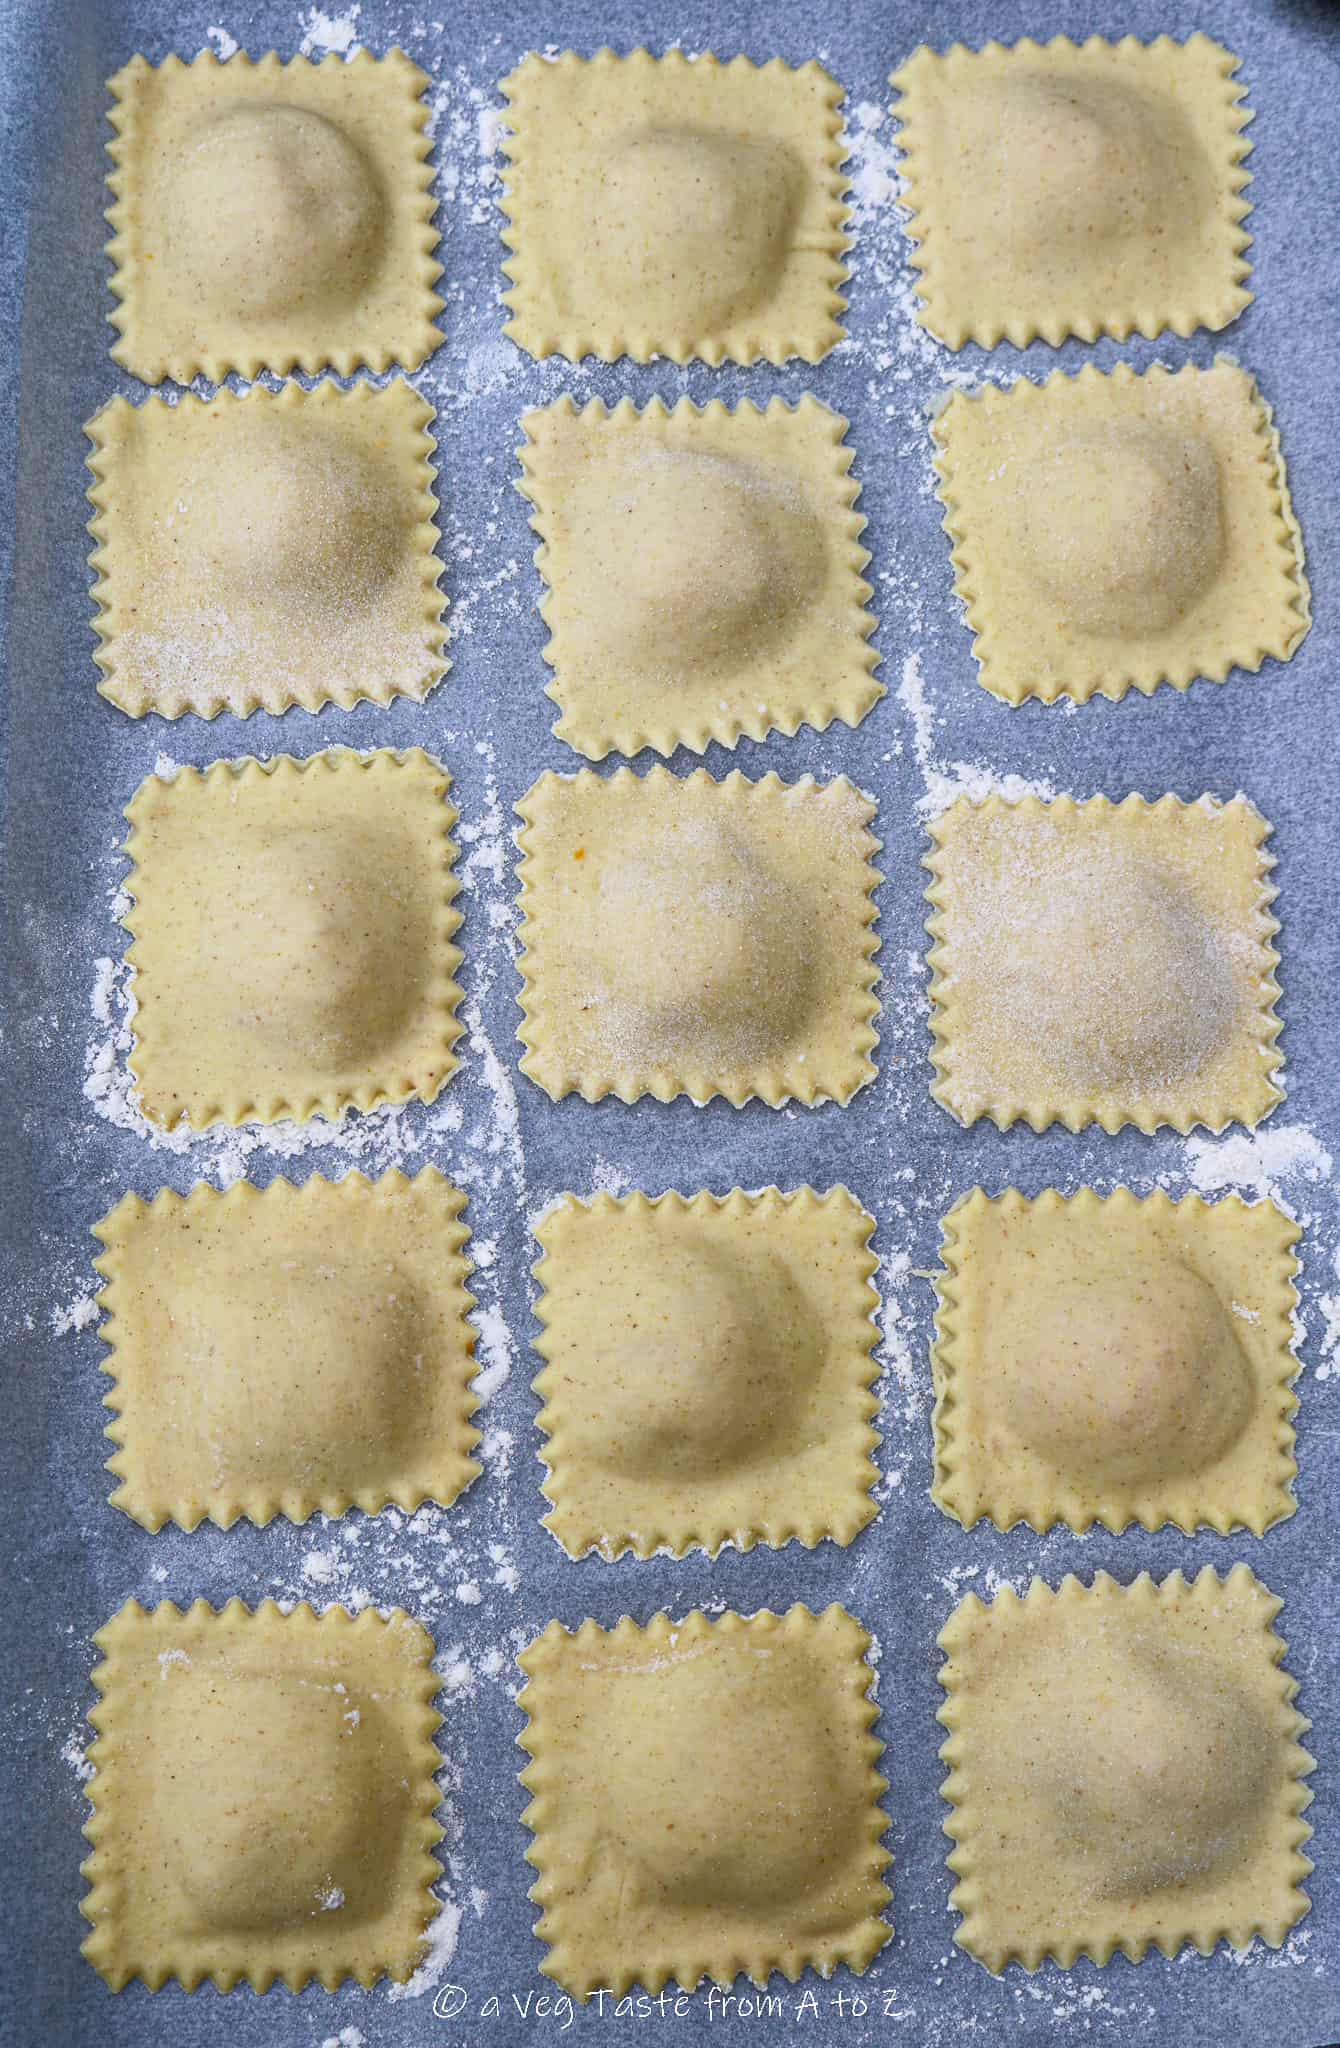
We used a 6x6 cm squared cutter, which yields 30 ravioli of around 20 grams of weight.
If using a mould, make sure to dust the bottom half with flour before layering a sheet of pasta over.
Pipe the filling into every hole, then run a slightly damp finger on the ravioli junctions to seal the second layer of pasta.
Gently cover with another pasta sheet, making sure not to form any air bubbles in between the two doughs, and carefully press the second dough down first with the hand then with a rolling pin.

Turn the mould upside down to reveal the ravioli, then transfer the ravioli onto a floured surface to prevent them to stick to the bottom. Do not overlap.

Continue the process until you finish the filling.
For the ravioli cutter version. Place a sheet of pasta onto a floured surface (I would suggest a wooden chopping board) and pipe around 15-17 grams of filling. Wet the pasta around the filling with a slightly damp finger, then carefully cover with a second layer of freshly rolled pasta, making sure to remove all the air in between the two doughs.

Seal the two sheets by gently pressing them together, then cut the ravioli with the cutter and place them onto a floured surface to prevent them to stick to the bottom. Do not overlap.
Continue the process until you finish the filling.
 STEP 5 - Make the Sauce
For the sauce simply heat the milk with a bunch of thyme. Reduce the heat and simmer for 5 minutes.
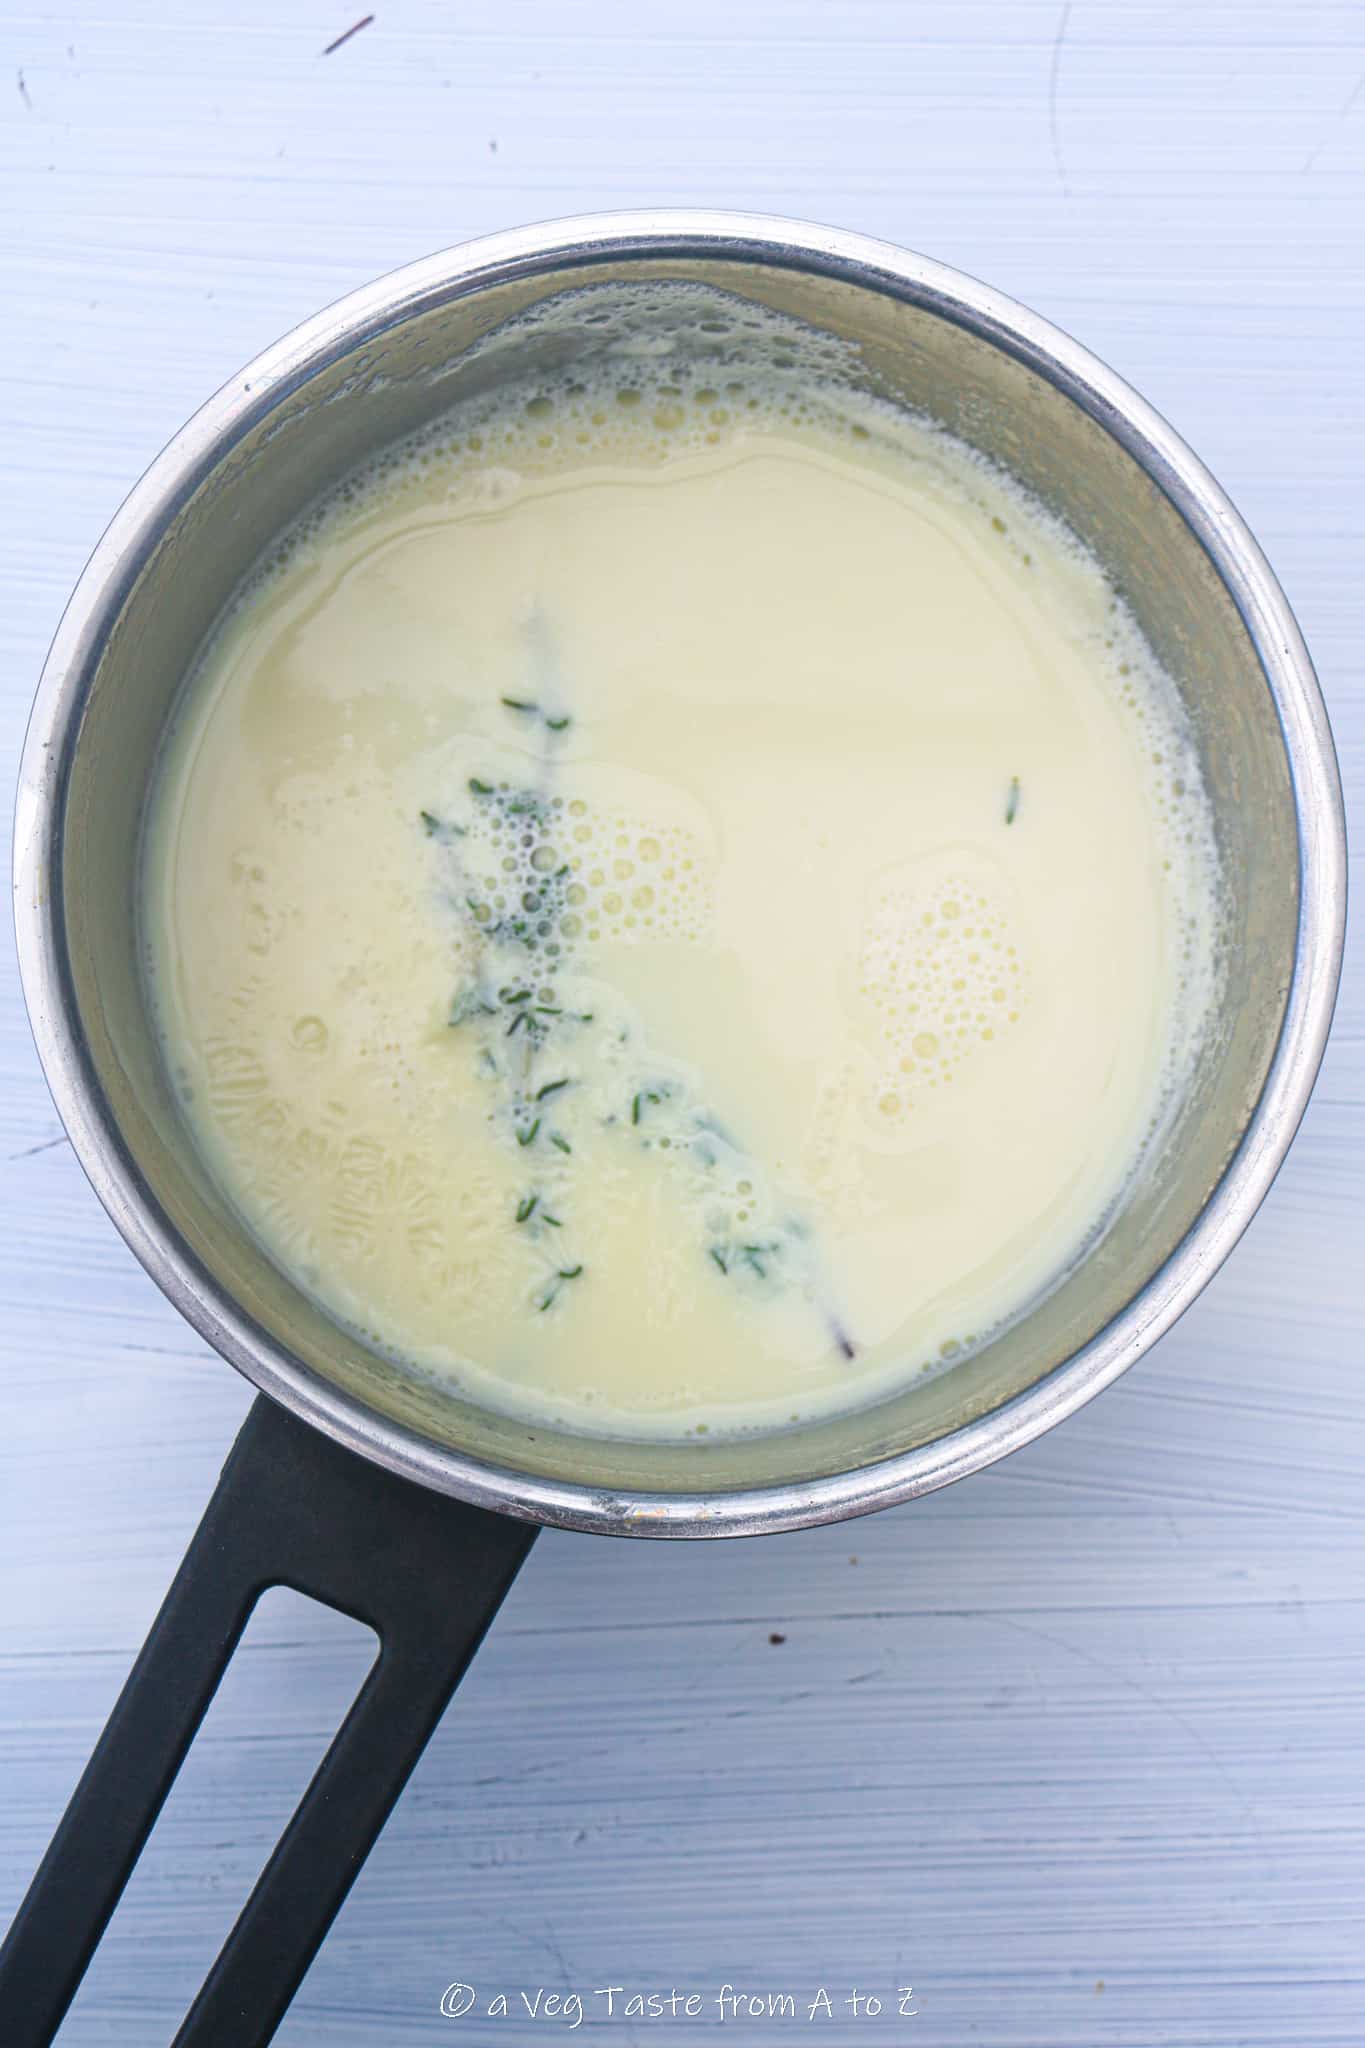
Combine flour and oil into a paste, then carefully add a splash of thyme infused milk at the time, to avoid lumps. Season with salt and put back on gentle heat until the sauce thickens (3 to 5 minutes) stirring all the time. We are basically making a besciamelle style sauce.
Step 6 - Assemble the dish
Cook the ravioli in plenty of salted boiling water then transfer into the pan with the thyme infused sauce. Please note: cooking time varies based upon the thickness of the pasta, but it normally takes 1 to 3 minutes to cook fresh ravioli.
Make sure to save some of the cooking water to add should the white sauce result too thick.
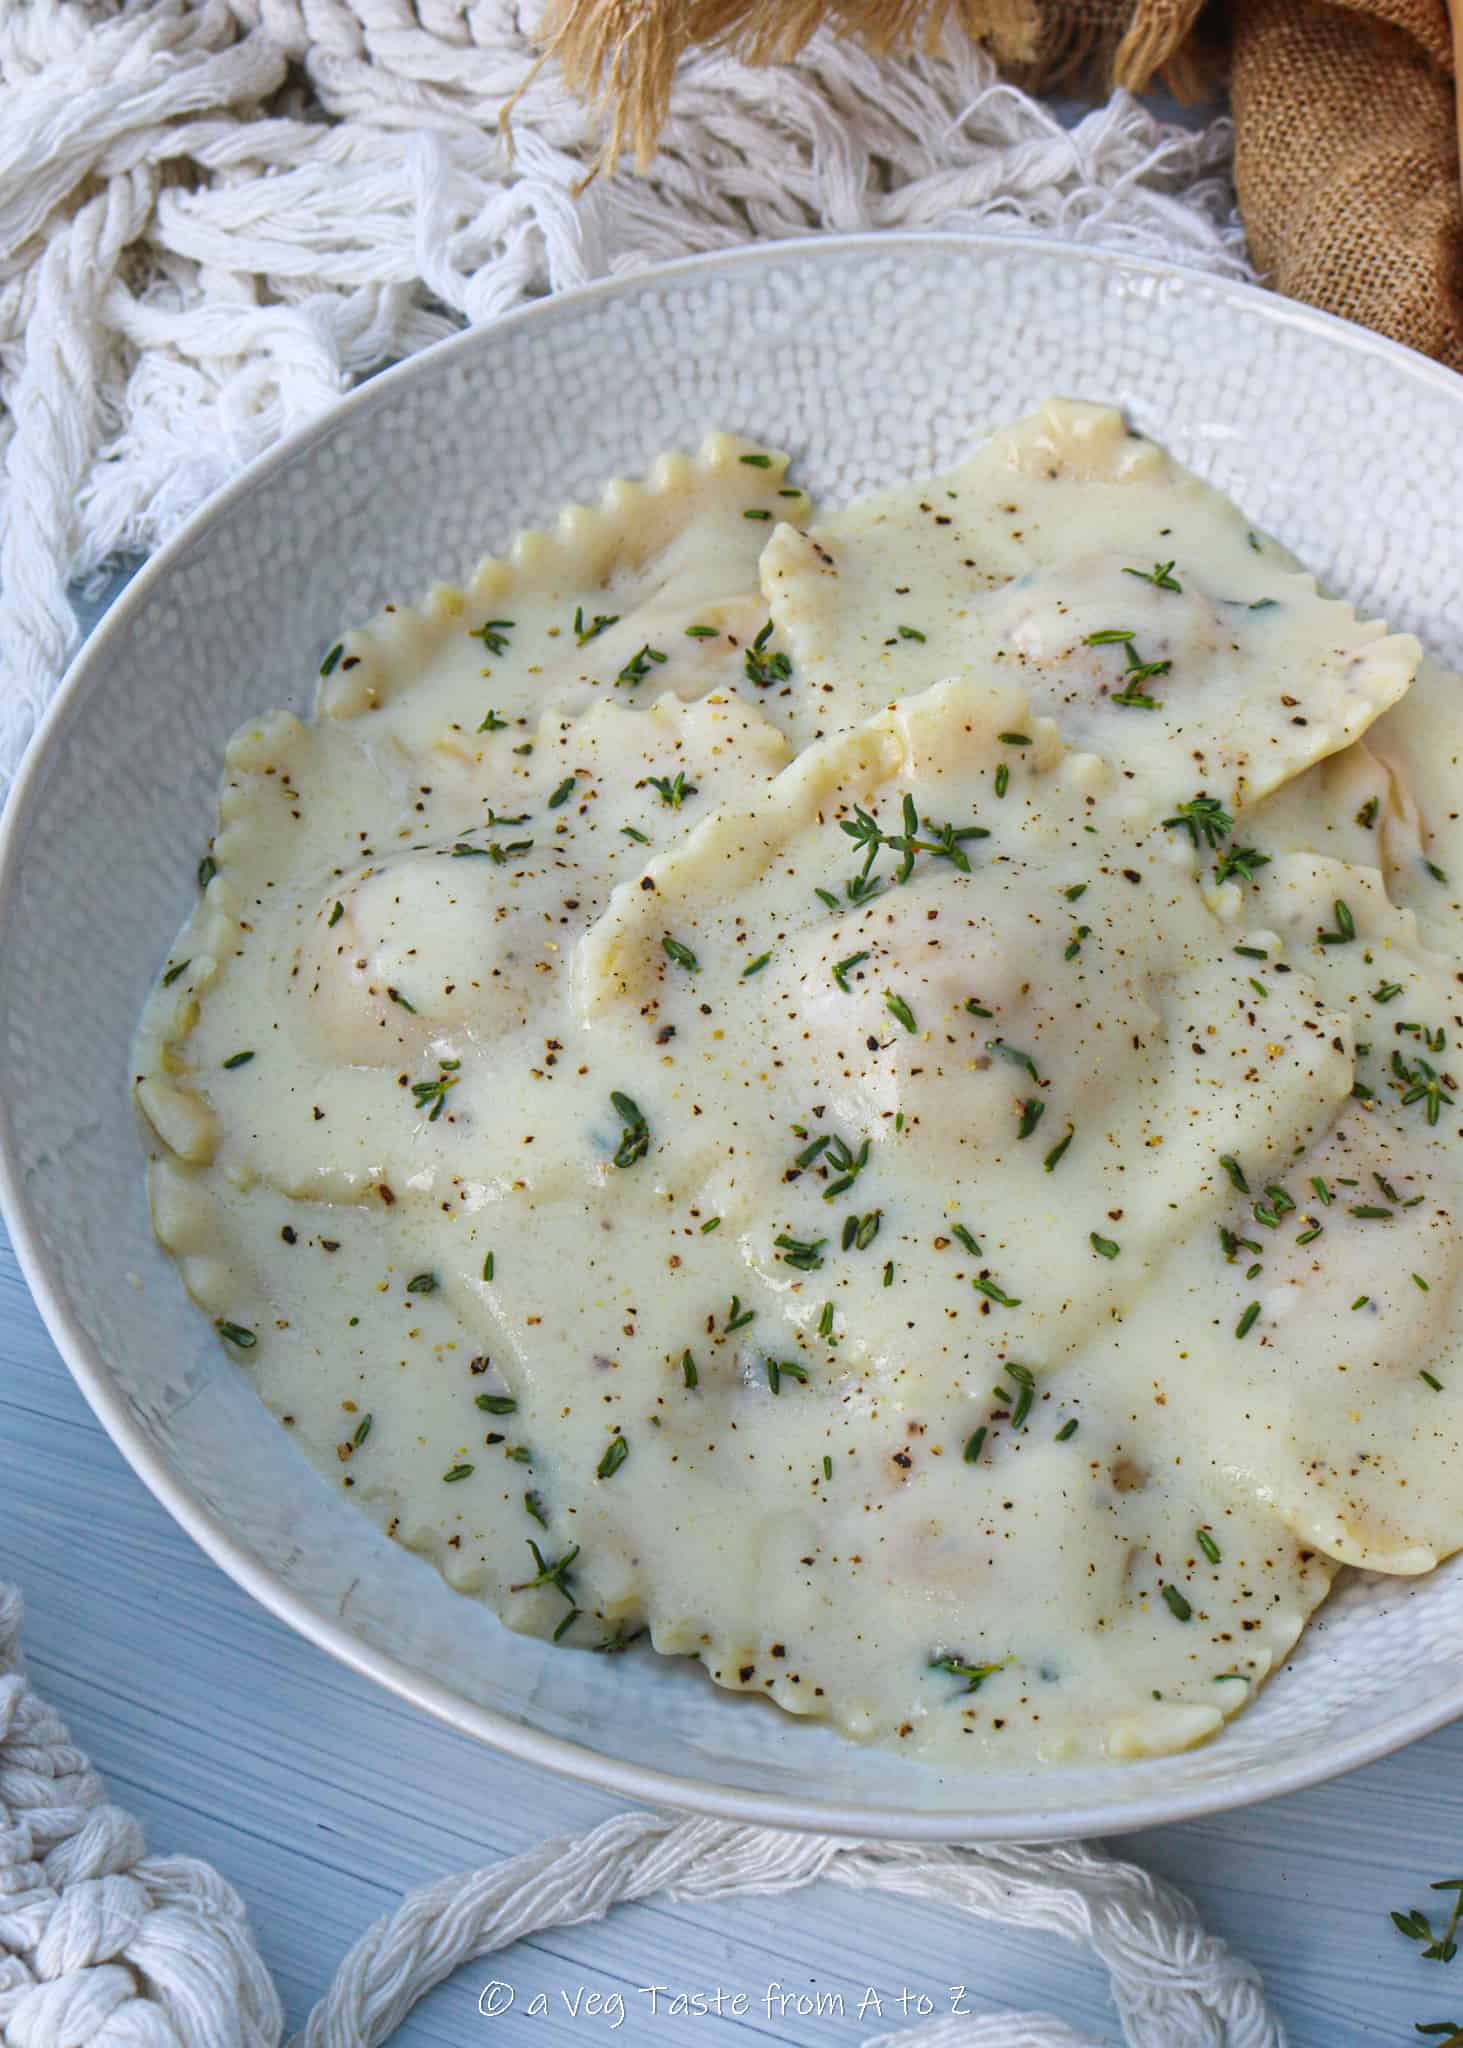
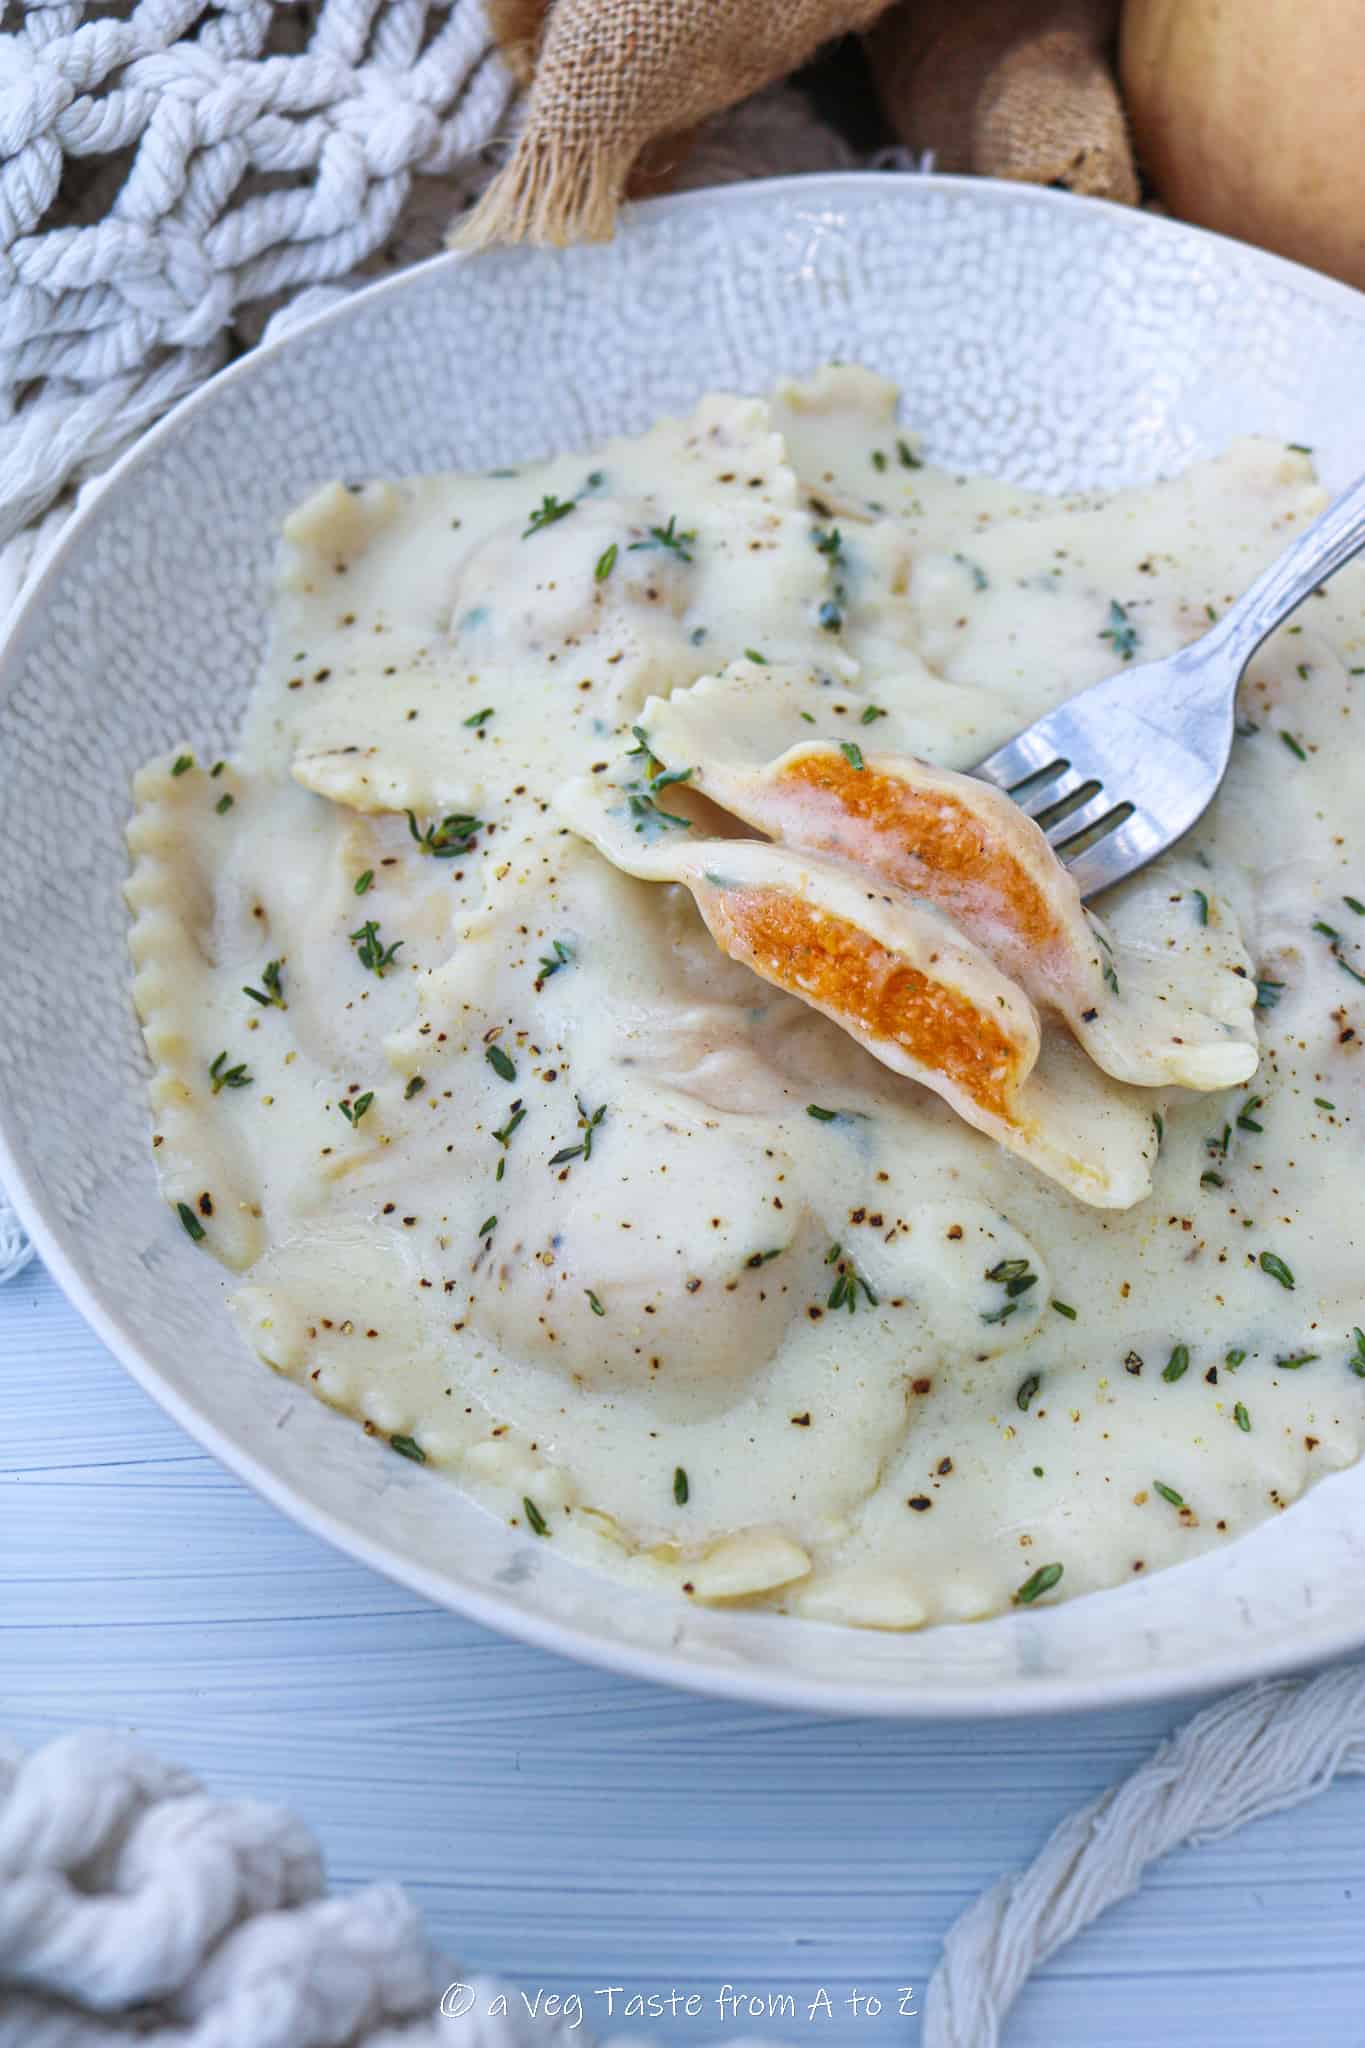
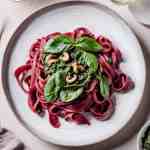
Coat the ravioli in the white sauce, add around ½ cup of cooking water to loose up the sauce, then heat for 30 seconds to 1 minute. Top with fresh thyme and freshly ground pepper and serve.
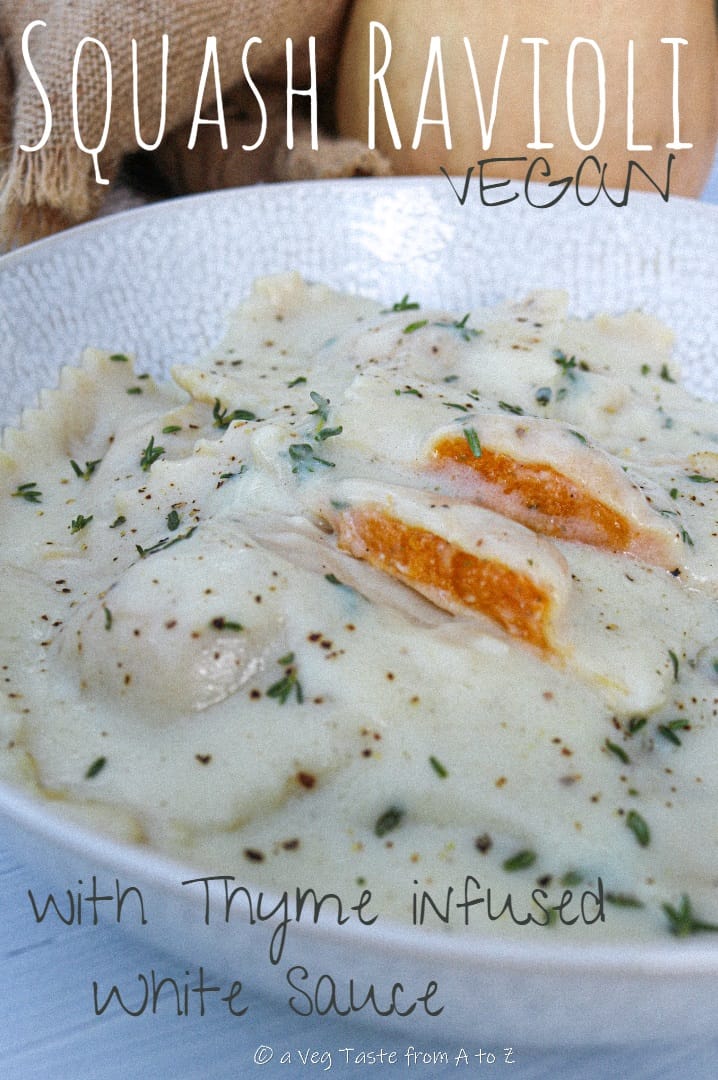
Butternut Squash Ravioli with Thyme Infused White Sauce Recipe
Ingredients:
..for the dough..
200 g All Purpose Flour
200 g Durum Wheat Flour (Italian Semola/Semolina)
150 g Aquafaba (canned chickpeas water)
½ teaspoon Turmeric Powder
Optional Water
...for the filling...
350 g Butternut Squash Cooked Pulp (1 small squash)
30 g Vegan Grated Cheese (or ½ tablespoon Nutritional Yeast + ½ tablespoon Ground Almonds)
½ teaspoon Dried Sage
½ teaspoon Onion Powder
½ teaspoon Salt
¼ teaspoon Garlic Powder
¼ teaspoon Nutmeg Powder
¼ teaspoon White Pepper
...for the sauce...
300 g Plant Based Milk (Soy)
30 g Vegetable Oil (Sunflower)
20 g All Purpose Flour
1 bunch Thyme
Salt
...to garnish...
Fresh Thyme
Black Pepper
Method:
1. Use your preferred method to cook the squash (see notes).
2. Make the dough. Weight both flours in a large bowl and combine turmeric powder with aquafaba in a small jug. Pour the aquafaba mixture over the flours to form the dough. Add more water if required, and work the dough until smooth. Cover with cling film and let it rest for 30 minutes.
3. Meanwhile make the filling by combining mashed squash pulp with the remaining ingredients. Transfer into a piping bag.
4. Shape the ravioli. Roll out the dough, either by hand using a rolling pin, or with a pasta machine. Make sure to roll it into very thin sheets before shaping the ravioli (thickness 2-3 if using the pasta machine). Make sure to dust the working surface (or bottom of the mould) before placing the sheet of pasta over.
5. Pipe the filling, then run a slightly damp finger around it (or on the ravioli junctions) to better seal the second layer of pasta.
Gently cover with another pasta sheet, making sure not to form any air bubbles in between the two doughs. (see post for detailed method for mould or cutter versions)
6. Place the ravioli onto a floured surface to prevent them to stick to the bottom. Do not overlap.
7. For the thyme infused white sauce: heat the milk with a bunch of thyme. Reduce the heat and simmer for 5 minutes. Combine flour and oil into a paste, then carefully add a splash of thyme infused milk at the time, to avoid lumps. Season with salt and put back on gentle heat until the sauce thickens (3 to 5 minutes) stirring all the time.
8. Cook the ravioli in plenty of salted boiling water then transfer into the pan with the thyme infused sauce. Please note: cooking time varies based upon the thickness of the pasta, but it normally takes 1 to 3 minutes to cook fresh ravioli. Make sure to save some of the cooking water.
9. Coat the ravioli in the white sauce, add around ½ cup of cooking water to loose up the sauce, then heat for 30 seconds to 1 minute.
10. Garnish with fresh thyme and freshly ground pepper and serve.

For other yummy pasta dishes do not miss:
- Mushroom Tagliatelle Paglia & Fieno
- Creamy Cauliflower and Mushroom Pasta
- Sea Flavoured Courgettes (Zucchini) and Blossom Pasta
- Caramelized Onion, Olives and Hummus Pasta
- Oil Free Vegan Alfredo
- Super Easy Green Bean Pasta Bake
- Pasta with Butternut Squash and Smokey Crispy Seaweed
- Vegan Seafood Pasta
- Courgette Blossom Pasta

Leave a Reply