Popular all over the Mediterranean and the middle east, each of these fantastic easy homemade pitta bread contains a small pocket to be filled with goodies!
Questa ricetta è disponibile anche in italiano

Pitta bread, what a wonderful bread don't you think?
Popular all over the Mediterranean and the middle east, each of these fantastic disc of bread contains a small pocket which you can fill with a wonderful array of healthy or not-so-healthy goodies... you pick!
I have always loved pitta, discovered in my various trips over the Mediterranean, when I still was an omnivore, but it wasn't until I took a trip to Bristol in the UK of all places, that I really experienced how good a vegan pitta can also be.
In that occasion, me and my husband visited a vegan street food stall that serves the most amazing falafel pittas in the whole country.
The crunch of the salad and pickles, the fluffy and aromatic falafels, the soft textures of vegetables and grains, and a very very extraordinary sauce that brings all the individual elements together.
Simple gorgeous flavours all held together by this wonderful bread. Seriously guys, forget store bought and dedicate some time to make it at home with a few basic ingredients and yes, just a bit of time, buy believe me it is worth the effort!
There is literally nothing better in the world than homemade bread, don't you think?
And The good thing about making pitta bread at home is that whenever we have a spare morning or afternoon we can produce it in bulk, and use it within a week or keep them frozen to be enjoyed anytime we like.
Let's now see how to make pita bread completely from scratch!

How to make the perfect Pitta Bread at home
As mentioned before, making pitta bread at home is a task that anyone can achieve, as long as you follow carefully a few important steps that I'm about to guide you through.
To make the most fantastic pitta bread that is way superior to the store bought one all we need is a bunch of basic and easy to find ingredients, such as:
- Flour - I use a mix of all purpose flour with a small percentage of wholemeal flour. The last one is not mandatory to use but I find that it helps forming a better gluten structure as well as giving a touch of extra flavour. If you don't have wholemeal flour just use all white flour and remember to reduce the amount of water by 10 grams.
- Agave Syrup - or any syrup or sugar you like or have at hand. The sugar will improve the proofing step as well as balancing the flavour. In fact, thanks to its nature, sugar acts both like yeast feeder, resulting in a faster rise, and it also helps the caramelization process, which occurs during the cooking time, when the bread crust turns into brown. Sugar also has an impact on the final flavour; that doesn't mean it will make your bread go sweet - do not panic! - it is just a subtle notes that perfectly marries to the other flavours, so my advice is to try not to omit this ingredient for best results.
- Extra Virgin Olive Oil - or any vegetable oil. If you are oil free you can omit it, but if you're not I do recommend you to use just a touch of oil in the dough.
- Yeast - I used instant yeast for this recipe, easy and straightforward. I highly recommend to use instant yeast especially if you are a beginner. However you can use any yeast you like as long as you follow each instruction accordingly.
- Salt and Water. Last but not least, they are essential for the savoury taste and to bring the dough to life.
Essential steps to make Pitta Bread at home
- THE DOUGH -
First thing we must do is to make sure to make a proper pitta dough. The easier method to do so is to add all the ingredients into a food mixer and kneed it for a few minutes, until the dough turns smooth and stretchy.
If you don't have a mixer don't worry, you can achieve the same exact outcome by working the dough by hands, let's see how.
In a bowl add the flour and the salt, mix well with a wooden spoon, then add the syrup, the olive oil and the yeast. Finally add the water (make sure it's lukewarm, around 25-30°C/75-90°F) and mix until it comes together.
Work the dough with your hands (it is normal for the dough to be quite sticky at this stage, so please don't be tempt to add more flour as it will compromise the result!) for at least 10 minutes. After 10-15 minutes you will notice that the dough has changed the texture: it is now smooth, elastic and less sticky. This is exactly the texture we are looking for. If you haven't achieved this texture, that means you haven't work the dough enough, so keep working for a few extra minutes until you got the desired consistency.
Now that our pitta dough is ready, it is time to proof it!
To do so transfer the dough into a plastic or glass bowl, cover with a cloth and transfer to a warm place. I normally proof my dough into the microwave: I just pop the bowl with the dough in it and close the door. Allow to proof for 1:30 to 2 hours (depending on the season) or until it doubles the size.
- THE SHAPING -
After our dough has risen we have to transfer on a working surfaces, lightly floured, and roll it into a thick sausage.
Cut the dough into 8 pieces and shape every piece of dough into a smooth ball.
Roll each ball of dough into flat discs, of around 5 mm thick, then arrange into a tray, cover with a cloth and allow to rest (or proof, if you like) for another 30 minutes.

- THE COOKING -
Now that our discs have rested, we can finally cook our pittas.
This is definitely the fun part of all the recipe, as they will gorgeously puff into the pan turning you into the most proud pitta bread mom EVER!
But it also it the trickier part as there are still a few tricks and tips to follow in order to give birth to the perfectly puffed pitta bread.
First we have to make sure the pan is HOT (1), otherwise our bread dough will stick into it, burn and we will be more easy to pierce.
Once we have our pan hot and beautiful, we have to FLIP the disc onto it (2) making sure the part that was on top during proofing is now in direct contact to the hot pan.
Wait a few seconds (generally from 15 to 25) until the surface starts to BUBBLE (3), then CAREFULLY flip the pitta (4) with a spatula.
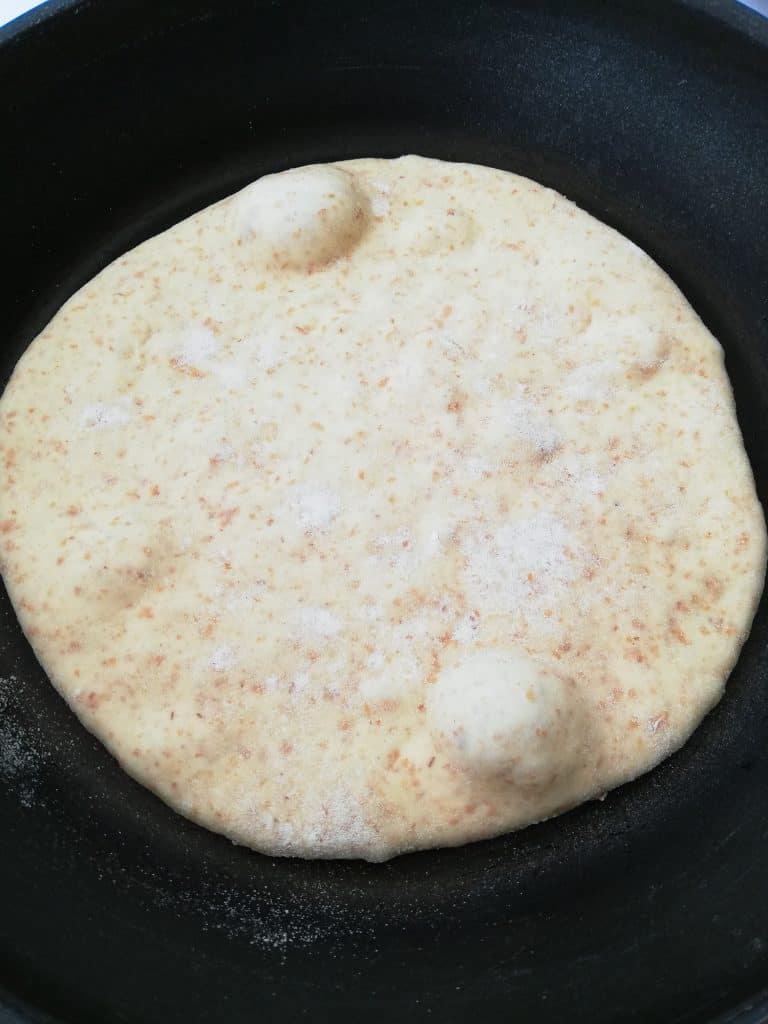
Within a minute or so the pitta bread will start to puff up (5).
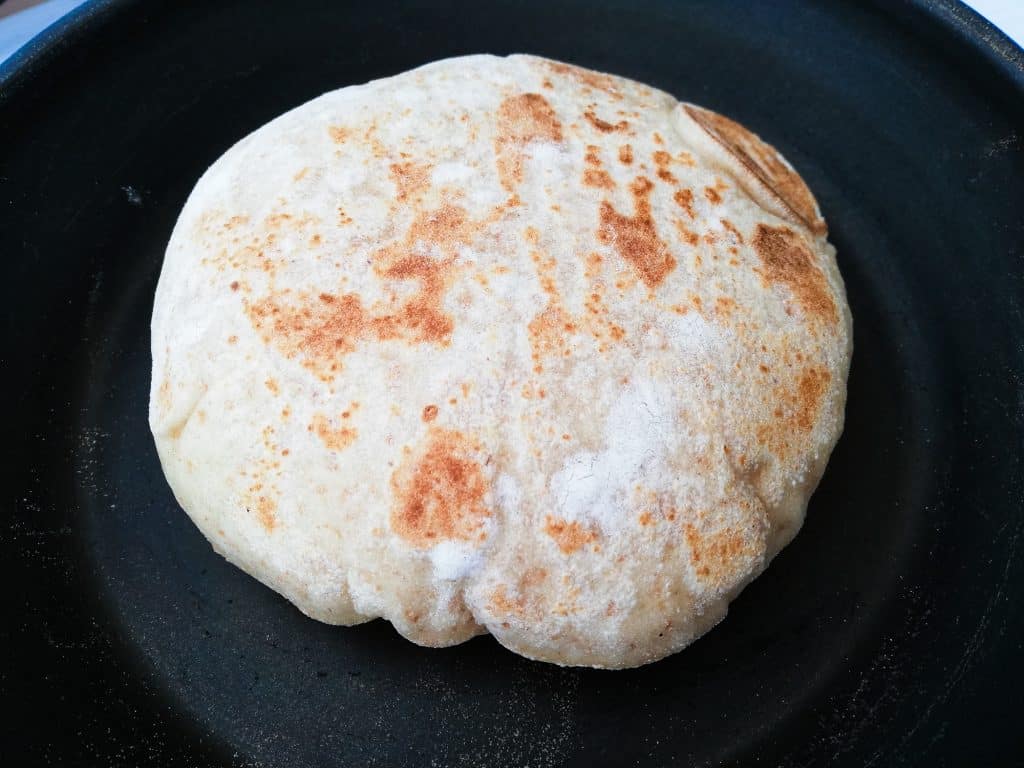
Flip the bread one last time (6) and cook on the other side for another 20-30 seconds (7).
Now this is what will normally happen to achieve the perfect pitta bread. However, as we are all humans, we can have a few bumps on the road or make a few mistakes, such as piercing the dough during cooking.
What to do if I accidentally pierce the dough during cooking
Piercing the pitta dough during cooking it's not ideal, as it will not make it puff, but don't worry, it is also NOT THE END OF THE WORLD!
If your pitta develops an hole during cooking because you accidentally pierce it with your nail or tools or just because one of its bubble pops, simply press your spatula against the hole to trap steam being trapped inside the pocket. You will see that it your pitta will still puff up nicely.
Use the spatula to cover accidental holes or also to help the pitta puff up when it doesn't do it on its own. In this case, simply press the spatula on the centre and the edges of the pitta while still on the hot pan, and you will see that it will start puffing up in a matter of seconds!
Continue cooking all pittas using these tricks and you'll be simply amazed, I guarantee you!
Now that our pittas are ready and gorgeous looking, have fun stuffing them with your favourite meat substitutes, veggies and sauces!
Soon on this blog I will post a scrumptious idea on how to use these pittas to make the most amazing Greek-inspired grilled tofu ever! So stay tuned and don't forget to fill the box with your email address and hit the button SUBSCRIBE to receive new vegan recipes straight to your mail box two times a week!
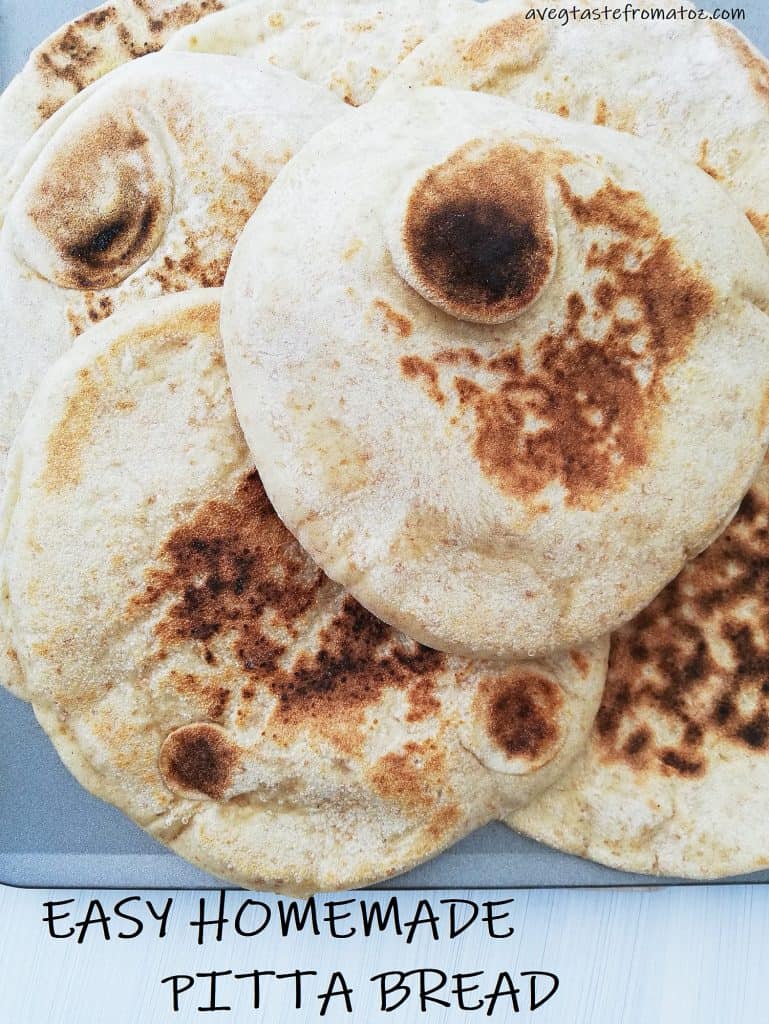
Easy Homemade Pitta Bread Recipe
Ingredients:
350 g All Purpose Flour (2 cups)
240 g Lukewarm Water (1 cup)
90 g Wholemeal Flour (½ cup)
20 g Agave Syrup (1 tbsp)
10 g Extra Virgin Olive Oil (1 tbsp)
6 g Instant Yeast (2 tsp)
5 g Salt (1 tsp)
Method:
1. Add all ingredients to a mixer. Kneed at medium heat for 5-10 minutes, until the dough turns smooth and after pinching fingers come out clean.
2. Transfer into a glass bowl, cover with a cloth and proof in a warm environment for 1:30 - 2 hours.
3. Dust your working area with a pinch of flour, roll the dough into a sausage and cut into 8 same size pieces.
4. Form a smooth ball with each piece of dough, then roll into a 3-4 mm disk.
5. Proof the discs for another 30 minutes.
9. Heat a pan until hot. Flip one disc on the hot pan (making sure the top part goes on the pan first), wait until bubbles start to appear on the surface then GENTLY flip it with a spatula.
10. Within 1 or 2 minutes the dough should puff into a ball. Carefully flip the pitta on the pan one last time and cook for another 20-30 seconds.
11. Repeat steps 9 and 10 to all pittas.
12. Cut the pitta in two and stuff with salad, grilled or pickled veggies, your favourite meat free protein and you favourite sauces.


For other bread ideas:
- Turtle Brioche Bread Buns
- Homemade Speedy Pizza
- Fluffy Courgette Stuffed Brioche Bread
- Ratatouille Pizza Bites
- Quarantine Vegan Croissants (not the classic recipe)
- Vegan Casatiello - Italian Stuffed Bread
- Pull Apart Stuffed Brioche Bread
- Homemade Naans
- Mediterranean Empanadas
- Classic Focaccia Barese
- Taralli Pugliesi
If you enjoyed this or any other recipes on this blog please do support @avegtastefromatoz on Instagram, Facebook and Pinterest!


Leave a Reply