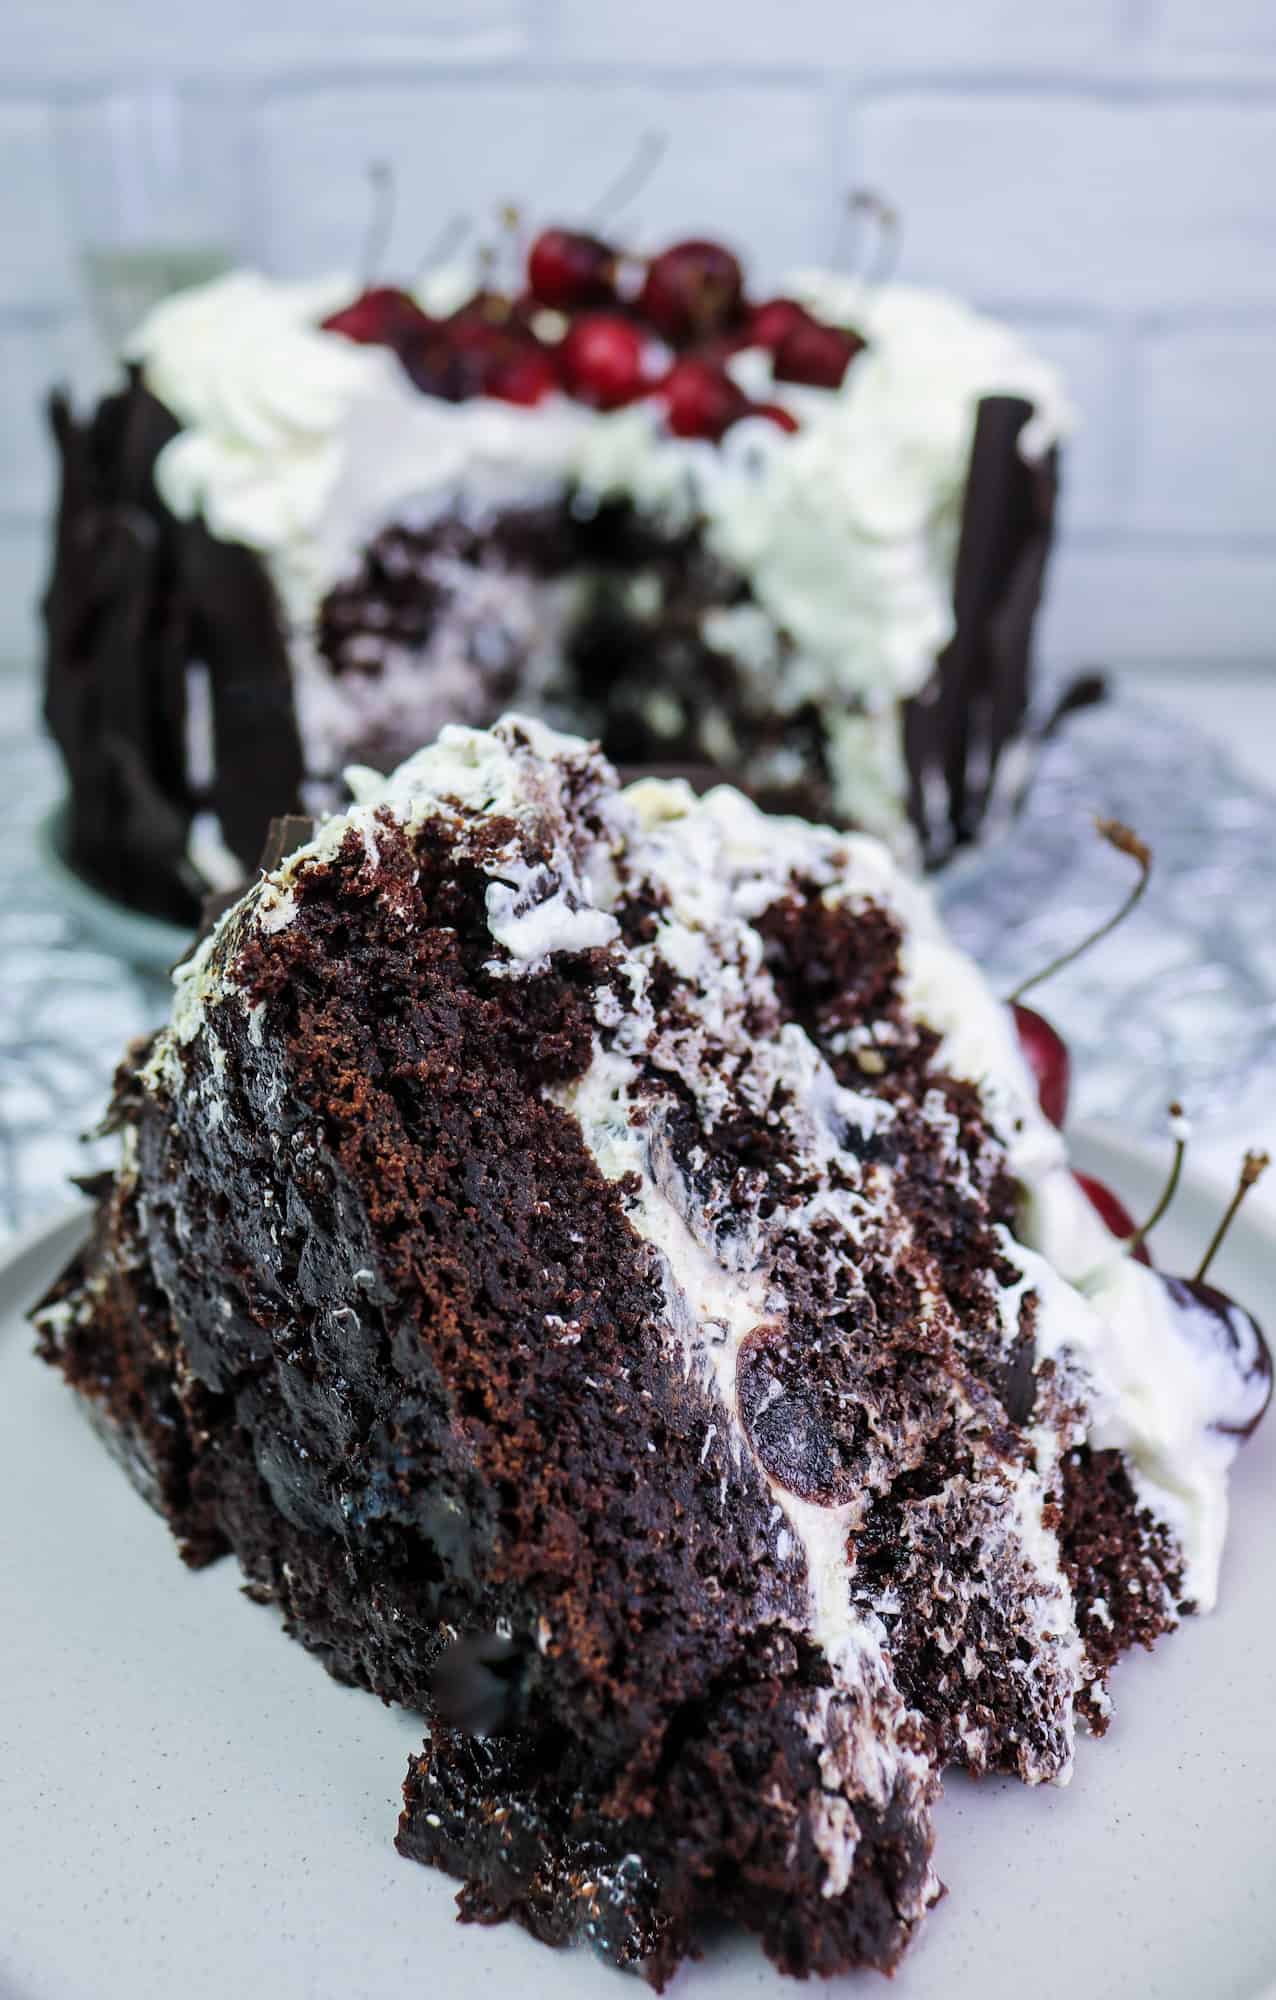
Indulgent, decadent and chocolatey, this vegan black forest cake is a complete plant-based version of the scrumptious German dessert.
Questa ricetta è disponibile anche in italiano

Layers of chocolate sponge alternate with generous whipped cream and preserved black cherries, decorated with temperate dark chocolate barks and fresh cherries, give birth to this absolute masterpiece!
This is the cake I baked for my husband's birthday this year, and after receiving lots of love on social medias I've decided to share the recipe with all of you.
If we leave the temperate chocolate decoration out, it's a fairly medium-easy and pretty straightforward cake.
But if you really want to impress and give this cake an eye catching look, I'll leave you all the instructions you need to make these effective chocolate barks.
I have to admit.
I personally do not like at all working with chocolate.
Tempering chocolate is one of the most unpleasant things I find to do. Not to mention the absolute mess I always make in the kitchen AND on my hands (especially finger nails).
But because it was my hubby's birthday and he has been awesome on mine, just a couple of weeks before his (he cooked me the whole lunch: tortellini from scratch, grilled veggies and sundried tomatoes for starters, and a gorgeous vegan cake completely from scratch - and he doesn't like to cook!!!), I felt I should put some extra effort too, and make something special out of one of his most loved ingredients: chocolate, indeed.
I also didn't want his cake to be the classic sponge cake, if you know what I mean. And as I thought about his absolute LOVE for German cuisine and desserts, immediately the Schwarzwalder Kirschtorte (Black Forest Gateau) popped into my mind!
So I build this cake up in my head, and took inspiration for the design online and this happened:
The base is our favourite vegan chocolate sponge and it is decorated with:
- Vanilla flavoured whipped cream (I used Emlea double cream available in the UK)
- Preserved black cherries (or "amarene" or "maraschino cherries"- I used Fabbri's as I find them to be the best on the market - also, because I grew up with them!)

- Dark chocolate barks (from 70+% dark chocolate)
- Fresh Cherries (that luckily we can find all year around here in Britain).
How to make a Vegan Black Forest Cake
First step is to make the batter and bake the chocolate cake.
Make the "egg" by combining 2 tablespoon of ground flax seeds with 6 tablespoon of water, and set aside (alternatively you can use ½ cup of applesauce and skip this step).
Stir into the soy milk 1 tablespoon of apple cider vinegar, and set aside.
In a large bowl weight all the dry ingredients (flour, sugar, cocoa, baking powder, baking soda, and salt).
Add the vegetable oil, the egg replacement, the vanilla, the cherry syrup and the vegan buttermilk, and give a little stir.
In the meantime bring the water to a boil, and add to the cake mixture.
Whisk vigorously to a smooth batter.
Add the optional dark chocolate chips now, and combine into the batter.
Line three 8-inch (20 cm) round hinged moulds with baking paper, and pour into each one ⅓ of the batter.
Alternatively, if you have regular cake tins you can lightly butter the sides and bottom and coat with a bit of cocoa powder to help demould the cakes.
You can also use only 1 or 2 deep edged tins, divide the batter accordingly and slice the layers manually. In both cases you will have to increase the cooking time of at least 15 minutes (up to 30 if using only 1 mold).
Just make sure to do the check with a wooden skewers until it comes out of the cake dry.
Next: the chocolate barks (skip this step if you are keeping your decoration easy).
For this step we need to start with a good quality at least 70% dark chocolate. All dark chocolate should be vegan, but always make sure to check the label before purchasing. I like working with different brands and one of my favourite for both quality and price is Tesco's Finest, followed by this one, available both in the US and UK.
250 grams are more than enough to decorate a 8 inch (20 cm) 3 tier cake (the one you'll get with these measurements).
If you are a professional you won't need to read the following part that focuses on how to temper chocolate.
But, if you are a home baker or baker enthusiast as I like calling myself, I'll teach you the "cheat" method to easily temper chocolate at home, without any thermometer nor marble surface.
Tempering chocolate is an essential step for making smooth, glossy, evenly colored coating for your chocolate creations. Tempering prevents the dull grayish color and waxy texture that happens when the cocoa fat separates out. Tempered chocolate produces a crisp, satisfying snap when you bite into it.
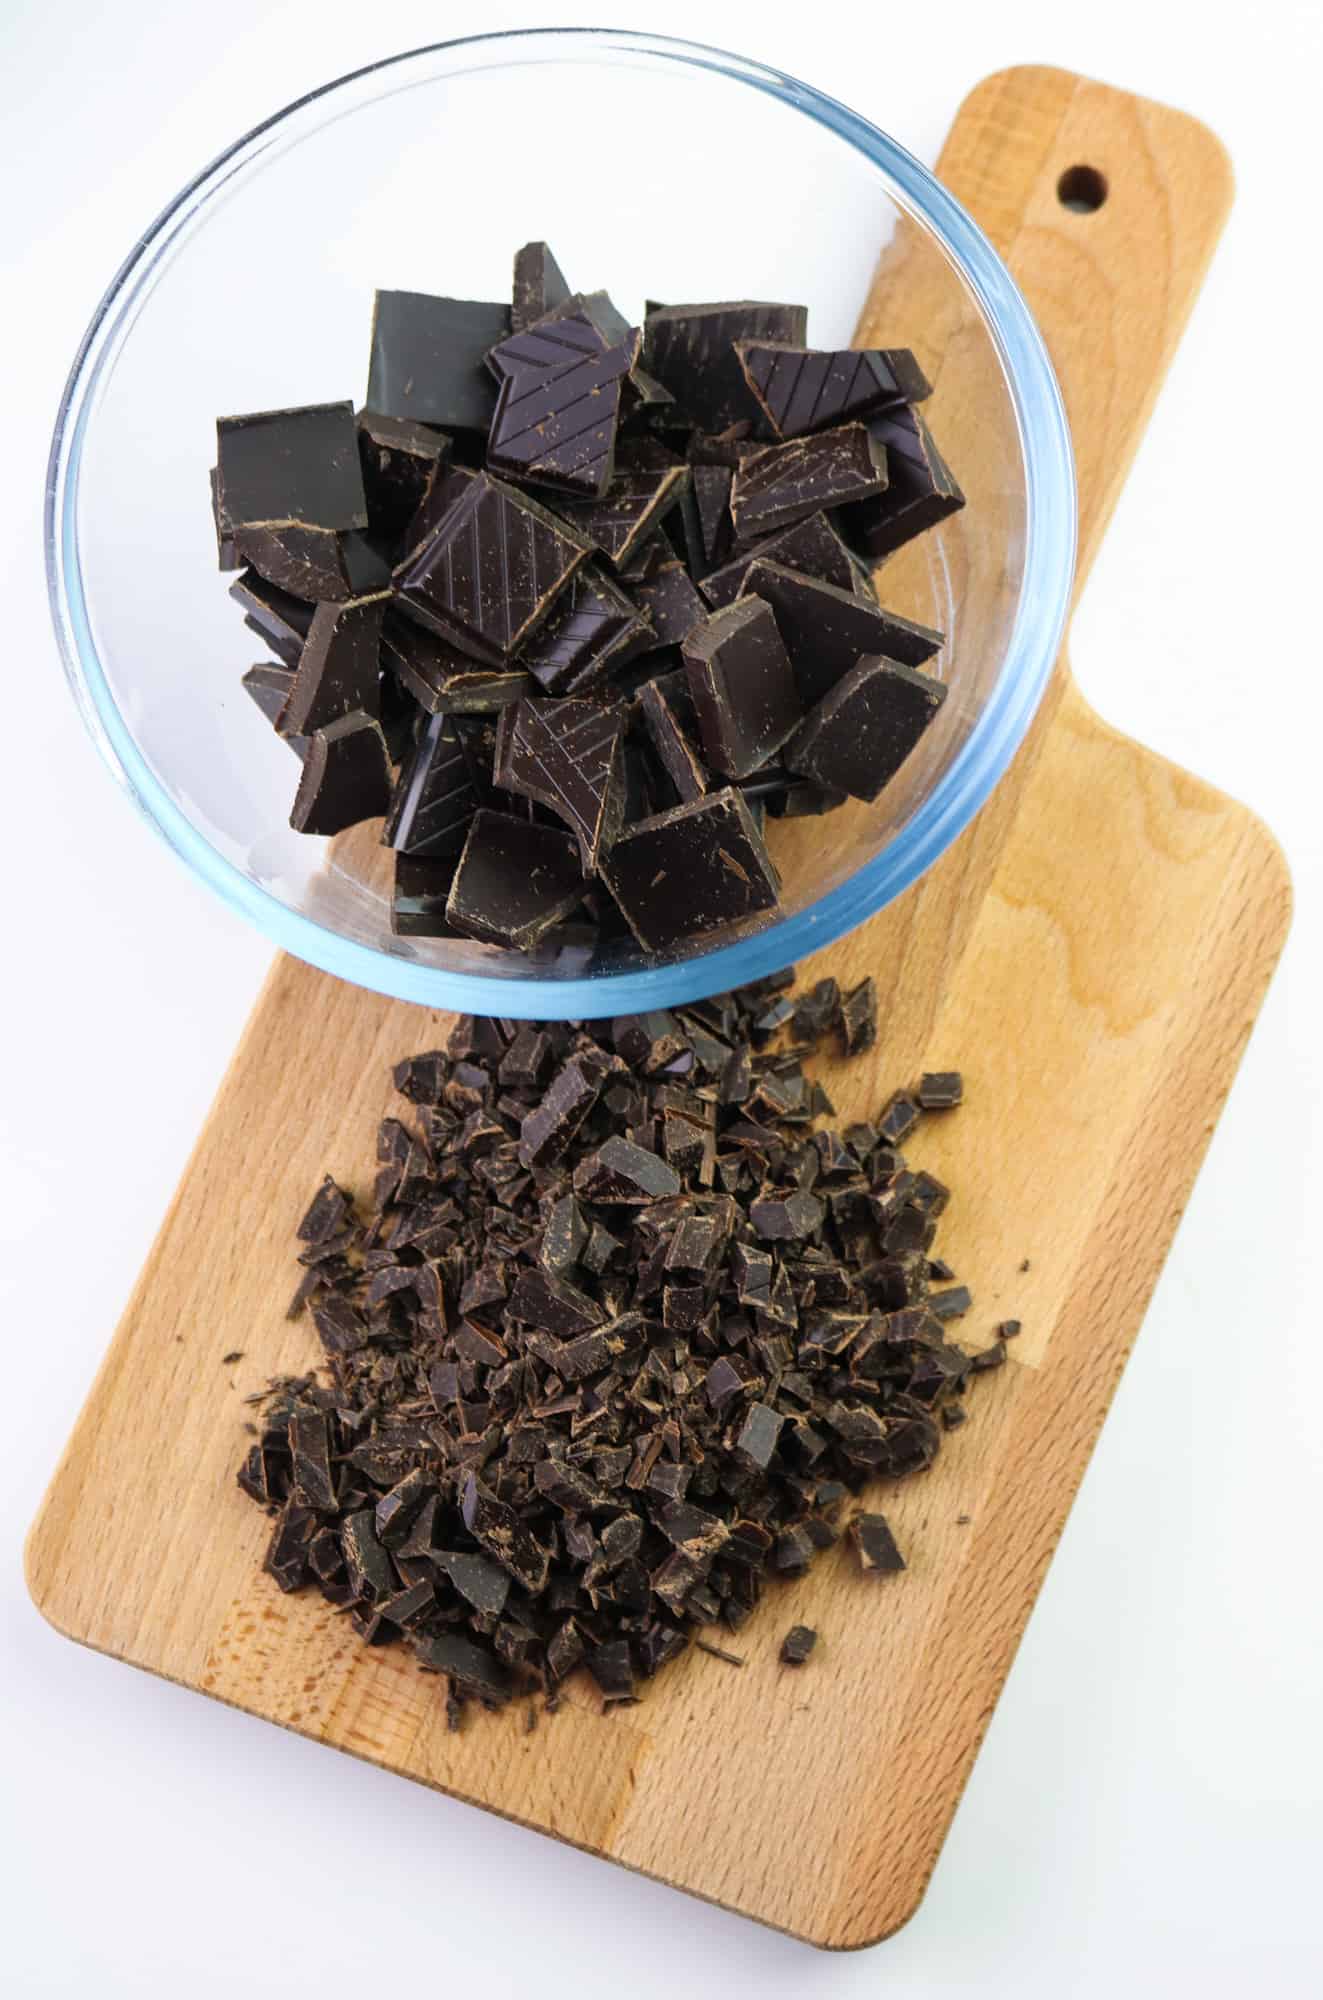
All we need to do to make this cheat version of tempered chocolate is to finely chop the chocolate and divide the needed amount into two parts: ⅔ of the chocolate will be melted and the remaining ⅓ will be added lastly to lower the temperature.
To melt the chocolate you can use 2 methods:
 Bain-Marie - by placing the bowl with chocolate over a simmering water pot. You have to be very careful NOT to boil the water to prevent splashes and drops ending up in the chocolate as this will compromise the whole outcome.
Microwave (my preferred one) - by microwaving the chocolate at 50% of the power (300-400max W) in 20-30 seconds intervals, stirring with a spatula after every interval, until completely melted (this will take 1 to 3 minutes depending on the amount of the chocolate and the size of the chunks/shavings).
Once the ⅔ of dark chocolate is melted, we can stir in the remaining ⅓ until it's all melted.
Note: if using the bain-marie method, you must remove the chocolate bowl from the water during this step.
Line one large piece of parchment paper on your working surface.

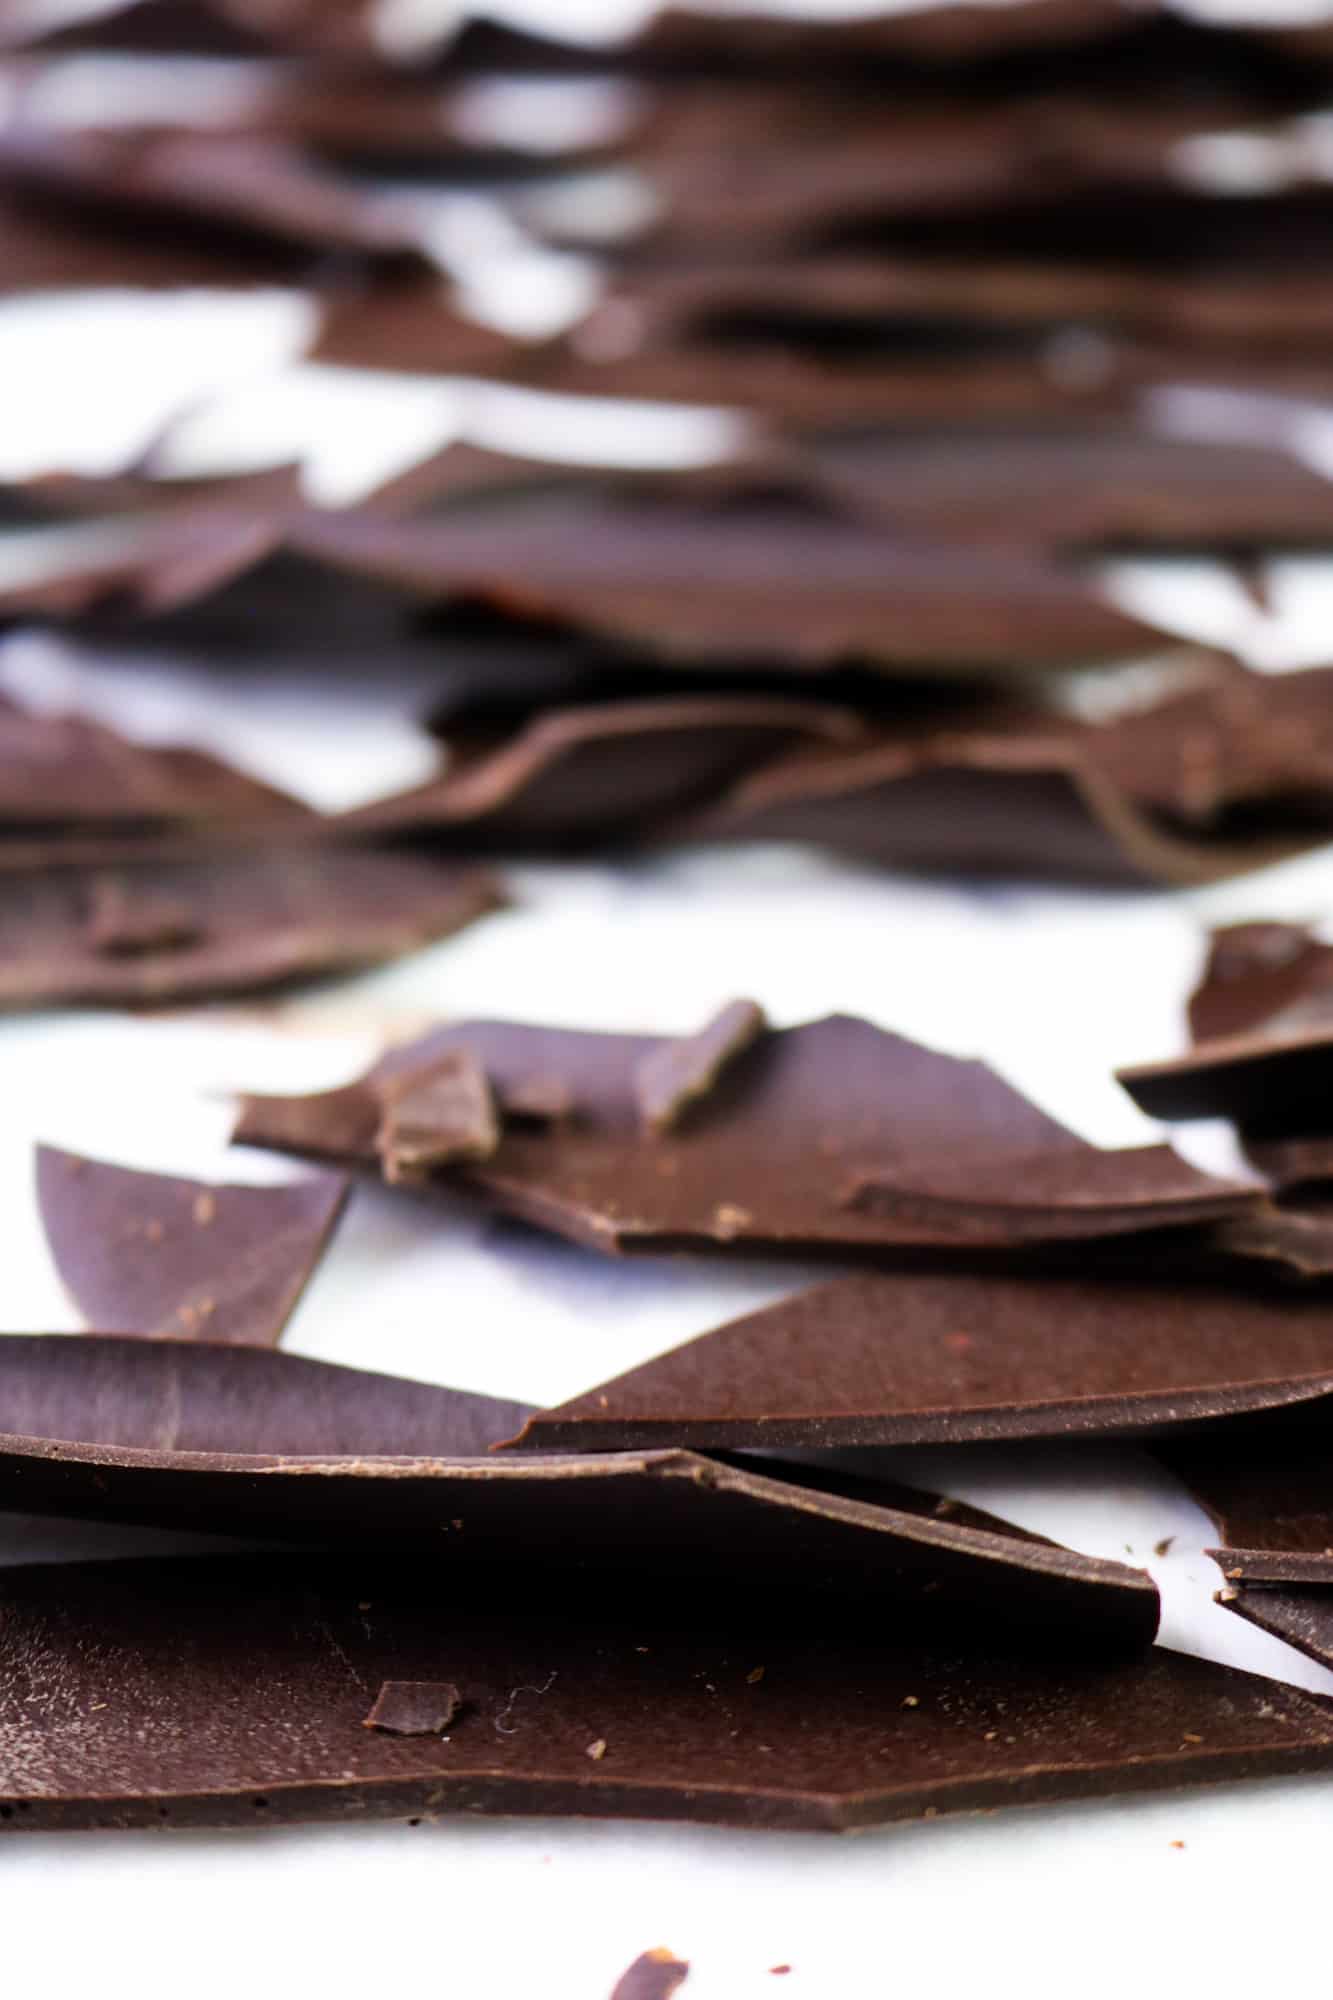
Pour over the melted chocolate and spread it with a spatula into a thin (2-3 mm) layer.
Please note that the temperature of your home can compromise the result. The best environment to work with chocolate is cold-ish room, with temperatures ideally at room temperature or below, with low humidity.
Roll up from the short side of the parchment, and place in the fridge or freezer until firm.
Once cold, you'll be able to get the chocolate barks by simply unroll it!
Step three: the filling.
The filling for this decadent vegan black forest gateau, cannot be simpler!
All we need to do is to add the whipping cream and the powdered sugar (omit if using sweetened whipping cream) to a bowl, and whisk it into stiff peaks.
We needed such easy step after all the effort put for the chocolate work, didn't we?
Once the cakes are cold we can finally start assembling the dessert.
Place the first disk on the bottom, and spread over around ⅔ of the vegan whipped cream. Cut ½ of the preserved black cherries in halves (or into 4) and arrange over the cream.
Repeat for another layer.
Top the cake with the last disk of chocolate sponge, and coat both the top and sides with a thin layer of cream.
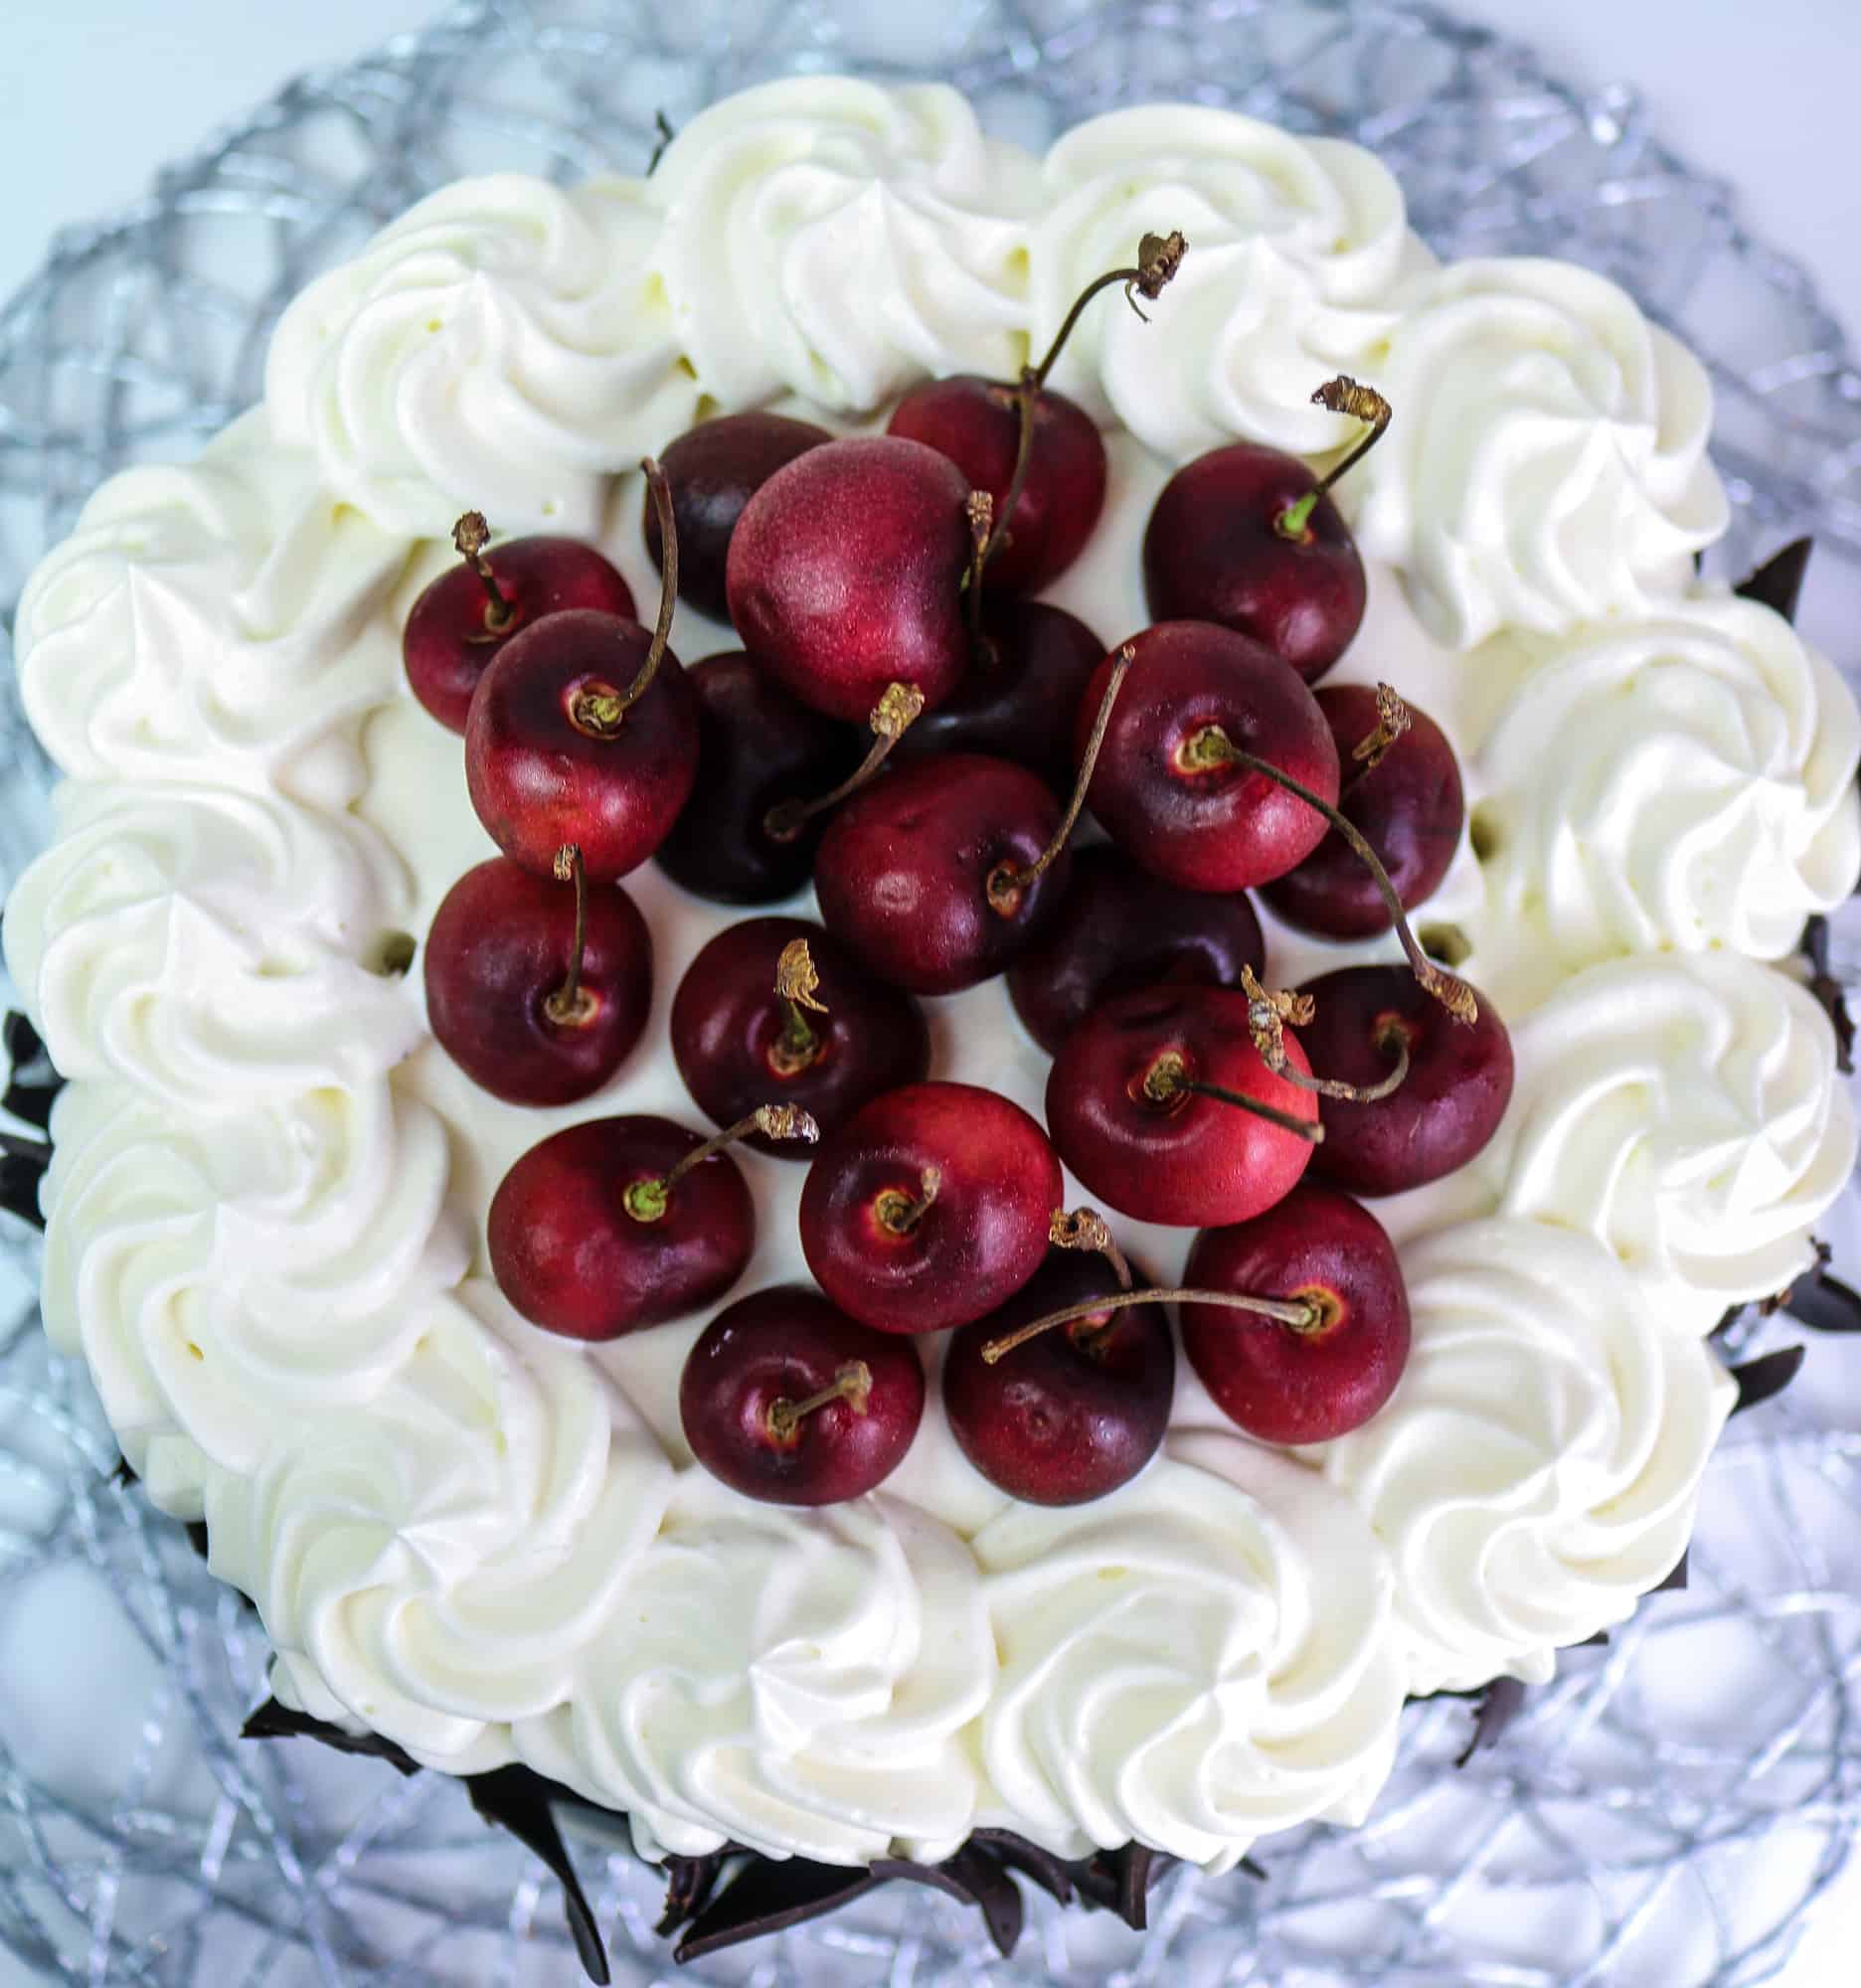
Decorate the top by piping some whipped cream kisses around the cake and the sides with the tempered chocolate barks.
Finish with (literally!) the cherry on the cake, by placing the fresh cherries in the center of the cake.
Refrigerate the cake for at least 2 hours before serving (better if overnight!).
Tips: if working in high temperatures, it might be cleverer to refrigerate the cake in between the assembling steps.
The beauty of vegan whipped cream is that it doesn't overwhip like the dairy one, so you can keep on whipping it during the steps if you need to refrigerate the cake in between.
This vegan black forest cake can be stored in the fridge for 5-6 days after making it (if it lasts!).

Vegan Black Forest Cake Recipe
Ingredients:
...for the sponge...
230 g Flour
250 g Sugar
160 g Water (Hot)
90 g Vegetable Oil
90 g Soy Milk
60 g Cocoa Powder
5o g Dark Chocolate Chips (optional)
6 tablespoon Water (for the flax egg)*
6 tablespoon Black Cherry Syrup (or Kirch, or Rhum for a boozy version)
2 tablespoon Flax Seeds (ground - for the flax egg)*
1 tablespoon Apple Cider Vinegar
1.5 teaspoon Baking Powder
1 teaspoon Baking Soda
1 teaspoon Vanilla Extract
½ teaspoon Sea Salt
*alternatively you can use ½ cup of applesauce
...for the filling...
500 g Vegan Whipping Cream
100 g Icing Sugar
120 g Preserved Black Cherries
...for the decoration...
250 g Dark Chocolate
Fresh Cherries
Method:
1. Preheat the oven at 180°C (350°F).
2. Make the vegan egg by combining 2 tablespoon of ground flax seeds with 6 tablespoon of water, and set aside (alternatively you can use ½ cup of applesauce and add with the liquids).
3. Stir the apple cider vinegar into the soy milk and set aside.
4. In a large bowl weight all the dry ingredients: flour, sugar, cocoa, baking powder, baking soda and salt.
5. Make a hole in the middle and add the vegetable oil, the egg replacement, the vanilla, the cherry syrup (or booze) and the vegan buttermilk, and give a little stir.
6. Bring the water to a boil, and add to the cake mixture. Whisk vigorously to a smooth batter.
7. Add the optional dark chocolate chips now, and combine into the batter.
8. Line three-8inch (20 cm) round hinged moulds with baking paper, and pour into each one ⅓ of the batter*.
9. Bake for 40 minutes or until the wooden skewer comes out dry from the cake. Once cooked, allow to cool completely at room temperature.
10. For the chocolate barks: melt** ⅔ of the chocolate (finely chopped). Remove from heat and stir in with a spatula the remaining ⅓ until it's all well melted and smooth.
11. Line one large piece of parchment paper on your working surface. Pour over the melted chocolate and spread it with a spatula into a thin (2-3 mm) layer***. Roll up from the short side of the parchment, and place in the fridge or freezer until firm.
12. Add the vegan whipping cream and the powdered sugar to a bowl, and whisk it into stiff peaks.
13. Place the first disk of chocolate sponge on the bottom, spread over around ⅔ of the vegan whipped cream and half of the preserved black cherries cut in halves.
14. Repeat for another layer.
15. Top the cake with the last disk of chocolate sponge, and coat both the top and sides with a thin layer of cream.
16. Decorate the top by piping some whipped cream kisses around the cake and the sides with the tempered chocolate barks.
17. Finish with (literally!) the cherry on the cake, by placing the fresh cherries in the centre of the cake.
18. Refrigerate the cake for at least 2 hours before serving (better if overnight).

Do you have a sweet tooth? Also check the following recipes!
- Easy Vegan Tiramisù
- Deliciously Moist Rhubarb Sponge
- Heart shaped Mini Cakes
- Carrot Cake with a Twist
- Fudgy Chocolate & Sweet Potato Cake Loaf
- Indulgent Chocolate & Raspberry Mousse
- Best Vegan Sticky Toffee Pudding
- Amaretto & Rhubarb Crumble
– Banoffee Pie
– Chocolate & Almond Fudge


Michele
I’m looking forward to making this. I need to omit the oil. What can I use in place of it? Also can you provide the measurements for US?
Adriana Z.
Hi Michele, thanks for stepping by.
Although I highly recommend the use of a scale in baking, you can find US measurements in brackets next to each ingredient.
Regarding the oil, I haven't personally tried making it without, but a good substitute would be applesauce. In this case I'd also recommend to reduce the amount of sugar as applesauce is quite sweet itself.
I really hope you'll like it. If you do make it, please tag me on social medias if you have any account, as I'd love to see your attempt!
Have a nice day,
Adriana.
box of cake
Really I happy to say your post is very valuable and informative thank you so much for providing this
Adriana Z.
I'm so pleased to hear this. Glad to help and thank you for stepping by 🙂
Pizza and Pasta Hut
Thanks for sharing...Checkout my profile by for Fast food south west London Wimbledon